- Hello
- Login or Register
- Quick Links
- Live Chat
- Track Order
- Parts Availability
- RMA
- Help Center
- Contact Us
- Shop for
- Toyota Parts
- Scion Parts

Popular OEM Scion Parts
- Body & Hardware Parts View More >
- Electrical Parts View More >
- Engine Parts View More >
- Air & Fuel Delivery Parts View More >
- Belts & Cooling Parts View More >
- Steering Parts View More >
- Suspension Parts View More >
- Emission Control & Exhaust Parts View More >
- A/C & Heating Parts View More >
- Charging & Starting Parts View More >
- Brakes Parts View More >
- Transmission Parts View More >


Why Buy Genuine Scion Parts From ToyotaPartsNow.com
At ToyotaPartsNow.com, our staff is dedicated to answering your questions about ordering high-quality genuine Scion parts, including Headlights & Lighting. From finding the right category to confirming fit, our online catalog helps you search and place orders so the process is quick and straightforward. It clearly identifies authentic OEM Scion part numbers and fitment notes, so you select factory-spec components with confidence. If you'd like more guidance, we'll help you clarify the part names or availability before you make a purchase. Whether you're a home mechanic or an expert, you get clear, practical help that cuts out guesswork and delays. The goal is to save you time and frustration by making each step of the process from browsing to checkout simple and predictable. With ToyotaPartsNow.com, you can have time to focus on the repair while we take care of the details of part identification and ordering so that you can get from cart to install with confidence.
ToyotaPartsNow.com is the trusted online source for discounted prices on factory auto parts. You get genuine OEM Scion parts, such as Driveline & Axles for the quality and fit you expect, supporting correct assembly without guesswork at a discounted price. Our pricing makes it economical to buy the optimal parts without sacrificing quality or your budget. Orders are processed based on your location, and our warehouse logistics system helps deliver your Scion parts, like Interior & Exterior Trim directly and fast once your order is processed. That means shorter wait times and fewer disruptions to your schedule. Choose ToyotaPartsNow.com to get unmatched value and reliability from parts built to factory standards. If you're replacing one component or preparing for a larger job, authentic parts, discounted pricing, and efficient fulfillment keep your project moving while keeping costs in check.
Scion was a car line marketed by Toyota targeting the youths and started operating in 2003. Scion took an out-of-the-box approach to marketing, such as virtual Scion City, to find its customers and maintained a draw by selling limited editions of the Release Series. Scion offered compact cars with simple buying and unique colors that let people make each Scion their own. Scion acted as a test lab for fresh ideas and sold over a million vehicles, many to first-time Toyota customers. Scion ended in 2016, but its influence lives on.
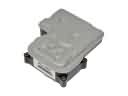
Scion is known for straightforward engineering that fixes daily annoyances and makes the remedy last. Smooth drivability starts with tight sealing. The genuine Scion Head Gasket Set keeps compression strong, keeps oil and coolant apart, and helps prevent hot-soak misfires and stains. Confident stops rely on steady assist. The OEM Scion Braking Booster brings back a light, progressive pedal so emergency stops stay straight with low effort. Throttle response depends on clean airflow. A Rocket Aluminum Intake cuts heat soak and steadies idle, so tip-in feels crisp and midrange pull stays clean without drone. These components meet Scion dimensions and pass heat, pressure, and vibration validation. Fit is exact, sealing surfaces seat once, and NVH stays low after service. Expect quieter starts, shorter stopping distances, and quicker response with durability that safeguards reliability and long-term value.
Scion Parts and Q&A
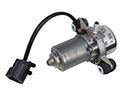
- Q: How to install the water pump assembly on Scion tC?A:Install the water pump assembly, old seal packing should be removed, new seal packing should be applied and the pump installed using bolts and nuts with a torque of 9.0 Nm. Fit the crankshaft position sensor, water pump pulley, and generator assembly and fill with coolant. Connect battery back, verify any leaks and initialize.
- Q: How to install the Catalytic Converter sub-assembly on Scion xB?A:To install the exhaust manifold converter for the 2AZ-FE, install the No.2 heat insulator and No.1 converter insulator. Tighten manifold nuts through a new gasket, install stays and front pipe assembly, fit air-fuel sensor and No.1 insulator, inspect for leaks and install engine under cover.
- Q: How to replace the alternator assembly on Scion xA?A:In order to change the generator assembly, take off the terminal cap, nut, the generator wire and disconnect the generator connector. Unscrewing The bolts, loosening the tension of the belt and the fan and generator belt. Install the installation of the generator and adjusting bar giving it a proper tension. Tighten the bolts, rejoin the generator and check the drive belt.


