My Garage
Cart
Make sure this part fits

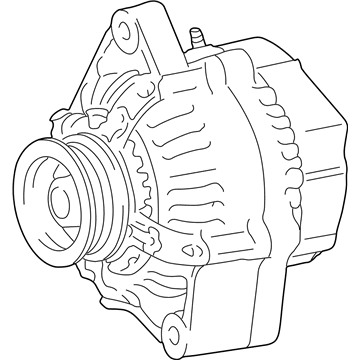
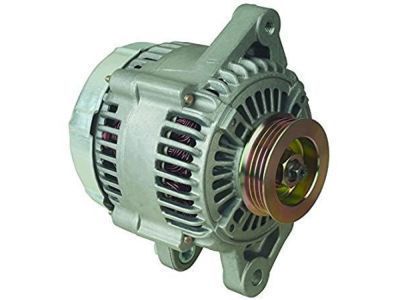
Toyota 27060-21140-84
Alternator

2004-2006 Scion xA 270602114084

Customer Questions & Expert Answers (6)
Toyota 27060-21140-84 Alternator
  • Part Description
    Reman Alternator
  • Manufacturer
    Toyota
Make sure this part fits
$81.79 MSRP: $112.81
You Save: $31.02 (28%)
Core Charge: $75.00
Ships in 1-3 Business Days
1
ADD TO CART
  • Related Parts
  • Product Specifications
  • Vehicle Fitment
  • Customer Questions & Expert Answers
  • Product Specifications

    BrandGenuine Toyota
    Manufacturer Part Number27060-21140-84
    Part DescriptionReman Alternator
    Item Dimensions13.2 x 10.5 x 9.0 inches
    Item Weight15.70 Pounds
    ConditionNew
    ManufacturerToyota
    SKU27060-21140-84
    WarrantyThis genuine Toyota part is guaranteed by Toyota's factory warranty.
    Shipping & ReturnShipping Policy Return Policy
    Warning: California's Proposition 65
  • Vehicle Fitment

    Year Make Model Trim Engine
    2004-2006 Scion xABase4 Cyl 1.5 L GAS
  • Customer Questions & Expert Answers

    Q:
    Any advice on whether 27060-21140-84 is suitable for my car? Posted by ToyotaPartsNow Specialist
    A:
    Find out if part number 27060-21140-84 is the right fit for your car by Selecting Your Vehicle model.
    Posted by ToyotaPartsNow Specialist
    Q:
    How to overhaul the alternator assembly on Scion xA? Posted by Customer
    A:
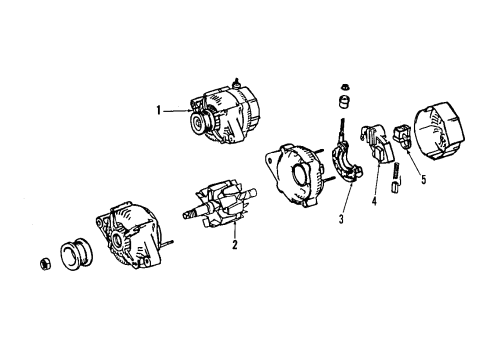
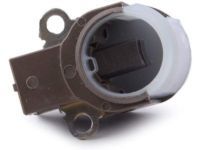
    The generator assembly overhauling process begins with pulley removal by utilizing Special Service Tool 09820-63010 (09820-06010, 09820-06020) to connect the tool to the rotor shaft and applying a torque of 39 Nm (400 kgf.cm, 29 ft.lbf) to the socket while turning it clockwise. Tighten the pulley nut counterclockwise until it reaches a half turn then you can detach the generator from its adapter while also taking out the pulley nut and pulley. You can start by disconnecting the rear end cover where you first remove the nut followed by the terminal insulator and bolt and three nuts and plate terminal. Separate the generator brush holder from the generator regulator by removing the brush holding cover and unscrewing screws and proceeding to remove all three screws from the regulator. Use Special Service Tool 09286-46011 to detach the generator holder with rectifier through four screw removal then extract the generator rectifier end frame by discarding four rubber insulators and the seal plate with four nuts alongside the clip code. You should start rotor assembly removal by taking away both the generator washer and then gently pull out the rotor from the drive end frame. The generator regulator assembly should be checked for proper functioning while testing the continuity between F to B and F to E terminals. The generator rotor assembly between slip rings should have 2.1 to 2.5 Ohm resistance at 20 degrees Celsius (68 degrees Fahrenheit) and must have proper ground continuity. The diameter of the slip ring must be measured with vernier calipers to check it stays within the accepted range of 14.2 to 14.4 mm (0.559 to 0.567 in.) and exceeds 12.8 mm (0.504 in.). Check the bearing wear and perform a replacement when needed on the generator rotor system. An ohmmeter assessment should be performed on both positive and negative rectifiers of the generator holder with rectifier to check for proper functionality. The stator coil requires testing for open circuits while checking for ground continuity before replacing the generator assembly. Check the brush length exposure measuring 9.5 to 11.5 mm (0.374 to 0.453 in.) while being at least 4.5 mm (0.177 in.) since this determines brush holder assembly replacement eligibility. The installation process of the generator rotor assembly requires you to return the rotor along with the washer into its proper position. The generator rectifier end frame installation requires a 19 mm socket wrench for pressing in while securing it with four nuts and clip code at torque specifications. Apply the seal plate and rubber insulators while installing them according to their designated orientation. Reattach the generator holder with rectifier through four screws while keeping to specified torque values then connect the generator regulator assembly through three screws followed by two screws for the generator brush holder assembly with correct installation direction. Connect the rear end cover and terminal insulator where specified torques apply followed by generator pulley installation through hand-tightening the pulley nut before achieving final torque of 111 Nm (1,125 kgf.cm, 81 ft.lbf) using the holding tool to check smooth wheel movement.
    Posted by ToyotaPartsNow Specialist
    Q:
    How to remove and install an alternator on Scion xA? Posted by Customer
    A:
    The first step to remove an alternator involves disconnecting the negative battery cable while waiting for at least 90 seconds to avoid Air Bag and seat belt pretensioner activation. Initiate generator assembly removal by first detaching the terminal cap before eliminating the nut and generator wire and disconnecting the generator connector and wire harness clamp. The technician should first loosen bolts A and B and next release fan and generator V-belt tension before removing the fan and generator V-belt. The technician should begin by removing bolt A followed by the nut and adjusting bar and finally eliminating bolt B and the generator. Before installation, set up the generator first using bolt B while adjusting with bolt A before tightening the nut to reach 11 N.m (112 kgf.cm, 8 ft.lbf). After placing the fan and generator V-belts onto each pulley temporarily you must slip the adjusting bar between the engine mounting bracket and generator while using it to push toward the vehicle front for V-belt tension adjustment until damage risk is minimized between the oil control valve and generator. Tighten bolt A first to 18.5 N.m (189 kgf.cm, 14 ft.lbf) and follow with bolt B to 54 N.m (551 kgf.cm, 40 ft.lbf). Begin by installing the wire harness clamp before connecting the generator connector and installing the generator wire with its nut which should have a final torque of 9.8 N.m (100 kgf.cm, 7 ft.lbf). After that fasten the terminal cap in place. After inspecting the generator V-belt it is necessary to reconnect the cable to the negative battery terminal while performing initialization and specific systems need initialization steps after cable removal and reconnection.
    Posted by ToyotaPartsNow Specialist
    Q:
    How to service and repair the alternator on Scion xA? Posted by Customer
    A:
    The first step to work on an alternator requires complete disassembly. The generator pulley can be removed using Special Service Tool 09820-63010 (09820-06010, 09820-06020) as you tighten the pulley holding tool's socket clockwise to 39 Nm (400 kgf.cm, 29 ft.lbf) until it secures to the rotor shaft. Attach the pulley nut to the adapter after inserting the socket into the adapter which is securely fixed in a vise. Rotate the pulley holding tool counterclockwise while paying attention to prevent the rotor shaft damage by loosening the pulley nut only up to half a turn. Remove the generator from the adapter and carefully eliminate the socket and pulley holding tool before removing the pulley nut and pulley one after the other. Start by unattaching the rear end cover through the sequential removal of the nut followed by terminal insulator followed by bolt and then three nuts and plate terminal and end cover. The generator brush holder assembly requires removal after you detach the brush holder cover and use two screws to disassemble it before proceeding to remove the generator regulator assembly with its three screws. To replace the generator holder with rectifier dismantle the four screws first while the generator rectifier end frame requires removal of four rubber insulators together with seal plate and four nuts and cord clip by using Special Service Tool 09286-46011 for disassembly of this frame component. The rotor generator washer should be removed first followed by removing the rotor from the drive end frame but make sure the rotor does not drop. First install the generator rotor along with its washer before using a 19 mm socket wrench and press to deliberate pressure insertion of the rectifier end frame through four nut and cord clip assembly where torques apply 4.5 N.m (46 kgf.cm, 40 in.lbf) to nut A and 5.4 N.m (55 kgf.cm, 48 in.lbf) to nut B. Mount the seal plate after placing four rubber insulators properly. The generator holder with rectifier should be installed through four screws while torqueing them to 2.9 N.m (30 kgf.cm, 26 in.lbf). Install the generator regulator assembly by torquing three screws to 2.0 N.m (20 kgf.cm, 18 in.lbf) and install the generator brush holder assembly with two screws torqued to the same value, 2.0 N.m (20 kgf.cm, 18 in.lbf), then install the brush holder cover. Put the rear end cover and plate terminal in position with the bolt along with three nuts and apply 3.9 N.m (40 kgf.cm, 34 in.lbf) torque on the bolt while the nuts need 4.4 N.m (45 kgf.cm, 39 in.lbf) torque. Then install the terminal insulator using a nut that should get tightened to 4.1 N.m (42 kgf.cm, 36 in.lbf). The generator pulley installation began with hand-tightening the pulley nut before applying Special Service Tool 09820-63010 (09820-06010, 09820-06020) for turning the torque wrench to tighten the socket clockwise to 39 Nm (400 kgf.cm, 29 ft.lbf) while the tool remained fixed to the pulley shaft. Position the adapter within a vise and put the socket inside the adapter followed by the pulley nut application. Then tighten the pulley nut with the pulley holding tool through clockwise rotation to achieve 133 Nm (1,356 kgf.cm, 98 ft.lbf). First detach the generator from the adapter after which the socket holding tool should be removed by turning the socket and finally the pulley should be checked for smooth movement.
    Posted by ToyotaPartsNow Specialist
    Q:
    What is the first step in the installation process for the 2004 Scion xA? Posted by Customer
    A:
    Temporarily install the generator with bolt B.
    Posted by ToyotaPartsNow Specialist
    See expert answers on similar Alternator
    Q:
    What is the torque specification for tightening bolt A and bolt B for the 2005 Scion xA? Posted by Customer
    A:
    Tighten bolt A to 19 Nm (189 kgf.cm, 14 ft.lbf) and bolt B to 54 Nm (551 kgf.cm, 40 ft.lbf).
    Posted by ToyotaPartsNow Specialist
    See expert answers on similar Alternator
    If you have any questions about this product, please don't hesitate to ask us. We will be happy to help you!

OEM Toyota 27060-21140-84, Excellent Performance and Perfect Fitment

To ensure reliability, purchase Toyota part # 27060-21140-84 Alternator. It is sometimes referred to as Toyota Alternator. OEM parts are unrivaled in terms of quality. They go through extensive quality control inspections and are produced in accordance with Toyota's official factory specifications. All of these remove defects and imperfections. So you can relax knowing they promise exceptional lifespan and flawless fitment.

ToyotaPartsNow.com is a leading supplier of genuine Toyota parts such as Toyota 270602114084 Alternator. At ToyotaPartsNow.com, we have a wide variety of OEM Toyota parts available at competitive prices. Our comprehensive range of genuine Toyota parts come with a manufacturer's warranty for peace of mind. We also prioritize customer satisfaction, providing a hassle-free return policy and expedited delivery for all our parts. For detailed Scion parts information, click here.
Choose ToyotaPartsNow for discounted prices, exceptional service and fast delivery