- Hello
- Login or Register
- Quick Links
- Live Chat
- Track Order
- Parts Availability
- RMA
- Help Center
- Contact Us
- Shop for
- Toyota Parts
- Scion Parts

Popular OEM Scion xD Parts
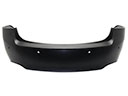
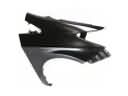
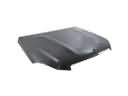
- Body & Hardware Parts View More >
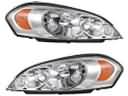
- Electrical Parts View More >
- Engine Parts View More >
- Air & Fuel Delivery Parts View More >
- Belts & Cooling Parts View More >
- Steering Parts View More >
- Suspension Parts View More >
- Emission Control & Exhaust Parts View More >
- A/C & Heating Parts View More >
- Charging & Starting Parts View More >
- Brakes Parts View More >
- Transmission Parts View More >


Why Buy Genuine Scion xD Parts From ToyotaPartsNow.com
ToyotaPartsNow.com highlights the reliability of OEM Scion xD parts right at your fingertips. Our skilled staff assists customers in selecting the right Scion xD parts and provides expert help with any unique part requests. At ToyotaPartsNow.com, we make all Scion xD parts available to you quickly and efficiently through our fast order and reliable ship process. Our service is designed to make finding the correct Scion xD parts fast and easy whether you are an amateur or a professional. We offer access to a broad inventory that includes a wide range of Scion years and variants. Affordable prices, quick processing and professional service are also our specialty to ensure your car remains in top condition with OEM Scion xD parts. You can feel confident shopping with us because all Scion xD parts you purchase from our store are of genuine quality and built to last.
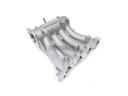
When the 2008 Scion xD hatchback entered the market it brought to customers an efficient practical setup and included a standard 2ZR-FE DOHC 1.8-liter four-cylinder engine. The 2ZR-FE engine contains Dual VVT-i technology together with an aluminum die-cast block and a four-cylinder inline-16-valve aluminum alloy construction. The system operates both valve timing features to achieve better engine efficiency. The Scion xD model exerts 128 horsepower from 125 lb-ft of torque resulting in smooth handling performance while driving. Around 35 to 40 mpg is achievable for customers who select either the manual five-speed transmission option or the automatic four-speed transmission option in this model. The combined effect of front-wheel-drive with quick-handling capabilities makes City driving deliver 27 miles per gallon. Scion xD entered the Canadian market for the first time in 2011 as the production ended in 2014 for its remaining inventory to sell until 2016. Scion xD owners can personalize their vehicles since the manufacturer provides genuine vehicle parts which undergo thorough examination for operational reliability and performance stability. Consumers can personalize their Scion xD vehicles using options which maintain car performance alongside reliability standards.
The Scion xD owners often encounter various issues affecting the Scion xD's electronic systems and engine. A loud noise or shaking when accelerating is one of the Scion xD widespread issues that are usually the result of a damaged left-side engine mount insulator. Replacing this part solves the issue. As well, certain Scion xD models can have a momentary knocking or rattle when starting the engine on a cold day. This is usually an indication that the Scion xD camshaft timing gear assembly needs replacement. It will help in restoring smooth operation of the engine. The extreme cold on the electrical side may result in several problems like obstructed shifting between park and drive and triggered warning lights. In such cases, it is advisable to replace the ignition relay with a new one to resolve the issue. All these problems point out the importance of taking care of the electrical and mechanical parts of the Scion xD so as to achieve the optimal and dependable functionality. Maintenance and fixing the Scion xD on a regular basis and fixing it at the right time can help to avoid many complications and enjoy the driving experience.
Scion xD Parts and Q&A
- Q: How to replace the oil filter on Scion xD?A:To change oil filter of the 2ZR-FE engine, drain the oil, wash and set the drain plug. The oil filter cap is to be removed with a special tool, the oil is to be drained, followed by replacement of the filter and O-ring. Install the cap back, tighten it and add some fresh oil to the engine and make sure that there is no leakage.
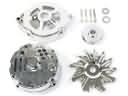
- Q: How to remove the alternator on Scion xD?A:In order to take off the alternator, disconnect negative battery terminal, then the engine under cover and cylinder head cover. Dismount the fan and generator V belt, the engine mounting insulator and transverse engine mounting bracket. Lastly, take the generator assembly off by unscrewing a number of bolts and connectors.
- Q: How to install the water pump assembly on Scion xD?A:To attach the water pump assembly of the 2ZR-FE cooling system, put a new gasket into the timing chain cover and hold the assembly together by bolts. Fit in the front suspension crossmember, engine assembly, front axle assemblies and other parts. Lastly check ignition timing and alignment, as well as leaks.


