×
ToyotaParts- Hello
- Login or Register
- Quick Links
- Live Chat
- Track Order
- Parts Availability
- RMA
- Help Center
- Contact Us
- Shop for
- Toyota Parts
- Scion Parts
My Garage
My Account
Cart
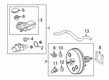
OEM Toyota Clutch Master Cylinder
- Select Vehicle by Model
- Select Vehicle by VIN
Select Vehicle by Model
orMake
Model
Year
Select Vehicle by VIN
For the most accurate results, select vehicle by your VIN (Vehicle Identification Number).
64 Clutch Master Cylinders found


Toyota Master Cylinder Part Number: 31410-34012
$157.32 MSRP: $222.71You Save: $65.39 (30%)Ships in 1-3 Business DaysProduct Specifications- Other Name: Cylinder Assembly, Master; Clutch Master Cylinder; Brake Master Cylinder; Cylinder Assembly, Clutch Master
- Replaces: 31410-34010, 31410-34011


Toyota Master Cylinder Part Number: 31410-17120
$154.38 MSRP: $218.55You Save: $64.17 (30%)Product Specifications- Other Name: Cylinder Assembly, Master; Clutch Master Cylinder; Brake Master Cylinder; Cylinder Assembly, Clutch Master


Toyota Cylinder Kit, Clutch Master Part Number: 04311-12080
$48.74 MSRP: $67.85You Save: $19.11 (29%)Product Specifications- Other Name: Cylinder Kit, Clutch; Clutch Master Cylinder
- Replaces: 04311-12060, 04311-22040


Toyota Master Cylinder Part Number: 31410-35310
$154.15 MSRP: $218.22You Save: $64.07 (30%)Ships in 1-3 Business DaysProduct Specifications- Other Name: Cylinder Assembly, Master; Clutch Master Cylinder; Brake Master Cylinder; Cylinder Assembly, Clutch Master


Toyota Cylinder Kit, Clutch Master Part Number: 04311-12110
$42.65 MSRP: $59.36You Save: $16.71 (29%)Ships in 1-3 Business DaysProduct Specifications- Other Name: Cylinder Kit Clutch; Clutch Master Cylinder
- Replaces: 04311-60150


Toyota Master Cylinder Part Number: 31420-04020
$128.42 MSRP: $181.79You Save: $53.37 (30%)Product Specifications- Other Name: Cylinder Assembly, Master; Clutch Master Cylinder; Brake Master Cylinder; Cylinder Assembly, Clutch Master
- Manufacturer Note: TYPE B:REFER ILLUST.


Toyota Master Cylinder Part Number: 31420-42020
$141.34 MSRP: $200.08You Save: $58.74 (30%)Ships in 1-3 Business DaysProduct Specifications- Other Name: Cylinder Assembly, Master; Clutch Master Cylinder; Brake Master Cylinder; Cylinder Assembly, Clutch Master


Toyota Master Cylinder Part Number: 31420-20070
$141.34 MSRP: $200.08You Save: $58.74 (30%)Ships in 1-3 Business DaysProduct Specifications- Other Name: Cylinder Assembly, Master; Clutch Master Cylinder; Brake Master Cylinder; Cylinder Assembly, Clutch Master

Toyota Master Cylinder Part Number: 31420-04011
$146.28 MSRP: $207.08You Save: $60.80 (30%)Product Specifications- Other Name: Cylinder Assembly, Master; Clutch Master Cylinder; Brake Master Cylinder; Cylinder Assembly, Clutch Master
- Manufacturer Note: TYPE A:REFER ILLUST.
- Replaces: 31420-04010


Toyota Master Cylinder Part Number: 31410-22240
$153.91 MSRP: $217.88You Save: $63.97 (30%)Ships in 1-2 Business DaysProduct Specifications- Other Name: Cylinder Assembly, Master; Clutch Master Cylinder; Brake Master Cylinder
- Replaces: 31410-35181, 31410-24012, 31410-35180, 31410-22142, 31410-22140


Toyota Master Cylinder Part Number: 31410-35360
$154.38 MSRP: $218.55You Save: $64.17 (30%)Ships in 1-2 Business DaysProduct Specifications- Other Name: Cylinder Assembly, Master; Clutch Master Cylinder; Brake Master Cylinder
- Replaces: 31410-35250


Toyota Cylinder Assembly, Clutch Master Part Number: 31410-14310
$154.85 MSRP: $219.22You Save: $64.37 (30%)Ships in 1-3 Business DaysProduct Specifications- Other Name: Cylinder Assembly, Master; Clutch Master Cylinder; Brake Master Cylinder

Toyota Master Cylinder Part Number: 31410-35142
$159.67 MSRP: $226.04You Save: $66.37 (30%)Ships in 1-3 Business DaysProduct Specifications- Other Name: Cylinder Assembly, Master; Clutch Master Cylinder; Brake Master Cylinder; Cylinder Assembly, Clutch Master
- Replaces: 31410-22070, 31410-35140, 31410-20460, 31410-22112, 31410-35141, 31410-22072, 31410-20461, 31410-22111, 31410-22110


Toyota Master Cylinder Part Number: 31410-35271
$179.17 MSRP: $255.81You Save: $76.64 (30%)Ships in 1-3 Business DaysProduct Specifications- Other Name: Cylinder Assembly, Master; Clutch Master Cylinder; Brake Master Cylinder
- Replaces: 31410-35270, 31410-35260


Toyota Master Cylinder Repair Kit Part Number: 04311-22050
$57.47 MSRP: $79.99You Save: $22.52 (29%)Ships in 1-3 Business DaysProduct Specifications- Other Name: Cylinder Kit, Clutch; Clutch Master Cylinder; Cylinder Kit, Clutch Master
- Replaces: 04311-22021, 04311-14040, 04311-22020, 04311-14041, 04311-22022, 31441-14020


Toyota Master Cylinder Part Number: 31420-12030
$113.51 MSRP: $159.33You Save: $45.82 (29%)Ships in 1-2 Business DaysProduct Specifications- Other Name: Cylinder Assembly, Master; Clutch Master Cylinder; Brake Master Cylinder; Cylinder Assembly, Clutch Master

Toyota Master Cylinder Part Number: 31420-33030
$114.22 MSRP: $160.33You Save: $46.11 (29%)Ships in 1-3 Business DaysProduct Specifications- Other Name: Cylinder Assembly, Master; Clutch Master Cylinder; Brake Master Cylinder; Cylinder Assembly, Clutch Master


Toyota Master Cylinder Part Number: 31420-35070
$118.13 MSRP: $165.82You Save: $47.69 (29%)Ships in 1-3 Business DaysProduct Specifications- Other Name: Cylinder Assembly, Master; Clutch Master Cylinder; Brake Master Cylinder; Cylinder Assembly, Clutch Master


Toyota Master Cylinder Repair Kit Part Number: 04311-60051
$56.39 MSRP: $78.49You Save: $22.10 (29%)Product Specifications- Other Name: Cylinder Kit, Clutch; Clutch Master Cylinder
- Replaces: 04311-60050


Toyota Master Cylinder Repair Kit Part Number: 04311-34010
Product Specifications- Other Name: Cylinder Kit, Clutch; Clutch Master Cylinder; Cylinder Kit, Clutch Master
| Page 1 of 4 |Next >
1-20 of 64 Results
Toyota Clutch Master Cylinder
OEM parts deliver unmatched quality you can rely on. They pass extensive quality control inspections. Toyota produces them to the official factory specifications. This process helps prevent defects and imperfections. So you can get exceptional lifespan and a flawless fit. Need new OEM Toyota Clutch Master Cylinder? You'll love our wide selection of genuine options. Shop in minutes and skip the hunt. Our prices are unbeatable, you'll save time and money. It's easy to shop and find the right piece. Our committed customer service team gives professional help from start to finish. Every part includes a manufacturer's warranty. We ship quickly, your parts will arrive fast at your door.
Clutch Master Cylinder translates the force of the pedal into sharp hydraulic pressure in order to operate the gears crisply. By eliminating waste and allowing line workers to fix hiccups before they multiply, Toyota evolved a lean 1937 startup into a world-spanning automaker with assembly lines that are always flowing and recalls that are infrequent. Toyota continues to optimize Hybrid Synergy Drive, which allows teens to travel longer distances on electricity without worrying about range constraints and still charge at the pumps. Toyota constructs each new body on the TNGA, which is a layout that reduces weight and stiffness in the frames and steering without increasing the price. Drivers feel it around corners and in their wallets each time they make a trip. Toyota drivers are confident in long life and honest efficiency so hybrids, plug-in crossovers, and compact sedans of the brand log loyalty on different continents. The Clutch Master Cylinder, which is located within the pedal circuit, pulls fluid out of its reservoir and forces it down a sealed bore whenever your left foot swings to provide line pressure that slides the slave piston and divides the clutch disc and flywheel to allow gears to slide smoothly. Once a seal on a Clutch Master Cylinder dries or air gets under the seal, the pedal becomes like a sponge and pushes grind. A leaking Clutch Master Cylinder also leaves behind characteristic fluid marks and compels motorists to press the pedal to at least get home. Replace an old Clutch Master Cylinder in a hurry to maintain hydraulic integrity and prevent small amounts of seepage from shredding gear synchros.
Toyota Clutch Master Cylinder Parts and Q&A
- Q: How to remove the Clutch Master Cylinder on Toyota Camry?A:First connect the negative terminal cable to remove power and drain brake fluid. First remove the air cleaner cap sub-assembly and then take out the air cleaner case sub-assembly. First detach the windshield wiper assemblies from both left and right sides before you remove front fender to cowl side seals on both sides of the vehicle. Pick first the cowl top ventilator louver sub-assembly and windshield wiper link assembly before removing the cowl top panel outer sub-assembly. Following these steps you should remove both brake booster assemblies as well as front door scuff plates and cowl side trim sub-assemblies and lower instrument panel finish panels from vehicles made by TMC and TMMK. Proceed with removing the No.1 instrument panel sub-assembly together with the lower instrument panel finish panels which do or do not feature the Smart Key System and the instrument cluster finish No.1 panel and combination meter assemblies suitable for TMC and TMMK vehicles. To disconnect the clutch master cylinder push rod clevis, remove the clip along with pin until the rod disconnects. Then, disconnect the clutch reservoir tube by using pliers to slide the clip off. A container should receive any escaping fluid as you perform this step. Disconnection of the clutch line requires Special Service Tool: 09023-00101 while using a container to receive the fluid. The clutch master cylinder assembly can be taken off by removing two nuts and the assembly components and then extracting the gasket from the clutch master cylinder assembly.
- Q: How to remove the Clutch Master Cylinder on Toyota Tacoma?A:The first step before removing the Clutch Master Cylinder involves draining the clutch fluid. You should remove the clutch reservoir tube and flexible hose tube by utilizing a union nut wrench. Start by taking out both the front door scuff plate on the left-hand side together with cowl side trim board on the left-hand side. Proceed to uninstall the lower No. 1 instrument panel finish panel. Cut the junction block for the driver side then detach the clutch pedal and clutch master cylinder through the clearance of the clutch start switch connector and removal of 2 nuts and a bolt. Completion of the clutch master cylinder removal begins with disconnecting the clutch reservoir tube followed by using a union nut wrench to detach the 2 way tube from the clutch master cylinder and finishing with removing the nut and clutch start switch from the clutch pedal support and finally removing the clutch master cylinder by taking out its 2 bolts.


Related Toyota Parts
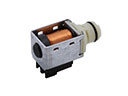 Toyota Shift Solenoid
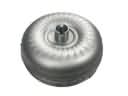 Toyota Torque Converter
 Toyota Clutch Fork
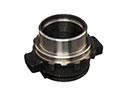 Toyota Clutch Release Bearing
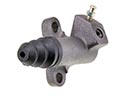 Toyota Clutch Slave Cylinder
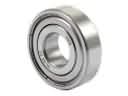 Toyota Pilot Bearing
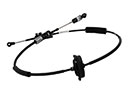 Toyota Shift Cable
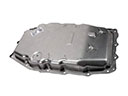 Toyota Transmission Pan
 Toyota Automatic Transmission Output Shaft Seal
 Toyota Clutch Hose
 Toyota Clutch Master Repair Kit
 Toyota Clutch Slave Repair Kit