×
ToyotaParts- Hello
- Login or Register
- Quick Links
- Live Chat
- Track Order
- Parts Availability
- RMA
- Help Center
- Contact Us
- Shop for
- Toyota Parts
- Scion Parts
My Garage
My Account
Cart
OEM Toyota Tacoma Clutch Master Cylinder
- Select Vehicle by Model
- Select Vehicle by VIN
Select Vehicle by Model
orMake
Model
Year
Select Vehicle by VIN
For the most accurate results, select vehicle by your VIN (Vehicle Identification Number).
7 Clutch Master Cylinders found


Toyota Tacoma Master Cylinder Part Number: 31410-34012
$157.32 MSRP: $222.71You Save: $65.39 (30%)Ships in 1-3 Business Days

Toyota Tacoma Cylinder Kit, Clutch Master Part Number: 04311-12110
$42.65 MSRP: $59.36You Save: $16.71 (29%)Ships in 1-3 Business Days

Toyota Tacoma Master Cylinder Part Number: 31420-04020
$128.42 MSRP: $181.79You Save: $53.37 (30%)
Toyota Tacoma Master Cylinder Part Number: 31420-04011
$146.28 MSRP: $207.08You Save: $60.80 (30%)Toyota Tacoma Master Cylinder Part Number: 31420-60033
$126.89 MSRP: $179.63You Save: $52.74 (30%)Ships in 1-2 Business Days
Toyota Tacoma Cylinder Assembly, Clutch Master Part Number: 31420-35090
$123.25 MSRP: $174.47You Save: $51.22 (30%)Ships in 1-2 Business Days


Toyota Tacoma Master Cylinder Repair Kit Part Number: 04311-34010
Toyota Tacoma Clutch Master Cylinder
Choose genuine Clutch Master Cylinder that pass strict quality control tests. You can trust the top quality and lasting durability. Shopping for OEM Clutch Master Cylinder for your Toyota Tacoma? Our website is your one-stop destination. We stock an extensive selection of genuine Toyota Tacoma parts. The price is affordable so you can save more. It only takes minutes to browse and find the exact fit. Easily add to cart and check out fast. Our hassle-free return policy will keep you stress-free. We process orders quickly for swift delivery. Your parts will arrive faster, so you can get back on the road sooner.
Toyota Tacoma Clutch Master Cylinder Parts and Q&A
- Q: How to install the clutch master cylinder assembly on Toyota Tacoma?A:The clutch master cylinder requires installation using 2 bolts tightened to 16 Nm (158 kgf-cm, 11 ft-lbf). Use a nut to fasten the clutch start switch while torquing it to 16 Nm (160 kgf-cm 12 ft-lbf). Attach the clutch master cylinder to the 2 way tube employing Special Service Tool 09023-00101 and fasten it with 15 Nm (155 kgf-cm, 11 ft-lbf) of torque before adding the clutch reservoir tube. The clutch master cylinder and clutch pedal installation requires 2 nuts then a bolt for attachment to the vehicle body while tightening the nut to 14 Nm (145 kgf-cm, 10 ft-lbf) and the bolt to 24 Nm (245 kgf-cm, 18 ft-lbf). The next step involves joining the clutch start switch connector. Start by linking the driver junction block followed by setting the lower No. 1 instrument panel finish panel, cowl side trim board LH and front door scuff plate LH. The clutch master cylinder must be attached to the flexible hose tube via Special Service Tool: 09023-00101 while torquing to 15 Nm (155 kgf-cm, 11 ft-lbf), followed by connecting the clutch reservoir tube. The technician follows the process of bleeding brake line (without VSC) and clutch pipe line before conducting inspections of the clutch pedal sub-assembly and brake fluid (without VSC) leakage checks and clutch fluid leakage tests and reservoir fluid level inspection.
- Q: How to service and repair the Clutch Master Cylinder on Toyota Tacoma?A:Repair of the Clutch Master Cylinder requires drawing fluid using a syringe followed by disconnecting the clutch line through Special Service Tool: 09023-00100 while collecting the fluid into a container. Initial tightening torque of 15 Nm must be applied to this connection which equals 155 kgf-cm and 11 ft. lbs. You need to extract the clip and clevis pin before you remove the mounting nuts to pull out the master cylinder with a maximum torque of 13 Nm (130 kgf-cm, 9 ft. lbs.). To disassemble the reservoir tank requires you to drive out the slotted spring pin with a pin punch and hammer followed by removal of the reservoir tank and grommet. With snap ring pliers users should uninstall the snap ring before they can remove the piston by pulling back the boot. Hot wash all parts before putting them into grease followed by piston insertion into cylinder then you can set up push rod assembly with snap ring while the reservoir tank must come next before securing the slotted pin with the new grommet. Bleeding procedures along with clutch pedal adjustment need to be completed before the system becomes operational after backward installation from removal steps.


Related Toyota Tacoma Parts
 Toyota Tacoma Transfer Case
 Toyota Tacoma Automatic Transmission Filter
 Toyota Tacoma Automatic Transmission Output Shaft Seal
 Toyota Tacoma Clutch Fork
 Toyota Tacoma Clutch Hose
 Toyota Tacoma Clutch Master Repair Kit
 Toyota Tacoma Clutch Release Bearing
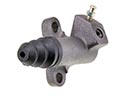 Toyota Tacoma Clutch Slave Cylinder
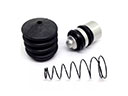 Toyota Tacoma Clutch Slave Repair Kit
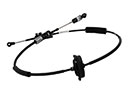 Toyota Tacoma Shift Cable
 Toyota Tacoma Transmission Drain Plug
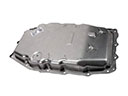 Toyota Tacoma Transmission Pan