- Hello
- Login or Register
- Quick Links
- Live Chat
- Track Order
- Parts Availability
- RMA
- Help Center
- Contact Us
- Shop for
- Toyota Parts
- Scion Parts

Popular OEM Toyota RAV4 Parts
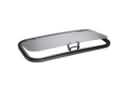
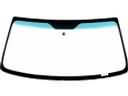
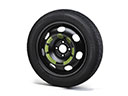
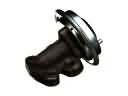
- Body & Hardware Parts View More >
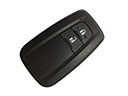
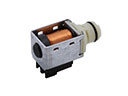
- Electrical Parts View More >
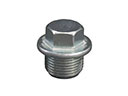
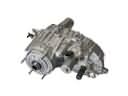
- Engine Parts View More >
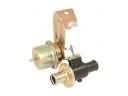
- Air & Fuel Delivery Parts View More >
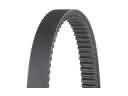
- Belts & Cooling Parts View More >
- Steering Parts View More >
- Suspension Parts View More >
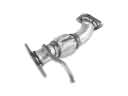
- Emission Control & Exhaust Parts View More >
- A/C & Heating Parts View More >
- Charging & Starting Parts View More >
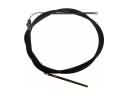
- Brakes Parts View More >
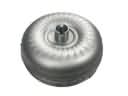
- Transmission Parts View More >


Why Buy Genuine Toyota RAV4 Parts From ToyotaPartsNow.com
ToyotaPartsNow.com highlights the reliability of OEM Toyota RAV4 parts right at your fingertips. Our skilled staff assists customers in selecting the right Toyota RAV4 parts and provides expert help with any unique part requests. At ToyotaPartsNow.com, we make all Toyota RAV4 parts available to you quickly and efficiently through our fast order and reliable ship process. Our service is designed to make finding the correct Toyota RAV4 parts fast and easy whether you are an amateur or a professional. We offer access to a broad inventory that includes a wide range of Toyota years and variants. Affordable prices, quick processing and professional service are also our specialty to ensure your car remains in top condition with OEM Toyota RAV4 parts, including Headlights & Lighting. You can feel confident shopping with us because all Toyota RAV4 parts, such as Driveline & Axles you purchase from our store are of genuine quality and built to last.
As Toyota manufactured the RAV4 since 1994. The popular vehicle has passed through five generational changes while its engine and transmission capabilities experienced remarkable developments. At its launch in 1994 the first model used a 119 hp 2.0-liter inline-four engine as its power source which customers could select with either a five-speed manual or automatic transmission with choices for front-wheel drive or all-wheel drive capabilities. The expansion of generations under the Toyota RAV4 included a 1.8-liter inline-four engine for 2WD models along with a stronger 2.4-liter power unit that delivered 158 hp for improved performance and better efficiency. An electric power steering system became standard in the 2006 redesign and a new platform was implemented which eventually resulted in a lineup that only included inline-four engines during the fourth generation release. Toyota introduced the 2018 RAV4 model with the TNGA-K platform which delivers enhanced driving dynamics by improving rigidity and having a lower center of gravity. The current RAV4 edition provides hybrid variants along with sophisticated transmission systems which maximize both power and fuel economy. Safety remains a priority for the Toyota RAV4 because it comes standard with Vehicle Stability Control and additional advanced safety systems. The market offers genuine Toyota RAV4 parts that fulfill Toyota's original production standards providing durability alongside exceptional performance from each part.
The Toyota RAV4 has some issues that can afflict it because of engine and emissions systems. The Toyota RAV4 oxygen sensor failure is a common culprit. This failure affects the air-fuel ratio in the engine, causing a lean condition and high emissions. The next issue is potential EVAP system leaks, such as the Toyota RAV4 EVAP canister releasing charcoal pellets that clog the vent valve. This typically triggers fault codes P0441, P0442 and P0446. An electrical issue with the vent valve will result with a P0446 fault code. This issue can only be fixed by replacing the entire canister assembly, a part located on the fuel tank's top. Plus, Toyota has sent out a software patch to mask the erroneous readings to the Toyota RAV4 catalytic converter, which can also trigger the CEL. The update remedies the situation since the vehicle computer will update the current condition of the Toyota RAV4 catalytic converter. In any of the mentioned issues, it would be easier to seek the assistance of a skilled technician to identify and remove all the problems. Providing proper maintenance on time, keeps your Toyota RAV4 performing as it should.
Toyota RAV4 Parts and Q&A
- Q: How to install the radiator on Toyota RAV4?A:Installation of the radiator is done by first adding the cooling fan and fan shroud, followed by the fixing of the cooler condenser and radiator. Install upper radiator support and hose, clamp and connectors. Lastly, fit in the battery, clamp tight, run negative and coolant and sound out leaks.
- Q: How to install the alternator assembly on Toyota RAV4?A:Secure crankshaft position sensor harness to clamp bracket behind timing chain cover rib. Install generator with two bolts torqued to 21 Nm and 52 Nm. Install harness clamp/bracket to 8.4 Nm. Tighten generator wire nut to 9.8 Nm, fit terminal cap/connector, install fan and V belt, reconnect negative battery cable.
- Q: How to address a steering wheel that is off center on Toyota RAV4?A:To fix an off-center steering wheel, tape the top center of the wheel and column. Drive straight for 100 meters, mark a line, then adjust the wheel to straight and mark again. Measure the distance between lines to determine the steering angle, then adjust the tie rod ends accordingly. Reinstall boot clips after tightening lock nuts.


