×
ToyotaParts- Hello
- Login or Register
- Quick Links
- Live Chat
- Track Order
- Parts Availability
- RMA
- Help Center
- Contact Us
- Shop for
- Toyota Parts
- Scion Parts
My Garage
My Account
Cart
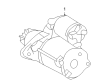
OEM Toyota RAV4 Starter Motor
Starter Ignition- Select Vehicle by Model
- Select Vehicle by VIN
Select Vehicle by Model
orMake
Model
Year
Select Vehicle by VIN
For the most accurate results, select vehicle by your VIN (Vehicle Identification Number).
17 Starter motors found


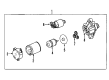
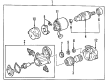
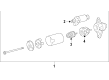
Toyota RAV4 Starter
Part Number: 28100-20020-84$156.25 MSRP: $219.85You Save: $63.60 (29%)Ships in 1-3 Business Days


Toyota RAV4 Starter
Part Number: 28100-20022$247.32 MSRP: $353.11You Save: $105.79 (30%)Ships in 1 Business Day


Toyota RAV4 Starter
Part Number: 28100-0V012$217.61 MSRP: $310.69You Save: $93.08 (30%)Ships in 1-3 Business Days
Toyota RAV4 Starter
Part Number: 28100-74270-84$153.94 MSRP: $216.57You Save: $62.63 (29%)Ships in 1-3 Business Days
Toyota RAV4 Starter Assembly
Part Number: 28100-74260-84$158.04 MSRP: $222.38You Save: $64.34 (29%)Ships in 1-3 Business Days
Toyota RAV4 Starter
Part Number: 28100-0A011-84$160.01 MSRP: $225.18You Save: $65.17 (29%)Ships in 1-3 Business DaysToyota RAV4 Starter Assembly
Part Number: 28100-74140-84$167.05 MSRP: $235.17You Save: $68.12 (29%)Ships in 1-3 Business Days
Toyota RAV4 Starter
Part Number: 28100-74290-84$176.66 MSRP: $250.93You Save: $74.27 (30%)Ships in 1-3 Business Days
Toyota RAV4 Starter
Part Number: 28100-F0130$229.73 MSRP: $327.99You Save: $98.26 (30%)Ships in 1-3 Business Days
Toyota RAV4 Starter
Part Number: 28100-24140$222.74 MSRP: $318.02You Save: $95.28 (30%)Ships in 1-3 Business DaysToyota RAV4 Starter
Part Number: 28100-F2020$249.53 MSRP: $356.28You Save: $106.75 (30%)Ships in 1-3 Business DaysToyota RAV4 Starter
Part Number: 28100-F0080$245.22 MSRP: $350.12You Save: $104.90 (30%)Ships in 1-3 Business DaysToyota RAV4 Starter Assembly
Part Number: 28100-F0060$234.39 MSRP: $334.65You Save: $100.26 (30%)Ships in 1-3 Business Days
Toyota RAV4 Starter Assembly
Part Number: 28100-28072$239.98 MSRP: $342.64You Save: $102.66 (30%)Ships in 1-3 Business DaysToyota RAV4 Starter
Part Number: 28100-25070$237.18 MSRP: $338.64You Save: $101.46 (30%)Ships in 1-3 Business Days
Toyota RAV4 Starter Motor
Choose genuine Starter Motor that pass strict quality control tests. You can trust the top quality and lasting durability. Shopping for OEM Starter Motor for your Toyota RAV4? Our website is your one-stop destination. We stock an extensive selection of genuine Toyota RAV4 parts. The price is affordable so you can save more. It only takes minutes to browse and find the exact fit. Easily add to cart and check out fast. Our hassle-free return policy will keep you stress-free. We process orders quickly for swift delivery. Your parts will arrive faster, so you can get back on the road sooner.
Toyota RAV4 Starter Motor Parts and Q&A
- Q: How to remove and replace the starter motor on Toyota RAV4?A:You should start by detaching the cable connecting to the negative battery terminal before waiting for at least ninety seconds to avoid triggering the seat belt pretensioner and Air Bag system. Begin by discharging the positive battery terminal cable and following with the steps to loosen the nut then remove the bolt and detach 2 wire harness clamps and finally pull off the battery clamp from the front of the battery bracket. The removal of battery insulator together with battery and front battery bracket requires disconnected wire harness clamps and removal of four bolts and two wire harness clamps. The battery bracket reinforcement must be taken out through removing the 2 bolts. The starter assembly installation requires disconnecting the starter connector and opening the terminal cap to remove the nut before disconnecting the starter wire and then taking out the 2 bolts to remove it. Begin the installation by attaching the starter assembly through its 2 bolts which should be torqued to 37 N.m (377 kgf.cm, 27 ft.lbf), then reconnect the starter connector, fasten the terminal nut while placing a cap above it with a torque setting of 9.8 N.m (100 kgf.cm, 7 ft.lbf). After installing the battery bracket reinforcement with a torque of 19 N.m (194 kgf.cm, 14 ft.lbf), the worker must install the front battery bracket using 4 bolts that are torqued to 19 N.m (194 kgf.cm, 14 ft.lbf) while attaching the 2 wire harness clamps. Start by mounting the battery and battery insulator followed by installing the battery clamp through front attachment of its hook then temporary nut torquing before adding the bolt for adjustment before tightening both to 5.0 N.m (51 kgf.cm, 44 in.lbf) while securing wire harness clamps. The cable installation ends with connecting it first to the positive battery terminal followed by the negative terminal.
- Q: How to install the starter motor on Toyota RAV4?A:The starter motor installation requires first tightening 2 starter assembly bolts to 37 Nm (377 kgf-cm, 27 ft-lbf) before connecting the starter connector. Begin with installing the terminal nut then replace it with the cap while applying 9.8 Nm (100 kgf-cm, 87 in-lbf). Install the battery bracket reinforcement through two bolts that require 20 Nm torque (204 kgf-cm, 15 ft-lbf). The installation of the front battery bracket requires 4 bolts where bolt (A) gets torqued to 20 Nm (204 kgf-cm, 15 ft-lbf) and bolt (B) gets torqued to 19 Nm (196 kgf-cm, 14 ft-lbf). Additionally, both wire harness clamps need attachment at this point. The installation process begins with putting in the battery tray and then adding the battery and battery insulator until the end where you install the battery clamp. Fasten the hook of the battery clamp onto the front battery bracket before partially tightening the nut while installing the bolt temporarily. The battery clamp position needs adjustment before torquing the nut to 4.9 Nm (50 kgf-cm, 43 in-lbf) and the bolt to 17 Nm (168 kgf-cm, 12 ft-lbf) while attaching the 2 wire harness clamps. The procedure requires attaching the radiator support opening cover next to connecting the cable to the positive terminal then finishing with connecting the cable to the negative terminal.


Related Toyota RAV4 Parts
 Toyota RAV4 Alternator
 Toyota RAV4 Battery Terminal
 Toyota RAV4 Starter Solenoid
 Toyota RAV4 Alternator Bearing
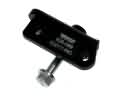 Toyota RAV4 Alternator Bracket
 Toyota RAV4 Alternator Brush
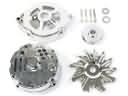 Toyota RAV4 Alternator Case Kit
 Toyota RAV4 Armature
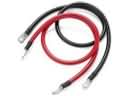 Toyota RAV4 Battery Cable
 Toyota RAV4 Car Batteries
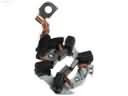 Toyota RAV4 Starter Brush
 Toyota RAV4 Starter Drive Gear