- Hello
- Login or Register
- Quick Links
- Live Chat
- Track Order
- Parts Availability
- RMA
- Help Center
- Contact Us
- Shop for
- Toyota Parts
- Scion Parts

Popular OEM Toyota Sienna Parts
- Body & Hardware Parts View More >
- Electrical Parts View More >
- Engine Parts View More >
- Air & Fuel Delivery Parts View More >
- Belts & Cooling Parts View More >
- Steering Parts View More >
- Suspension Parts View More >
- Emission Control & Exhaust Parts View More >
- A/C & Heating Parts View More >
- Charging & Starting Parts View More >
- Brakes Parts View More >
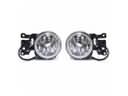
- Headlights & Lighting Parts View More >


Why Buy Genuine Toyota Sienna Parts From ToyotaPartsNow.com
ToyotaPartsNow.com highlights the reliability of OEM Toyota Sienna parts right at your fingertips. Our skilled staff assists customers in selecting the right Toyota Sienna parts and provides expert help with any unique part requests. At ToyotaPartsNow.com, we make all Toyota Sienna parts available to you quickly and efficiently through our fast order and reliable ship process. Our service is designed to make finding the correct Toyota Sienna parts fast and easy whether you are an amateur or a professional. We offer access to a broad inventory that includes a wide range of Toyota years and variants. Affordable prices, quick processing and professional service are also our specialty to ensure your car remains in top condition with OEM Toyota Sienna parts. You can feel confident shopping with us because all Toyota Sienna parts, such as Driveline & Axles you purchase from our store are of genuine quality and built to last.
Since its market introduction in 1997, Toyota brought the Sienna minivan four different generations and each transition showcased the progress of good design and engineering. Uniformly using the Camry platform for its initial production period the first-generation Toyota Sienna contained a 3.0-liter V6 engine which synchronized with a four-speed automatic transmission to achieve 16 city mpg and 22 highway mpg fuel economy ratings. The 2003 second-generation update brought the 3MZ-FE V6 3.3-liter engine and added a five-speed automatic transmission that gave drivers more control through its gated shift pattern. The new generation expanded its capacity to move eight people and it provided larger interior storage options. The 2010 third-generation Toyota Sienna began its production with the first-ever implementation of a four-cylinder engine and included electric power steering and improved fuel economy. The 2020, fourth-generation Sienna brought USB multiple ports and four-zone climate control alongside rear entertainment capabilities which remained with its existing powerful V6 3.5-liter engine used with an eight-speed automatic transmission for enhanced speed and reaction capabilities. All parts that carry the Toyota Sienna brand originate from Toyota factories to deliver products that guarantee longevity and successful operation of the vehicle. The testing process for these parts is rigorous to ensure driving comfort remains at the level which has made the Toyota Sienna famous and secure its reputation as a reliable vehicle.
The Toyota Sienna has always been a dependable vehicle, but it does have some issues associated with a number of systems of the automobile. Electric sliding doors are included in electrical system. Cables become frayed, and the consequence is that the door mechanism fails, which can end up damaging the electric motor. To repair it, typically the Toyota Sienna sliding door cable assembly needs to be replaced. The second problem is interior: the dashboard in Toyota Sienna tends to crack. While this is purely a cosmetic concern and doesn't cause any functional issues, a full replacement of the Toyota Sienna dashboard is the solution. Last, there may be some oxygen sensor issues in the engine's management system. A failed oxygen sensor may trigger the Check Engine Light (CEL), which means that some immediate attention is in order. As much as you may be keen to have your engine running at its optimum, you will have to get the oxygen sensor replaced. All these problems show the significance of servicing the Toyota Sienna and repairing it in time. Repairing these parts helps prevent further damage and keeps the vehicle in good working condition. The significant point is that owners gain the ability to act when they learn about these typical issues. The owners of the Toyota Sienna are likely to gain the habit of taking preemptive actions in regards to car maintenance.
Toyota Sienna Parts and Q&A
- Q: How to install the radiator on Toyota Sienna?A:Installation of the radiator requires connecting the inlet hose and tightening the inlet sub-assembly. Install the shroud of the fan and the radiator support. Fix condenser assembly and fit radiator assembly. Install oil cooler hoses, the upper support, and connect different parts. Lastly, put in the fluids and make adjustments to the vehicle.
- Q: How to replace the oil filter sub-assembly on Toyota Sienna?A:In order to change the oil filter, put on protective wear and gloves to prevent the skin irritation caused by engine oil. Pour out the oil, take out the old drain and fit a new drain with the special tool. Add new engine oil, fit the filler top and investigate leaks. Dispose of used oil properly.
- Q: How to remove the alternator on Toyota Sienna?A:Removal of the alternator requires initially a V-bank cover and then removal of the front wheel and engine under cover. Unattach the front fender apron seal and drain the engine coolant. Take off the air cleaner inlets, battery, front bumper assembly, and un-hook a number of hoses. Lastly, take the generator assembly and parts out.


