×
ToyotaParts- Hello
- Login or Register
- Quick Links
- Live Chat
- Track Order
- Parts Availability
- RMA
- Help Center
- Contact Us
- Shop for
- Toyota Parts
- Scion Parts
My Garage
My Account
Cart
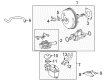
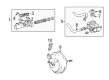
OEM Toyota Sienna Brake Booster
Brake Power Booster- Select Vehicle by Model
- Select Vehicle by VIN
Select Vehicle by Model
orMake
Model
Year
Select Vehicle by VIN
For the most accurate results, select vehicle by your VIN (Vehicle Identification Number).
8 Brake Boosters found


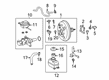
Toyota Sienna Brake Booster Part Number: 44610-08071
$606.42 MSRP: $888.71You Save: $282.29 (32%)Ships in 1-3 Business Days


Toyota Sienna Brake Booster Part Number: 47200-08071
$1030.34 MSRP: $1509.98You Save: $479.64 (32%)Ships in 1-3 Business DaysToyota Sienna Brake Booster Part Number: 44610-08080
$644.78 MSRP: $944.94You Save: $300.16 (32%)Ships in 1-3 Business Days
Toyota Sienna Brake Booster Part Number: 44610-08040
$661.69 MSRP: $969.72You Save: $308.03 (32%)Ships in 1-3 Business DaysToyota Sienna Brake Booster Part Number: 44610-08090
$760.89 MSRP: $1115.10You Save: $354.21 (32%)Ships in 1-3 Business DaysToyota Sienna Brake Booster Part Number: 44610-08010
$953.70 MSRP: $1397.65You Save: $443.95 (32%)Ships in 1-3 Business DaysToyota Sienna Brake Booster Part Number: 44610-08020
$973.82 MSRP: $1427.15You Save: $453.33 (32%)Ships in 1-3 Business DaysToyota Sienna Brake Booster Part Number: 47200-08081
$1000.26 MSRP: $1465.90You Save: $465.64 (32%)
Toyota Sienna Brake Booster
Choose genuine Brake Booster that pass strict quality control tests. You can trust the top quality and lasting durability. Shopping for OEM Brake Booster for your Toyota Sienna? Our website is your one-stop destination. We stock an extensive selection of genuine Toyota Sienna parts. The price is affordable so you can save more. It only takes minutes to browse and find the exact fit. Easily add to cart and check out fast. Our hassle-free return policy will keep you stress-free. We process orders quickly for swift delivery. Your parts will arrive faster, so you can get back on the road sooner.
Toyota Sienna Brake Booster Parts and Q&A
- Q: How to service and repair the vacuum brake booster on Toyota Sienna?A:The process to service and repair the vacuum brake booster starts with removing the 2 cowl top ventilator louvers, the outer front cowl top panel and the master cylinder as well as ABS actuator assembly. Start the repair of the vacuum brake booster by disconnecting its vacuum hose and removing lower finish panel and insert No. 1 safety pad. To remove the pedal return spring together with its clip and clevis pin you must first uninstall the cruise control ECU and the pedal return spring before you can retrieve the clip and clevis pin. First detach the brake booster through removal of its 4 nuts and clevis before extracting the brake booster and gasket. The installer should start by mounting the brake booster using a new gasket before attaching the clevis to the operating rod and torquing booster installation nuts to 13 Nm (130 kgf-cm, 9 ft. lbs.). After inserting the clevis pin into both the clevis and brake pedal you should keep it secured by using the clip before installing the pedal return spring followed by the cruise control ECU while torquing it at 5.0 Nm (51 kgf-cm, 41 inch lbs.). View the following procedure for adjusting the booster push rod length by installing the gasket on the master cylinder and using Special Service Tool: 09737-00010 to position its platform against the gasket followed by lowering the pin until it makes a slight contact with the piston. Set the gasket and ABS actuator bracket on the booster and slightly tighten its screws to secure the bracket before placing Special Service Tool: 09737-00010 upside down for positioning on the booster. Before adjusting the booster push rod length measure the space between the rod and pin head to reach 0.35 mm (0.014 inch) then adjust the rod to make a slight contact with the pin's head by depressing the brake pedal. Proceed to reinstall the ABS actuator assembly followed by the master cylinder then attach the vacuum hose to the brake booster. People should replace the front cowl top panel along with the 2 ventilator louvers before filling brake fluid into the reservoir and bleeding the brake system. After leak inspection verify brake pedal operation while you tighten the clevis lock nut to 25 Nm (260 kgf-cm, 19 ft. lbs.). Finally, perform an operational check.
- Q: How to remove the vacuum brake booster on Toyota Sienna?A:The process for vacuum brake booster removal starts with verifying the brake booster push rod adjustment status and maintaining the diameter converting unit and brake coupling stability. Particles from the booster vacuum should be released through repeated braking pedal presses before you disconnect the Brake Master Cylinder from the brake booster. Start your brake booster removal by taking off the front wheel followed by draining brake fluid before washing all fluids that touch painted areas. Disconnect the battery and remove the front door scuff plate LH before removing the cowl side trim board LH by unfastening its nut and cowl trim board plate LH. Unscrew all 2 bolts that secure the instrument panel finish panel sub-assembly lower LH before you detach the instrument panel safety pad insert sub-assembly No. 1 by removing its 4 bolts. Unfasten the cowl top panel sub-assembly outer front and then detach the air cleaner assembly with corresponding hose. Use Special Service Tool: 09023-00101 to detach the brake actuator assembly from cars without VSC functionality and to take off the ABS & traction actuator assembly from vehicles with VSC. The brake line detachment requires removal of components including front brake tubings numbered 1, 2, 3, and 4 and the rear brake tubings numbered 1 and 2. The first step includes removing the push rod pin from the brake booster push rod followed by detaching the brake master cylinder assembly with a clip which breaks the connection of the brake master cylinder reservoir hose from the brake master cylinder union and the vacuum hose from the brake vacuum check valve assembly. The brake booster with master cylinder can be extracted by first removing the 4 nuts and clevis. Beginning by removing the brake booster gasket attached to the brake booster with master cylinder requires extraction of both the brake vacuum check valve assembly and its corresponding check valve grommet from the brake booster assembly.


Related Toyota Sienna Parts
 Toyota Sienna Brake Pads
 Toyota Sienna Brake Master Cylinder
 Toyota Sienna Yaw Sensor
 Toyota Sienna Brake Booster Vacuum Hose
 Toyota Sienna Brake Caliper Piston
 Toyota Sienna Brake Drum
 Toyota Sienna Brake Fluid Pump
 Toyota Sienna Brake Line
 Toyota Sienna Brake Master Cylinder Reservoir
 Toyota Sienna Brake Rotor
 Toyota Sienna Master Cylinder Repair Kit
 Toyota Sienna Wheel Cylinder