- Hello
- Login or Register
- Quick Links
- Live Chat
- Track Order
- Parts Availability
- RMA
- Help Center
- Contact Us
- Shop for
- Toyota Parts
- Scion Parts

Popular OEM Toyota Land Cruiser Parts
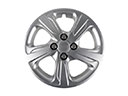
- Body & Hardware Parts View More >
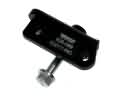
- Electrical Parts View More >
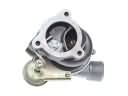
- Engine Parts View More >
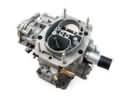
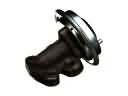
- Air & Fuel Delivery Parts View More >
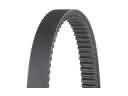
- Belts & Cooling Parts View More >
- Steering Parts View More >
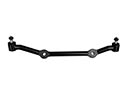
- Suspension Parts View More >
- Emission Control & Exhaust Parts View More >
- A/C & Heating Parts View More >
- Charging & Starting Parts View More >
- Brakes Parts View More >
- Transmission Parts View More >


Why Buy Genuine Toyota Land Cruiser Parts From ToyotaPartsNow.com
ToyotaPartsNow.com highlights the reliability of OEM Toyota Land Cruiser parts right at your fingertips. Our skilled staff assists customers in selecting the right Toyota Land Cruiser parts and provides expert help with any unique part requests. At ToyotaPartsNow.com, we make all Toyota Land Cruiser parts available to you quickly and efficiently through our fast order and reliable ship process. Our service is designed to make finding the correct Toyota Land Cruiser parts fast and easy whether you are an amateur or a professional. We offer access to a broad inventory that includes a wide range of Toyota years and variants. Affordable prices, quick processing and professional service are also our specialty to ensure your car remains in top condition with OEM Toyota Land Cruiser parts, including Headlights & Lighting. You can feel confident shopping with us because all Toyota Land Cruiser parts, such as Driveline & Axles you purchase from our store are of genuine quality and built to last.
Since its original manufacturing year in 1951 the Toyota Land Cruiser has transformed continuously yet it preserves its well-known attributes including dependability and toughness. The Toyota Land Cruiser first entered the market with its 3.9-liter F-type gasoline engine but subsequently received the 3.4-liter 3B diesel engine in the 1980s to boost performance and efficiency. The Land Cruiser's transmission systems underwent major advancements through the incorporation of advanced automatic and manual gear control systems which enable smooth gear transitions for enhanced power delivery in diverse ground conditions. The four-wheel-drive system of Toyota Land Cruiser obtains additional support from its sturdy suspension design which provides enhanced stability during tough terrain driving conditions. The model has transformed over time to fit multiple purposes including civilian usage and humanitarian missions thus demonstrating its broad functionality. The genuine parts popularity for Toyota Land Cruiser buyers continues due to the OEM components which support Toyota's rigorous quality standards while maintaining model compatibility. You can trust your Toyota Land Cruiser maintenance because the extensive parts collection designed exactly for this car model makes it possible for owners to perform repairs confidently.
The Toyota Land Cruiser is a durable car. But it does have its own specific problems that may arise with its systems. A leak in the power steering is also common, particularly in higher mileage vehicles (125,000–150,000 miles). The Toyota Land Cruiser power steering pump is typically defective in this issue and may need to be replaced. The second problem concerns the faulty Toyota Land Cruiser electrical junction block and, consequently, could lead to inoperative power windows and mirrors. This block is a key part of how the battery distributes power to this suite of systems. Lastly, the Check Engine Light may come on due to faults in the evaporative emission (EVAP) system. The frequent culprits that mechanics have encountered are a faulty Toyota Land Cruiser charcoal canister or even a gas cap. They affect many systems: the steering system is influenced by the power steering pump, the electrical system by the Toyota Land Cruiser electrical junction block, and the emission system by the EVAP. As soon as these problems are resolved promptly, it contributes to maintaining the Toyota Land Cruiser's performance and reliability.
Toyota Land Cruiser Parts and Q&A
- Q: How to remove the steering wheel on Toyota Land Cruiser?A:In order to remove the steering wheel, place the front wheels in a straight position and disconnect the negative battery terminal, as long as the SRS system is neutralized. Unscrew the lower steering wheel covers, steering pad and the switch assembly. Lastly, loosen the steering wheel assembly with the necessary special service tools.
- Q: How to remove the alternator on Toyota Land Cruiser?A:Removing the alternator, first of all, disconnect negative battery terminal. Then detach the V-bank cover, air cleaner hose and air cleaner assembly. Then remove the front fender splash shield on each side. Lastly, unplug the required parts and take off the generator unit.
- Q: How to remove and install the radiator on Toyota Land Cruiser?A:In order to take out the radiator, drain out the engine coolant and unconnection of the hoses. Take out the radiator reservoir and assembly then the fan and shroud. To install, fasten the side supports, brackets and radiator assembly. Reattach the hoses, coolant fill, leak check and place the engine cover back in place.


