×
ToyotaParts- Hello
- Login or Register
- Quick Links
- Live Chat
- Track Order
- Parts Availability
- RMA
- Help Center
- Contact Us
- Shop for
- Toyota Parts
- Scion Parts
My Garage
My Account
Cart
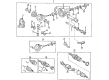
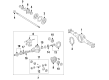
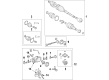
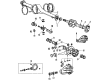
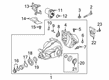
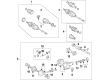
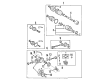
OEM Toyota Differential
Front Differential- Select Vehicle by Model
- Select Vehicle by VIN
Select Vehicle by Model
orMake
Model
Year
Select Vehicle by VIN
For the most accurate results, select vehicle by your VIN (Vehicle Identification Number).
324 Differentials found


Toyota Carrier Assembly, Differential, Front Part Number: 41110-60801
$1805.32 MSRP: $2645.72You Save: $840.40 (32%)Ships in 1-3 Business DaysProduct Specifications- Other Name: Carrier Assembly, Differential; Differential
- Manufacturer Note: *FGR=41:10=4.100
- Position: Front

Toyota Carrier Assembly, Differential Part Number: 41110-6A171
$2538.87 MSRP: $3720.74You Save: $1181.87 (32%)Ships in 1-3 Business DaysProduct Specifications- Other Name: CARRIER ASSY, DIFFER; Differential
- Position: Front
- Replaces: 41110-60820


Toyota Differential Case Part Number: 41301-35200
$603.13 MSRP: $883.90You Save: $280.77 (32%)Ships in 1-3 Business DaysProduct Specifications- Other Name: Case Sub-Assembly, Differential; Differential Carrier, Rear; Case; Case Sub-Assembly, Rear Differential; Differential


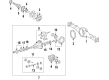
Toyota Differential Assembly, Rear Part Number: 41110-45011
$1015.47 MSRP: $1488.19You Save: $472.72 (32%)Ships in 1-3 Business DaysProduct Specifications- Other Name: Carrier Assembly, Differential; Differential, Rear; Carrier; Carrier Assembly, Differential, Rear; Differential
- Manufacturer Note: *FGR=41:18=2.277
- Position: Rear
- Replaces: 41110-45010


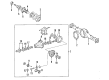
Toyota Differential Carrier, Rear Part Number: 41110-34341
$1462.32 MSRP: $2143.05You Save: $680.73 (32%)Ships in 1-2 Business DaysProduct Specifications- Other Name: Carrier Assembly, Differential; Differential Carrier, Rear; Carrier Assembly; Carrier Assembly, Differential, Rear; Differential
- Manufacturer Note: *FGR=41:10=4.100
- Position: Rear
- Replaces: 41110-34340


Toyota Differential Carrier, Rear Part Number: 41110-35270
$1504.20 MSRP: $2204.43You Save: $700.23 (32%)Ships in 1-3 Business DaysProduct Specifications- Other Name: Carrier Assembly, Differential; Differential Carrier, Rear; Carrier Assembly; Carrier Assembly, Differential, Rear; Differential
- Position: Rear


Toyota Differential Carrier, Rear Part Number: 41110-35891
$1535.19 MSRP: $2249.84You Save: $714.65 (32%)Ships in 1-3 Business DaysProduct Specifications- Other Name: Carrier Assembly, Differential; Differential Carrier, Rear; Differential; Carrier Assembly; Carrier
- Position: Rear
- Replaces: 41110-35890


Toyota Carrier, Rear Part Number: 41110-WAA05
$1538.83 MSRP: $2255.18You Save: $716.35 (32%)Ships in 1-3 Business DaysProduct Specifications- Other Name: Carrier Assembly, Differential; Differential, Rear; Differential; Carrier Assembly, Differential, Rear
- Position: Rear


Toyota Carrier Assembly, Rear Part Number: 41110-0C061
$1797.60 MSRP: $2634.41You Save: $836.81 (32%)Product Specifications- Other Name: Carrier Assembly, Differential; Differential Carrier Assembly, Rear; Carrier Assembly, Differential, Rear; Differential
- Position: Rear


Toyota Differential Carrier, Rear Part Number: 41110-35751
$1803.50 MSRP: $2643.06You Save: $839.56 (32%)Ships in 1-3 Business DaysProduct Specifications- Other Name: Carrier Assembly, Differential; Differential Carrier, Rear; Carrier Assembly; Carrier Assembly, Differential, Rear; Differential
- Manufacturer Note: *FGR=41:10=4.100
- Position: Rear
- Replaces: 41110-35750

Toyota Carrier Assembly, Rear Part Number: 41110-34221
$1750.95 MSRP: $2566.04You Save: $815.09 (32%)Ships in 1-3 Business DaysProduct Specifications- Other Name: Carrier Assembly, Differential; Differential Carrier, Rear; Carrier Assembly, Differential, Rear; Differential
- Manufacturer Note: *FGR=47:12=3.916
- Position: Rear
- Replaces: 41110-34220


Toyota Differential Carrier, Rear Part Number: 41110-34541
$1873.31 MSRP: $2745.35You Save: $872.04 (32%)Ships in 1-3 Business DaysProduct Specifications- Other Name: Carrier Assembly, Differential; Differential Carrier Assembly, Rear; Differential, Rear; Differential; Carrier Assembly, Differential, Rear
- Position: Rear

Toyota Differential Carrier, Rear Part Number: 41110-34400
$1877.85 MSRP: $2752.01You Save: $874.16 (32%)Ships in 1-2 Business DaysProduct Specifications- Other Name: Carrier Assembly, Differential; Differential Carrier, Rear; Carrier Assembly; Carrier Assembly, Differential, Rear; Differential
- Manufacturer Note: *FGR=43:11=3.909
- Position: Rear

Toyota Carrier Assembly, Rear Part Number: 41110-0C020
$1845.16 MSRP: $2704.10You Save: $858.94 (32%)Product Specifications- Other Name: Carrier Assembly, Differential; Differential Carrier Assembly, Rear; Carrier Assembly, Differential, Rear; Differential
- Position: Rear


Toyota Differential Carrier, Rear Part Number: 41110-35C60
$1894.76 MSRP: $2776.79You Save: $882.03 (32%)Ships in 1-2 Business DaysProduct Specifications- Other Name: Carrier Assembly, Differential; Differential Carrier, Rear; Carrier Assembly; Carrier Assembly, Differential, Rear; Differential
- Manufacturer Note: *FGR=41:11=3.727
- Position: Rear
- Replaces: 41110-3D470

Toyota Differential Carrier, Rear Part Number: 41110-35A21
$2611.96 MSRP: $3827.86You Save: $1215.90 (32%)Ships in 1-3 Business DaysProduct Specifications- Other Name: Carrier Assembly, Differential; Differential Carrier, Rear; Differential; Carrier Assembly
- Position: Rear
- Replaces: 41110-35A20


Toyota Differential Case Part Number: 41311-71020
$347.86 MSRP: $496.67You Save: $148.81 (30%)Ships in 1-3 Business DaysProduct Specifications- Other Name: Case, Differential; Case, Front Differential; Differential


Toyota Carrier, Rear Part Number: 41110-21051
$1370.39 MSRP: $2008.31You Save: $637.92 (32%)Ships in 1-3 Business DaysProduct Specifications- Other Name: Differential; Carrier Assembly, Differential, Rear
- Manufacturer Note: *FGR=41:18=2.277
- Position: Rear


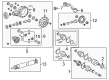
Toyota Differential Carrier Part Number: 41110-60371
$2518.44 MSRP: $3690.80You Save: $1172.36 (32%)Ships in 1-3 Business DaysProduct Specifications- Other Name: Carrier Assembly, Differential; Differential; Carrier
- Replaces: 41110-60370


Toyota Differential Case Part Number: 41311-14031
$291.70 MSRP: $416.49You Save: $124.79 (30%)Product Specifications- Other Name: Case, Differential; Case; Case Sub-Assembly, Rear Differential; Case, Front Differential; Case, Rear Differential; Differential
- Replaces: 41311-14030
| Page 1 of 17 |Next >
1-20 of 324 Results
Toyota Differential
OEM parts deliver unmatched quality you can rely on. They pass extensive quality control inspections. Toyota produces them to the official factory specifications. This process helps prevent defects and imperfections. So you can get exceptional lifespan and a flawless fit. Need new OEM Toyota Differential? You'll love our wide selection of genuine options. Shop in minutes and skip the hunt. Our prices are unbeatable, you'll save time and money. It's easy to shop and find the right piece. Our committed customer service team gives professional help from start to finish. Every part includes a manufacturer's warranty. We ship quickly, your parts will arrive fast at your door.
Toyota Differential equalizes speed of wheels to make turns smooth and traction to remain high all over the globe. Toyota expanded out of a small 1937 company into an international brand by eliminating unnecessary processes, mastering lean production, and seeking components with a long lifespan instead of flashy gimmicks. Toyota is also using the TNGA platform to reduce weight, center of gravity, and give every driver tighter handling without compromising on crash safety. The brand is also rapidly filling dealer lots with hybrids that consume less fuel, such as the recent RAV4 plug-in that chugs out forty-plus electrical miles before the engine goes on. Toyota is a company that convinces drivers due to the fact that the vehicles shake off the rough miles and do not need much of a rest as well as remain affordable long before the original owner slips the keys out of the pocket. Simple open units that divide the power equally with limited-slip types that push additional torque to the wheel can be found on the lineup list. Oil baths spiral-cutting ring gears, pinions, and clutch packs contained in the Differential housing cool teeth, remove backlash, and ensure the drivetrain is silent during rough corner exits. The difference between service times remains minimal since low fluid is an attraction of grit, death of bearings, and weld scrap of gears at high cost. Lockup is now adjusted on the fly by differentiation to active electronic control, enhancing grip on ice and reducing tire scrub on dry pavement. The Differential is crucial for maintaining performance and efficiency in various driving conditions. Proper maintenance of the Differential ensures longevity and reliability for Toyota vehicles.
Toyota Differential Parts and Q&A
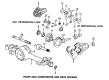
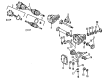
- Q: How to remove the front differential on 1995 through 2004 Toyota Tacoma?A:Before you remove the wheels, loosen their lug nuts, lift your vehicle using a jack, and put it on secure jackstands. Begin by taking off the engine under cover and draining the fluids from the differential. Unhook the front driveshaft from the front differential and hold up the front part of the driveshaft with a piece of wire. Take out the drive shafts, disconnect the pipe that lets air out, and remove the single screw holding the metal line connected to the differential. Models with ADD can remove its vacuum tubing by taking off the two bolts holding it to the actuator. Unplug and detach the vacuum hoses from the actuator. Support the differential carefully with either a transmission jack or a floor jack, then take out all three mounting bolts - one at the back, and two front ones - to lower the unit slowly. Installation is the reverse of removal.

Related Toyota Parts
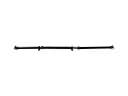 Toyota Drive Shaft
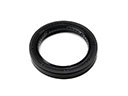 Toyota Output Shaft Seal
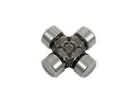 Toyota Universal Joint
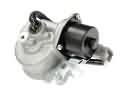 Toyota 4WD Actuator
 Toyota Pinion Bearing
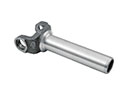 Toyota Slip Yoke
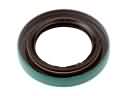 Toyota Transfer Case Seal
 Toyota CV Joint Companion Flange
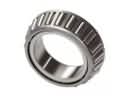 Toyota Differential Bearing
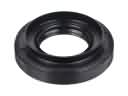 Toyota Differential Seal
 Toyota Pinion Washer
 Toyota Transfer Case Bearing