×
ToyotaParts- Hello
- Login or Register
- Quick Links
- Live Chat
- Track Order
- Parts Availability
- RMA
- Help Center
- Contact Us
- Shop for
- Toyota Parts
- Scion Parts
My Garage
My Account
Cart
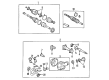
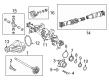
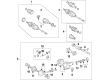
OEM Toyota Tacoma Differential
Front Differential- Select Vehicle by Model
- Select Vehicle by VIN
Select Vehicle by Model
orMake
Model
Year
Select Vehicle by VIN
For the most accurate results, select vehicle by your VIN (Vehicle Identification Number).
65 Differentials found


Toyota Tacoma Differential Carrier, Rear Part Number: 41110-34341
$1462.32 MSRP: $2143.05You Save: $680.73 (32%)Ships in 1-2 Business Days


Toyota Tacoma Differential Carrier, Rear Part Number: 41110-35270
$1504.20 MSRP: $2204.43You Save: $700.23 (32%)Ships in 1-3 Business Days


Toyota Tacoma Differential Carrier, Rear Part Number: 41110-35751
$1803.50 MSRP: $2643.06You Save: $839.56 (32%)Ships in 1-3 Business Days
Toyota Tacoma Differential Carrier, Rear Part Number: 41110-35A21
$2611.96 MSRP: $3827.86You Save: $1215.90 (32%)Ships in 1-3 Business Days
Toyota Tacoma CASE, DIFFERENTIAL Part Number: 41311-35121
$343.77 MSRP: $503.79You Save: $160.02 (32%)Ships in 1-2 Business Days
Toyota Tacoma Carrier Case, Rear Part Number: 41101-35151
$416.42 MSRP: $610.27You Save: $193.85 (32%)Ships in 1-3 Business Days
Toyota Tacoma Differential Case Part Number: 41302-34010
$426.18 MSRP: $624.57You Save: $198.39 (32%)Ships in 1-3 Business DaysToyota Tacoma Differential Case, Rear Part Number: 41301-60061
$762.60 MSRP: $1117.59You Save: $354.99 (32%)Ships in 1-3 Business Days
Toyota Tacoma Differential Carrier, Rear Part Number: 41110-35B40
$1263.45 MSRP: $1851.59You Save: $588.14 (32%)Ships in 1-3 Business DaysToyota Tacoma Differential Carrier, Rear Part Number: 41110-43030
$1296.73 MSRP: $1900.37You Save: $603.64 (32%)Ships in 1-3 Business Days
Toyota Tacoma Differential Carrier, Rear Part Number: 41110-04130
$1315.68 MSRP: $1928.14You Save: $612.46 (32%)Toyota Tacoma Differential Carrier, Rear Part Number: 41110-35A31
$1381.40 MSRP: $2024.45You Save: $643.05 (32%)Ships in 1-3 Business DaysToyota Tacoma Differential Carrier, Rear Part Number: 41110-35A51
$1462.32 MSRP: $2143.05You Save: $680.73 (32%)Ships in 1-3 Business DaysToyota Tacoma Differential Carrier, Rear Part Number: 41110-0K580
$1454.60 MSRP: $2131.74You Save: $677.14 (32%)Ships in 1-3 Business Days
Toyota Tacoma Differential Carrier, Front Part Number: 41110-35820
$1492.17 MSRP: $2186.80You Save: $694.63 (32%)Ships in 1-3 Business Days
Toyota Tacoma Carrier Assembly, Differential, Rear Part Number: 41110-04160
$1539.87 MSRP: $2256.69You Save: $716.82 (32%)Ships in 1-2 Business DaysToyota Tacoma Carrier Assembly, Differential, Rear Part Number: 41110-04150
$1539.96 MSRP: $2256.82You Save: $716.86 (32%)Ships in 1-2 Business DaysToyota Tacoma Differential Carrier, Rear Part Number: 41110-0K600
$1545.40 MSRP: $2264.81You Save: $719.41 (32%)Ships in 1-3 Business DaysToyota Tacoma Differential Carrier, Rear Part Number: 41110-35741
$1803.50 MSRP: $2643.06You Save: $839.56 (32%)Ships in 1-2 Business Days
Toyota Tacoma Differential Carrier, Front Part Number: 41110-35A11
$1900.21 MSRP: $2784.77You Save: $884.56 (32%)Ships in 1-3 Business Days
| Page 1 of 4 |Next >
1-20 of 65 Results
Toyota Tacoma Differential
Choose genuine Differential that pass strict quality control tests. You can trust the top quality and lasting durability. Shopping for OEM Differential for your Toyota Tacoma? Our website is your one-stop destination. We stock an extensive selection of genuine Toyota Tacoma parts. The price is affordable so you can save more. It only takes minutes to browse and find the exact fit. Easily add to cart and check out fast. Our hassle-free return policy will keep you stress-free. We process orders quickly for swift delivery. Your parts will arrive faster, so you can get back on the road sooner.
Toyota Tacoma Differential Parts and Q&A
- Q: How to remove and replace the rear differential carrier assembly (without differential lock) on Toyota Tacoma?A:Before starting the process of differential carrier assembly removal and replacement without differential lock technicians should isolate the negative battery terminal and remove the rear wheel and drain brake fluid. You must first detach the rear brake drum sub-assembly before proceeding to take off the front and rear brake shoes. The repair process starts with the removal of propeller shaft assembly for 2WD driver type regular cab units while 2WD drive type except regular cab requires the removal of the propeller with center bearing shaft assembly and 4WD drive type regular cab needs the same propeller shaft assembly removed as 2WD followed by the removal of propeller with center bearing shaft assembly for 4WD drive type except regular cab. After draining differential oil users must separate the rear Speed Sensors from both sides by using the same steps employed for the right side application as for the left. After separating the No.3 parking brake cable assembly as for the No.2 cable proceed with the same method. Procede with the removal of the backed-up Axle Shaft from both sides by implementing the same technique used for the right side that was employed for the left. Use caution when removing the ten nuts from the differential carrier assembly because doing so may damage its removal surface. After taking off the assembly you should remove the rear differential carrier gasket from the differential carrier assembly.
- Q: How to install the rear differential carrier assembly without a differential lock on Toyota Tacoma?A:The first step to install the rear differential carrier assembly without differential lock requires a two-part process. Clean the differential carrier assembly and axle housing contact surfaces before applying liquid gasket on both sides but excluding the stud bolt. You should position 10 new nuts and washers on the differential carrier assembly and torques them to 45 Nm (459 kgf-cm, 33 ft-lbf). The installation of rear Axle Shafts with backing plates should be carried out on both left and right sides adopting a standardized procedure. Execute installation of the No.3 and No.2 parking brake cable assemblies on both sides using the same method. The rear Speed Sensor installation process should be done once for both the left and right sides. The propeller shaft assembly needs installation according to drive type and cab configuration through the correct procedures that differ for 2WD and 4WD systems or Regular Cab and Access/Dual Cab setups. Move on to the installation of brake shoes on both the rear and front while inspecting the brake drum installation for the rear braking system before installing the rear brake drum sub-assembly. The service process includes two steps which are adjusting the rear drum brake shoe clearance followed by filling reservoirs with brake fluids for multiple boosters before performing master cylinder and brake line bleeding operations for all Brake Boosters. The examination of the reservoir fluid content along with brake fluid leak detection is essential. Differential oil maintenance requires inspection and search for leakage during the process. The final step includes installing the rear wheel with a torque setting of 113 Nm (1,152 kgf-cm, 83 ft-lbf) and performing proper checks on the parking brake system followed by connecting the cable to the negative battery terminal using 3.9 Nm (40 kgf-cm, 35 in-lbf) of torque. The VSC sensor signal needs verification for both components.


Related Toyota Tacoma Parts
 Toyota Tacoma Drive Shaft
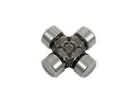 Toyota Tacoma Universal Joint
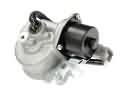 Toyota Tacoma 4WD Actuator
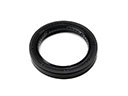 Toyota Tacoma Output Shaft Seal
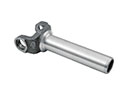 Toyota Tacoma Slip Yoke
 Toyota Tacoma CV Joint Companion Flange
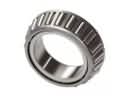 Toyota Tacoma Differential Bearing
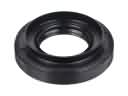 Toyota Tacoma Differential Seal
 Toyota Tacoma Pinion Bearing
 Toyota Tacoma Transfer Case Bearing
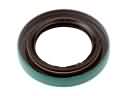 Toyota Tacoma Transfer Case Seal
Browse Toyota Tacoma Differential by Years
2025
2024
2023
2022
2021
2020
2019
2018
2017
2016
2015
2014
2013
2012
2011
2010
2009
2008
2007
2006
2005
2004
2003
2002
2001
2000
1999
1998
1997
1996
1995