×
ToyotaParts- Hello
- Login or Register
- Quick Links
- Live Chat
- Track Order
- Parts Availability
- RMA
- Help Center
- Contact Us
- Shop for
- Toyota Parts
- Scion Parts
My Garage
My Account
Cart
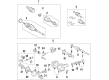
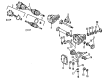
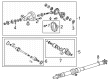
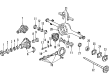
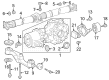
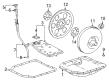
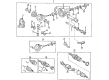
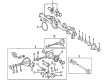
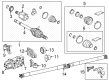
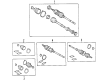
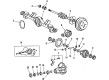
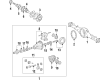
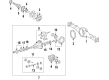
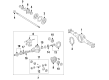
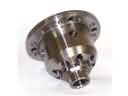
OEM Toyota Differential Seal
- Select Vehicle by Model
- Select Vehicle by VIN
Select Vehicle by Model
orMake
Model
Year
Select Vehicle by VIN
For the most accurate results, select vehicle by your VIN (Vehicle Identification Number).
35 Differential Seals found


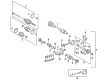
Toyota Pinion Seal Part Number: 90311-44005
$18.75 MSRP: $26.10You Save: $7.35 (29%)Ships in 1-2 Business DaysProduct Specifications- Other Name: Seal, Type T Oil; Differential Pinion Seal; Differential Seal; Axle Seal; Seal, Oil (For Rear Differential Carrier)


Toyota Pinion Seal, Front Part Number: 90311-46006
$37.87 MSRP: $52.71You Save: $14.84 (29%)Ships in 1-2 Business DaysProduct Specifications- Other Name: Seal, Type T Oil; Differential Pinion Seal, Front; Axle Seal; Differential Carrier Rear Seal; Seal, Oil (For Front Differential Carrier); Differential Pinion Seal
- Position: Front


Toyota Seal, Oil (For Rear Differential Carrier) Part Number: 90311-38068
$11.82 MSRP: $16.45You Save: $4.63 (29%)Ships in 1-3 Business DaysProduct Specifications- Other Name: Seal, Type T Oil; Differential Pinion Seal; Differential Seal; Axle Seal
- Position: Rear
- Replaces: 90311-38019, 90311-38027, 90311-38052, 90311-38048


Toyota Pinion Seal, Front Part Number: 90311-38070
$12.30 MSRP: $17.12You Save: $4.82 (29%)Ships in 1-3 Business DaysProduct Specifications- Other Name: Seal, Type T Oil; Differential Pinion Seal, Front; Differential Seal; Axle Seal; Front Seal; Seal, Oil (For Rear Differential Carrier)
- Position: Front

Toyota Pinion Seal Part Number: 90311-38047
$9.07 MSRP: $12.62You Save: $3.55 (29%)Ships in 1-3 Business DaysProduct Specifications- Other Name: Seal, Type T Oil; Differential Seal; Axle Seal; Seal, Oil (For Front Differential Carrier); Seal, Oil (For Rear Differential Carrier)
- Replaces: 90311-38133, 90311-38035, 90311-38134, 90311-38028


Toyota Pinion Seal Part Number: 90310-54003
$13.49 MSRP: $18.78You Save: $5.29 (29%)Ships in 1-2 Business DaysProduct Specifications- Other Name: Seal, Type S Oil; Differential Pinion Seal; Differential Seal; Axle Seal; Differential Front Seal; Seal, Oil Diaphragm


Toyota Rear Seal Part Number: 90311-35019
$15.52 MSRP: $21.61You Save: $6.09 (29%)Ships in 1-3 Business DaysProduct Specifications- Other Name: Seal, Type T Oil; Multi-Purpose Seal; Oil Seal; Seal, Oil for Rear Differential, Transaxle Housing, and Front Drive Shafts (Passenger/Driver Side)
- Replaces: 90311-35014, 90311-35015, 90311-35010, 90311-35011, 90311-35026


Toyota Pinion Seal, Rear Part Number: 41214-20020
$15.52 MSRP: $21.61You Save: $6.09 (29%)Ships in 1-3 Business DaysProduct Specifications- Other Name: Slinger, Drive Pinion; Differential Drive Pinion Oil Deflector, Rear; Differential Seal; Axle Seal; Oil Slinger; Slinger; Slinger, Front Differential Drive Pinion Oil; Slinger, Rear Differential Drive Pinion Oil
- Position: Rear
- Replaces: 41214-20010


Toyota Pinion Seal Part Number: 90311-41015
$18.51 MSRP: $25.77You Save: $7.26 (29%)Ships in 1-3 Business DaysProduct Specifications- Other Name: Seal, Type T Oil; Axle Seal; Seal, Type T Oil (For Front Axle Differential Carrier); Seal, Oil (For Front Differential Carrier)
- Manufacturer Note: LIMITED PACKAGE


Toyota Seal, Oil (For Front Differential Carrier) Part Number: 90311-46007
$22.57 MSRP: $31.42You Save: $8.85 (29%)Ships in 1-2 Business DaysProduct Specifications- Other Name: Seal, Type T Oil; Axle Seal
- Position: Front


Toyota Pinion Seal Part Number: 90311-38010
$23.41 MSRP: $32.59You Save: $9.18 (29%)Ships in 1-3 Business DaysProduct Specifications- Other Name: Seal, Type T Oil; Multi-Purpose Seal; Differential Seal; Axle Seal; Oil Seal; Seal, Oil (For Rear Differential Carrier)
- Replaces: 90311-38079


Toyota Pinion Seal Part Number: 90311-41009
$18.63 MSRP: $25.93You Save: $7.30 (29%)Ships in 1-2 Business DaysProduct Specifications- Other Name: Seal, Type T Oil; Differential Pinion Seal; Differential Seal; Axle Seal; Seal, Type T Oil for Front Axle Differential Carrier; also for Front/Rear Differential Carrier.


Toyota Pinion Seal Part Number: 90311-45028
$20.42 MSRP: $28.43You Save: $8.01 (29%)Ships in 1 Business DayProduct Specifications- Other Name: Seal, Type T Oil; Differential Pinion Seal; Differential Seal; Axle Seal; Seal, Oil (For Rear Differential Carrier)


Toyota Seal, Oil Diaphragm Part Number: 90311-54006
$16.36 MSRP: $22.77You Save: $6.41 (29%)Ships in 1-3 Business DaysProduct Specifications- Other Name: Seal, Type T Oil; Oil Seal Set


Toyota Seal, Driver Side Part Number: 90311-50029
$25.80 MSRP: $35.91You Save: $10.11 (29%)Ships in 1-3 Business DaysProduct Specifications- Other Name: Seal, Type T Oil; Multi-Purpose Seal; Axle Seal; Oil Seal; Seal, Oil(For Differential Side Bearing Retainer); Oil Seal, Front Drive Shaft, Driver Side
- Position: Driver Side
- Replaces: 90311-50011


Toyota Seal, Oil (For Front Differential Carrier) Part Number: 90311-38066
$13.01 MSRP: $18.11You Save: $5.10 (29%)Ships in 1-3 Business DaysProduct Specifications- Other Name: Seal, Type T Oil; Seal, Oil (For Rear Differential Carrier); Differential Pinion Seal; Differential Seal; Axle Seal
- Replaces: 90311-38049


Toyota Pinion Seal Part Number: 90311-38015
$11.82 MSRP: $16.45You Save: $4.63 (29%)Ships in 1-3 Business DaysProduct Specifications- Other Name: Seal, Type T Oil; Differential Pinion Seal; Outer Seal; Seal; Seal, Oil (For Rear Differential Carrier)
- Manufacturer Note: NOK
- Replaces: 90311-38014, 90311-38057, 90311-38124


Toyota Pinion Seal Part Number: 90311-T0065
$17.55 MSRP: $24.43You Save: $6.88 (29%)Ships in 1-3 Business DaysProduct Specifications- Other Name: Seal, Type T Oil; Differential Seal; Axle Seal; Seal, Oil (For Rear Differential Carrier)

Toyota Pinion Seal, Rear Part Number: 90311-A0007
$19.23 MSRP: $26.76You Save: $7.53 (29%)Ships in 1 Business DayProduct Specifications- Other Name: Seal, Type T Oil; Differential Pinion Seal, Rear; Differential Seal; Axle Seal; Seal, Oil (For Rear Differential Carrier); Differential Pinion Seal
- Position: Rear

Toyota Pinion Seal Part Number: 90311-44008
$20.54 MSRP: $28.59You Save: $8.05 (29%)Ships in 1-3 Business DaysProduct Specifications- Other Name: Seal, Type T Oil; Differential Seal; Axle Seal; Seal, Oil (For Rear Differential Carrier)
| Page 1 of 2 |Next >
1-20 of 35 Results
Toyota Differential Seal
OEM parts deliver unmatched quality you can rely on. They pass extensive quality control inspections. Toyota produces them to the official factory specifications. This process helps prevent defects and imperfections. So you can get exceptional lifespan and a flawless fit. Need new OEM Toyota Differential Seal? You'll love our wide selection of genuine options. Shop in minutes and skip the hunt. Our prices are unbeatable, you'll save time and money. It's easy to shop and find the right piece. Our committed customer service team gives professional help from start to finish. Every part includes a manufacturer's warranty. We ship quickly, your parts will arrive fast at your door.
Toyota Differential Seal prevents any leaks of gear oil and makes the drivetrain operate in a cool environment. Toyota began in 1937, but it never went out of the practice of ensuring waste reduction, refining assembly line, and allowing teams to solve issues immediately. Today, Toyota is selling hybrids, plug-in and efficient gasoline cars on the common TNGA platform that stiffens bodies, reduces weight and increases crash safety. The current Hybrid Synergy Drive update moves more electrons to the use of lighter motors and the RAV4 plug-in glides 42 miles before the engine is even engaged. Drivers have begun to have faith in Toyota since its vehicles shake off rust, cover immense mileages, and even on narrow lanes, it fits comfortably. Differential Seal protects the axle housing creating an airtight barrier that prevents dirt and contains important lubricant where the gears meet the load. Toyota uses high-quality synthetic rubber to install Differential Seal that is resistant to heat, corrosion and swelling experienced by cheap gaskets during thousands of miles on the highway. During the aging of Differential Seal, cracks open up to allow leakage into the bearings and the ring gears, hence early substitutes maintain low noise levels and constant traction. Using simple tools, drivers can install Differential Seal, a level flat toner, and top off gear oil and roll out without the concern that the drivetrain is not covered.
Toyota Differential Seal Parts and Q&A
- Q: How to replace the differential seal in a 1982 and later Toyota Supra?A:To replace the differential seal in a vehicle, start by raising the rear of the vehicle and supporting it on jackstands. Drain the differential lubricant and separate the Axle Shaft from the differential. Use a long punch and hammer to drive the differential flange gear out, catching it as it comes out. If needed, use a puller to remove the flange. Pry the seal out of the differential with a screwdriver. Install the new seal by using a large socket or pipe and a hammer, applying grease to the seal's lip. Finally, reverse the removal steps to complete the installation.

Related Toyota Parts
 Toyota Differential
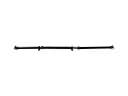 Toyota Drive Shaft
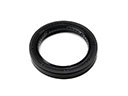 Toyota Output Shaft Seal
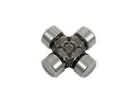 Toyota Universal Joint
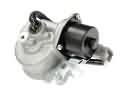 Toyota 4WD Actuator
 Toyota Pinion Bearing
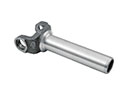 Toyota Slip Yoke
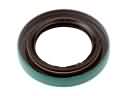 Toyota Transfer Case Seal
 Toyota CV Joint Companion Flange
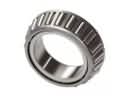 Toyota Differential Bearing
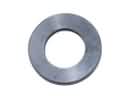 Toyota Pinion Washer
 Toyota Transfer Case Bearing