- Hello
- Login or Register
- Quick Links
- Live Chat
- Track Order
- Parts Availability
- RMA
- Help Center
- Contact Us
- Shop for
- Toyota Parts
- Scion Parts

Popular OEM Toyota Camry Parts
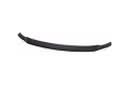
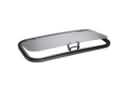
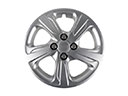
- Body & Hardware Parts View More >
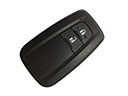
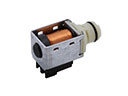
- Electrical Parts View More >
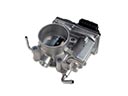
- Engine Parts View More >
- Air & Fuel Delivery Parts View More >
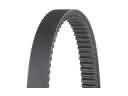
- Belts & Cooling Parts View More >
- Steering Parts View More >
- Suspension Parts View More >
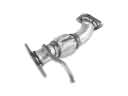
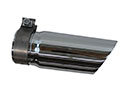
- Emission Control & Exhaust Parts View More >
- A/C & Heating Parts View More >
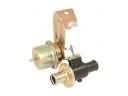
- Charging & Starting Parts View More >
- Brakes Parts View More >
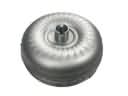
- Transmission Parts View More >


Why Buy Genuine Toyota Camry Parts From ToyotaPartsNow.com
ToyotaPartsNow.com highlights the reliability of OEM Toyota Camry parts right at your fingertips. Our skilled staff assists customers in selecting the right Toyota Camry parts and provides expert help with any unique part requests. At ToyotaPartsNow.com, we make all Toyota Camry parts available to you quickly and efficiently through our fast order and reliable ship process. Our service is designed to make finding the correct Toyota Camry parts fast and easy whether you are an amateur or a professional. We offer access to a broad inventory that includes a wide range of Toyota years and variants. Affordable prices, quick processing and professional service are also our specialty to ensure your car remains in top condition with OEM Toyota Camry parts, including Headlights & Lighting. You can feel confident shopping with us because all Toyota Camry parts, such as Driveline & Axles you purchase from our store are of genuine quality and built to last.
Since 1982 Toyota has manufactured the Toyota Camry as its primary vehicle model which has seen significant advancements in engine and transmission technology over time. Toyota's first Camry models used inline gasoline engines such as the 1.8-liter 3T-U and the 2.0-liter 2S-U which provided an effective balance between power output and fuel consumption. During the production period from 1991 until 1996 and further from 1997 until 2001 the XV10 Camry and its successor XV20 gained size dimensions that enhanced both interior space and driving dynamics which enhanced handling capabilities and ride quality. The Japanese model Gracia introduced better engines to XV20 as a part of its updated transmission systems for enhanced overall driving satisfaction. Braking operation on the vehicles depended on front ventilated discs along with rear drums until disc brakes were introduced to enhance stopping ability. All components in the Toyota Camry design process come from company-approved sources to achieve maximum performance and durability. This high-quality component selection achieves results through a load-sensitive proportional valve system which shows Toyota's engineering dominance. Innovation at Toyota drives continuous evolution of the Toyota Camry as Toyota maintains its dedication to sector-wide reliable automotive performance norms.
Toyota Camry may encounter various problems regarding both the engine and transmission systems. One of the most common issues is the Check Engine Light when the Toyota Camry oxygen sensor is faulty. This fault causes poor performance as the engine fails to monitor proper air fuel ratio. The common way of dealing with this problem is the replacement of the oxygen sensor in the Toyota Camry. The next issue is the stalling of acceleration on Toyota Camry with automatic transmissions. When it starts to malfunction, a newer car may benefit from a software update to the Toyota Camry transmission control module (TCM). The automatic transmission may also fail to shift as a result of higher mileage. This error can be caused by an out-of-adjustment throttle position sensor or by a faulty shift solenoid. In most cases, there is no need to conduct a complete overhaul of the transmission in such problems. It can be simply the replacement of the respective parts involved, such as the throttle position sensor or shift solenoid. The mentioned issues demonstrate the significance of the regular maintenance that will guarantee efficient and stable operation of the Toyota Camry.
Toyota Camry Parts and Q&A
- Q: How to replace the radiator assembly on Toyota Camry?A:In order to change the radiator assembly, empty the engine coolant, disconnect the different hoses and remove the air cleaner inlet assembly and the upper radiator support. Next, remove the radiator unit and fan. To install, re-assemble fan and radiator, reconnect connecters and re-install parts, and proper torque. Lastly, pour in coolant and inspect leaks.
- Q: How to install the alternator assembly on Toyota Camry?A:Installation of the generator assembly to the 2AZ-FE charging system The crankshaft position sensor wire harness should be clamped to the bracket. Bolt the generator assembly together, connect the generator wire to terminal B and attach the clamp bracket. Lastly, attach the V-ribbed belt and attach the negative battery terminal.
- Q: How to replace and maintain a Cabin Air Filter on Toyota Camry?A:In order to service the Plasmacluster, unscrew the battery, steering and instrument panels, and then two screws in order to change the unit. Install the panels and parts in reverse sequence, screw the parts to 5.4 N m, reconnect the battery, and test SRS and system functionality.


