×
ToyotaParts- Hello
- Login or Register
- Quick Links
- Live Chat
- Track Order
- Parts Availability
- RMA
- Help Center
- Contact Us
- Shop for
- Toyota Parts
- Scion Parts
My Garage
My Account
Cart
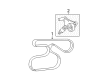
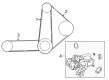
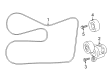
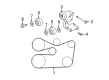
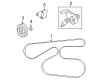
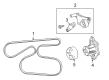
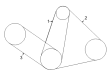
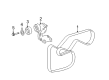
OEM Toyota Camry Drive Belt
Serpentine Belt- Select Vehicle by Model
- Select Vehicle by VIN
Select Vehicle by Model
orMake
Model
Year
Select Vehicle by VIN
For the most accurate results, select vehicle by your VIN (Vehicle Identification Number).
35 Drive Belts found


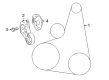
Toyota Camry Power Steering Belt Part Number: 90080-91212
$16.48 MSRP: $22.94You Save: $6.46 (29%)Ships in 1-2 Business Days

Toyota Camry Belt, V(For Fan & Alternator) Part Number: 90916-A2027
$29.15 MSRP: $40.57You Save: $11.42 (29%)Ships in 1 Business Day


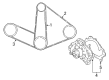
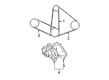
Toyota Camry Serpentine Belt Part Number: 90916-A2021
$25.56 MSRP: $35.58You Save: $10.02 (29%)Ships in 1-3 Business Days

Toyota Camry Belt, V (Cooler Compressor To Crankshaft Pulley) Part Number: 99366-31040
$27.59 MSRP: $38.41You Save: $10.82 (29%)Ships in 1-2 Business Days


Toyota Camry Serpentine Belt Part Number: 90916-02652
$39.90 MSRP: $55.53You Save: $15.63 (29%)Ships in 1-3 Business Days


Toyota Camry Power Steering Belt Part Number: 99363-30750
$10.27 MSRP: $14.29You Save: $4.02 (29%)Ships in 1-2 Business Days


Toyota Camry Serpentine Belt Part Number: 90916-A2005
$37.39 MSRP: $52.04You Save: $14.65 (29%)Ships in 1-3 Business Days

Toyota Camry Belt, V(For Fan & Alternator) Part Number: 90916-A2026
$42.05 MSRP: $58.53You Save: $16.48 (29%)Ships in 1-3 Business Days

Toyota Camry Belt, V(For Fan & Alternator) Part Number: 90916-A2019
$48.62 MSRP: $67.68You Save: $19.06 (29%)Ships in 1-3 Business Days

Toyota Camry Serpentine Belt Part Number: 90916-A2011
$40.98 MSRP: $57.04You Save: $16.06 (29%)Ships in 1-3 Business Days

Toyota Camry Belt, V (Cooler Compressor To Crankshaft Pulley) Part Number: 90916-02401
$24.96 MSRP: $34.75You Save: $9.79 (29%)Ships in 1-3 Business Days


Toyota Camry Alternator Belt Part Number: 90916-02356-83
$17.79 MSRP: $24.77You Save: $6.98 (29%)Ships in 1-3 Business Days

Toyota Camry Serpentine Belt Part Number: 90916-A2012
$53.29 MSRP: $74.17You Save: $20.88 (29%)Ships in 1-3 Business Days


Toyota Camry Power Steering Belt Part Number: 99363-90760-83
$8.83 MSRP: $12.29You Save: $3.46 (29%)Ships in 1-3 Business Days

Toyota Camry Alternator Belt Part Number: 99366-20950-83
$17.79 MSRP: $24.77You Save: $6.98 (29%)Ships in 1-3 Business Days

Toyota Camry Serpentine Belt Part Number: 99364-C1050
$18.63 MSRP: $25.93You Save: $7.30 (29%)Ships in 1-3 Business Days


Toyota Camry Serpentine Belt Part Number: 90916-A2022
$24.49 MSRP: $34.08You Save: $9.59 (29%)Ships in 1-3 Business Days


Toyota Camry Serpentine Belt Part Number: 90916-02671
$37.75 MSRP: $52.55You Save: $14.80 (29%)Ships in 1-3 Business Days

Toyota Camry Serpentine Belt Part Number: 90916-A2010
$43.01 MSRP: $59.86You Save: $16.85 (29%)Ships in 1-3 Business Days


Toyota Camry Power Steering Belt Part Number: 99363-70760-83
$9.91 MSRP: $13.79You Save: $3.88 (29%)Ships in 1-2 Business Days
| Page 1 of 2 |Next >
1-20 of 35 Results
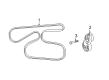
Toyota Camry Drive Belt
Choose genuine Drive Belt that pass strict quality control tests. You can trust the top quality and lasting durability. Shopping for OEM Drive Belt for your Toyota Camry? Our website is your one-stop destination. We stock an extensive selection of genuine Toyota Camry parts. The price is affordable so you can save more. It only takes minutes to browse and find the exact fit. Easily add to cart and check out fast. Our hassle-free return policy will keep you stress-free. We process orders quickly for swift delivery. Your parts will arrive faster, so you can get back on the road sooner.
Toyota Camry Drive Belt Parts and Q&A
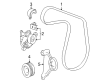
- Q: How to install the Drive Belt on Toyota Camry?A:Before installing the V-ribbed belt onto the 2AZ-FXE engine users should start by turning the V-ribbed belt tensioner arm counterclockwise. The V-ribbed belt should first be positioned onto all pulleys except the tensioner pulley when facing difficulty with installation. Following the releasing of the tension through counterclockwise tensioner rotation you must place the belt onto the tensioner pulley. The belt installation process requires tools to maintain alignment during use then requires slow clockwise rotation of the tensioner without excessive force until the belt sits correctly within the grooves. Additional checks for belt slip-off should be conducted at the crank pulley base by hand. Apply two bolts to the V-ribbed belt tensioner cover before torquing them to 9.0 Nm (92 kgf-cm, 80 in-lbf). Install the front fender apron seal on the right side followed by engine under cover on the right side before torquing the front wheel left side to 103 Nm (1,050 kgf-cm, 76 ft-lbf).
- Q: How to remove the drive belt on Toyota Camry?A:The process of drive belt removal from the 2AZ-FXE engine requires users to begin by taking off the front wheel from the right-hand side followed by engine under cover on that side and finally removing the front fender apron seal on the same side. You should now disconnect the V-ribbed belt tensioner cover sub-assembly through the removal of its 2 retaining bolts. First loosen the V-ribbed belt tensioner through counterclockwise rotation then you can remove the V-ribbed belt. Users should proceed with tool alignment during operation and should turn the tensioner clockwise while pulling it back gradually without abrupt movements. When the tensioner reaches its fully retracted position protect it from additional force.


Related Toyota Camry Parts
 Toyota Camry Water Pump
 Toyota Camry Thermostat
 Toyota Camry Radiator Cap
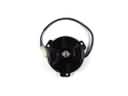 Toyota Camry Fan Motor
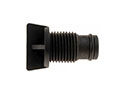 Toyota Camry Radiator Drain Plug
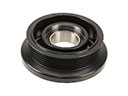 Toyota Camry A/C Idler Pulley
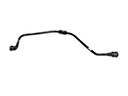 Toyota Camry Coolant Reservoir Hose
 Toyota Camry Fan Shroud
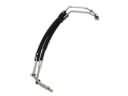 Toyota Camry Oil Cooler Hose
 Toyota Camry Water Hose
 Toyota Camry Water Pump Gasket
 Toyota Camry Water Pump Pulley