- Hello
- Login or Register
- Quick Links
- Live Chat
- Track Order
- Parts Availability
- RMA
- Help Center
- Contact Us
- Shop for
- Toyota Parts
- Scion Parts
Popular OEM Toyota Highlander Parts
- Body & Hardware Parts View More >
- Electrical Parts View More >
- Engine Parts View More >
- Air & Fuel Delivery Parts View More >
- Belts & Cooling Parts View More >
- Steering Parts View More >
- Suspension Parts View More >
- Emission Control & Exhaust Parts View More >
- A/C & Heating Parts View More >
- Charging & Starting Parts View More >
- Brakes Parts View More >
- Transmission Parts View More >
Why Buy Genuine Toyota Highlander Parts From ToyotaPartsNow.com
ToyotaPartsNow.com highlights the reliability of OEM Toyota Highlander parts right at your fingertips. Our skilled staff assists customers in selecting the right Toyota Highlander parts and provides expert help with any unique part requests. At ToyotaPartsNow.com, we make all Toyota Highlander parts available to you quickly and efficiently through our fast order and reliable ship process. Our service is designed to make finding the correct Toyota Highlander parts fast and easy whether you are an amateur or a professional. We offer access to a broad inventory that includes a wide range of Toyota years and variants. Affordable prices, quick processing and professional service are also our specialty to ensure your car remains in top condition with OEM Toyota Highlander parts. You can feel confident shopping with us because all Toyota Highlander parts you purchase from our store are of genuine quality and built to last.
The Toyota Highlander made its first appearance at the New York International Auto Show in April 2000 as a mid-size SUV that developers have substantially improved since its inception. Toyota launched the Highlander for market release in North America and Japan during early 2001 by developing this SUV to excel in comfort-based road driving instead of the sporty 4Runner model. This SUV incorporates a 3.5-liter V6 2GR-FE engine which combines power and fuel efficiency and functions with a five-speed automatic transmission that enables precise gear transitions during driving. The Toyota Highlander Hybrid introduced as a new variant introduced electric motors to enhance overall acceleration especially on high-speed roads. The vehicle achieves smooth ride quality through its independent rear suspension system and the Electronic Power Steering (EPS) features added to vehicles in 2010 improves handling dynamics. The Toyota Highlander delivers multi-purpose seating arrangements that include seating for seven passengers and added third-row seating available since its introduction in 2003. The exact manufacturing requirements of Toyota are fulfilled by authentic Highlander parts to achieve the manufacturer's durability goals for precise fitment needs that maintain the vehicle's performance levels. ToyotaPartsNow.com provides a complete range of manufacturer-certified Toyota Highlander OEM parts that come with warranty protection as well as dedicated well-maintained product standards.
The Toyota Highlander may have a number of problems with its engine and electrical systems. The first issue is a serious oil leak caused by a burst part: the Toyota Highlander VVT-i oil line. This leak can lead to the loss of oil pressure, and thus display dashboard warning lights come on. Replace the faulty oil line and clean up the engine bay to solve this. The other problem is the electrical system, specifically a faulty center airbag sensor. A fault in this sensor can also result in the airbag lamp going on, which indicates a potential safety issue. You will need to replace the Toyota Highlander center airbag sensor to ensure normal function. Finally, the Toyota Highlander can also have a Check Engine Light because of a disconnected hose at the air filter housing. This problem will affect the emission control system and can be easily rectified by reconnecting the hose. All these issues stress the necessity of routine maintenance and timely repairs to make the Toyota Highlander function well and with no risk of accidents. Further, more significant issues can be prevented through routine inspections of the components like Toyota Highlander VVT-i oil line and air filter housing hose.
Toyota Highlander Parts and Q&A
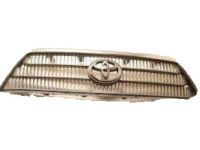
- Q: How to install the radiator grille and its components on Toyota Highlander?A:To install the radiator grille, engage the claws to install the lower, center, and upper radiator grille mouldings on both sides. Then, install the inside radiator grille, followed by the radiator grille emblem. Complete the installation by securing the radiator grille and installing the cool air intake duct seal.
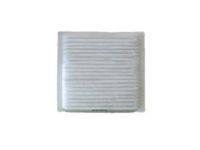
- Q: How to replace the Cabin Air Filter on Toyota Highlander?A:To replace the air refiner element, open the glove compartment, remove the cooler cover No.1, and take out the air filter sub-assembly. Remove the old air refiner element, install the new one, then reinstall the air filter sub-assembly and secure the cooler cover No.1.
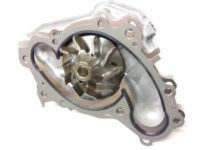
- Q: How to remove the water pump on Toyota Highlander?A:In order to replace the water pump, take off the negative battery terminal and observe possible initializing requirements. Take off the engine under cover and empty the coolant. Next remove the V-ribbed belt, generator assembly and tensioner assembly. Lastly, take out the water pump assembly with the use of the bolts and gasket.


