- Hello
- Login or Register
- Quick Links
- Live Chat
- Track Order
- Parts Availability
- RMA
- Help Center
- Contact Us
- Shop for
- Toyota Parts
- Scion Parts

Popular OEM Toyota Solara Parts
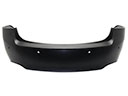
- Body & Hardware Parts View More >
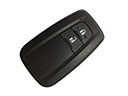
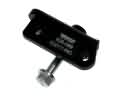
- Electrical Parts View More >
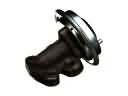
- Engine Parts View More >
- Air & Fuel Delivery Parts View More >
- Belts & Cooling Parts View More >
- Steering Parts View More >
- Suspension Parts View More >
- Emission Control & Exhaust Parts View More >
- A/C & Heating Parts View More >
- Charging & Starting Parts View More >
- Brakes Parts View More >
- Transmission Parts View More >


Why Buy Genuine Toyota Solara Parts From ToyotaPartsNow.com
ToyotaPartsNow.com highlights the reliability of OEM Toyota Solara parts right at your fingertips. Our skilled staff assists customers in selecting the right Toyota Solara parts and provides expert help with any unique part requests. At ToyotaPartsNow.com, we make all Toyota Solara parts available to you quickly and efficiently through our fast order and reliable ship process. Our service is designed to make finding the correct Toyota Solara parts fast and easy whether you are an amateur or a professional. We offer access to a broad inventory that includes a wide range of Toyota years and variants. Affordable prices, quick processing and professional service are also our specialty to ensure your car remains in top condition with OEM Toyota Solara parts. You can feel confident shopping with us because all Toyota Solara parts, such as Headlights & Lighting you purchase from our store are of genuine quality and built to last.
Toyota unveiled its midsize convertible coupe Solara during 1998 which replaced the Camry Coupe and delivered sportier styling together with better driving performance. The 1998 first-generation Solara featured a 2.2-liter 5S-FE four-cylinder engine with 135 hp output and 147 lb-ft of torque at 4,400 rpm which received power from a four-speed automatic transmission for seamless gear changes. A refreshed design of the Toyota Solara arrived in 2001 with VVT technology in the powertrain which delivered better performance at lower fuel consumption levels. The second generation Toyota Solara gained popularity with its rounded design in 2003 when shoppers could opt for a 3.3-liter V6 engine that produced 225 horsepower at 5,600 revolutions per minute. During this generation Toyota made a transmission upgrade from four-speed to five-speed MMT automatic for four-cylinder models that boosted speed and quickness. The suspension system of the Toyota Solara received specialized tuning for improved performance and added to its recognized reliability and comfort features. The interior section came with leather seating options and top-quality audio systems to satisfy regular commuters as well as automobile performance enthusiasts. Genuine Toyota Solara components match the manufacturer standards since they fulfill official performance and reliability parameters. The parts pass demanding quality tests which confirm their long-lasting features while ensuring that they fit properly on the Toyota Solara. This quality focus makes these parts the top choice for Solara maintenance.
There are many engine and ignition system-related problems with the Toyota Solara. A failed Toyota Solara oxygen sensor part will cause the Check Engine Light to come on. When this happens, the engine computer cannot accurately calculate the air-fuel ratio which results in the engine entering limp mode. The typical solution for this issue is to replace the Toyota Solara oxygen sensor. Ignition coils in a Toyota Solara often start to fail after the first 100,000 miles, leading to engine misfires and triggering the Check Engine Light. Professionals tend to suggest that when one ignition coil goes bad, you should replace the others to avoid repeated service. Another important concern is that of a poorly running engine, which can be caused by a Toyota Solara head gasket failure. In fact, it's a problem that may also result from cylinder block warping or cracking, leading to overheating and burning coolant, often seen as white smoke from the exhaust. Typical warning signs include rough idle and a milky film on the oil dipstick. The fix is to resurface the cylinder head and re-tap or repair the bolt holes before reinstalling the head. Prompt repair of these problems will restore the Toyota Solara's performance and reliability. The car needs regular maintenance and timely component replacement to keep it in prime working order.
Toyota Solara Parts and Q&A
- Q: How to replace the Cabin Air Filter on Toyota Solara?A:Changing an air conditioning filter begins with removing the glove compartment assembly. Next, loosen the 2 corresponding claws and take out the air filter sub-assembly. Install a new filter and lastly, reassemble it by following the process of taking apart in reverse.
- Q: How to remove and install the alternator on Toyota Solara?A:In order to dismantle the alternator, one must disconnect the negative battery terminal, front wheel, fender apron seal and engine cover. Then disassemble the engine control rod, engine control mounts and fan belt. Unplug the generator, then replace parts backwards, with correct torque specs. Re-attach battery and initialize.
- Q: How to remove and install the radiator on Toyota Solara?A:In order to change and install radiator, drain engine coolant, disconnect hose and air cleaner inlet assembly. Eliminate the radiator assembly, fan assembly. To disassemble, it is necessary to use a special device to open the caulking and remove the radiator tanks. Clean up, replace new O-rings and secure parts. Lastly, reassemble and look after leaks.


