×
ToyotaParts- Hello
- Login or Register
- Quick Links
- Live Chat
- Track Order
- Parts Availability
- RMA
- Help Center
- Contact Us
- Shop for
- Toyota Parts
- Scion Parts
My Garage
My Account
Cart
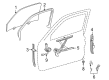
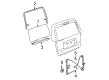
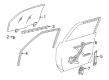
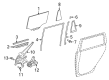
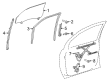
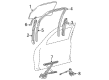
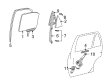
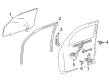
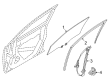
OEM Toyota Window Motor
Window Lift Motor- Select Vehicle by Model
- Select Vehicle by VIN
Select Vehicle by Model
orMake
Model
Year
Select Vehicle by VIN
For the most accurate results, select vehicle by your VIN (Vehicle Identification Number).
338 Window Motors found


Toyota Motor, Driver Side Part Number: 85720-35040
$316.64 MSRP: $452.09You Save: $135.45 (30%)Ships in 1-2 Business DaysProduct Specifications- Other Name: Motor Assembly, Power Window Regulator; Power Window Motor, Front Left; Door Lock Actuator Motor; Motor Assembly, Power Window Regulator, Driver Side; Window Motor
- Position: Driver Side


Toyota Window Motor, Driver Side Part Number: 85720-35150
$404.96 MSRP: $593.47You Save: $188.51 (32%)Ships in 1-2 Business DaysProduct Specifications- Other Name: Motor Assembly, Power Window Regulator; Motor; Motor Assembly, Power Window Regulator, Driver Side
- Position: Driver Side


Toyota Window Motor, Front Driver Side Part Number: 85720-60130
$407.34 MSRP: $596.96You Save: $189.62 (32%)Ships in 1-3 Business DaysProduct Specifications- Other Name: Motor Assembly, Power Window Regulator; Power Window Motor, Front Left; Door Lock Actuator Motor; Motor Assembly, Power Window Regulator, Front Driver Side; Power Window Motor
- Position: Front Driver Side
- Replaces: 85720-60090


Toyota Window Motor Part Number: 85720-AE010
$316.64 MSRP: $452.09You Save: $135.45 (30%)Ships in 1-2 Business DaysProduct Specifications- Other Name: Motor Assembly, Power Window Regulator; Motor, Center Left, Front Left, Rear Left, Rear Right; Door Lock Actuator; Motor; Power Window Regulator Assembly for Front Driver, Passenger, and Driver Side.
- Replaces: 85720-35140


Toyota Window Motor, Driver Side Part Number: 85720-0E060
$338.07 MSRP: $482.69You Save: $144.62 (30%)Ships in 1-3 Business DaysProduct Specifications- Other Name: Motor Assembly, Power Window Regulator; Power Window Motor, Front Left; Motor Assembly, Power Window Regulator, Driver Side
- Position: Driver Side
- Replaces: 85720-0T030


Toyota Window Motor, Driver Side Part Number: 85720-34030
$407.34 MSRP: $596.96You Save: $189.62 (32%)Ships in 1-2 Business DaysProduct Specifications- Other Name: Motor Assembly, Power Window Regulator; Power Window Motor, Front Left; Motor Assembly, Power Window Regulator, Front Driver Side; Driver Side; Power Window Motor
- Position: Driver Side


Toyota Window Motor Part Number: 85710-33170
$426.29 MSRP: $624.74You Save: $198.45 (32%)Ships in 1-3 Business DaysProduct Specifications- Other Name: Motor Assembly, Power Window Regulator; Front Right, Rear Left; Door Lock Actuator Motor; Motor
- Replaces: 85710-33130


Toyota Motor Assembly, Power Window Regulator, Driver Side Part Number: 85720-72011
$438.78 MSRP: $643.04You Save: $204.26 (32%)Ships in 1-3 Business DaysProduct Specifications- Other Name: Door Lock Actuator Motor; Window Motor
- Position: Driver Side
- Replaced by: 85720-47110


Toyota Window Motor, Passenger Side Part Number: 85710-08041
$447.29 MSRP: $655.51You Save: $208.22 (32%)Ships in 1-2 Business DaysProduct Specifications- Other Name: Motor Assembly, Power Window Regulator; Power Window Motor, Rear Right; Motor; Motor Assembly, Power Window Regulator, Passenger Side
- Position: Passenger Side
- Replaces: 85710-08040


Toyota Window Motor Part Number: 85720-AA050
$316.64 MSRP: $452.09You Save: $135.45 (30%)Ships in 1-3 Business DaysProduct Specifications- Other Name: Motor Assembly, Power Window Regulator; Power Window Motor, Front Left, Rear Right; Door Lock Actuator Motor; Motor; Power Window Regulator Assemblies for Passenger and Driver Side.


Toyota Window Motor, Driver Side Part Number: 85720-AA020
$316.64 MSRP: $452.09You Save: $135.45 (30%)Ships in 1-3 Business DaysProduct Specifications- Other Name: Motor Assembly, Power Window Regulator; Power Window Motor, Front Left; Door Lock Actuator Motor; Motor; Motor Assembly, Power Window Regulator, Driver Side; Power Window Motor
- Position: Driver Side
- Replaces: 85720-33050


Toyota Window Motor, Rear Passenger Side Part Number: 85720-60110
$316.64 MSRP: $452.09You Save: $135.45 (30%)Ships in 1-3 Business DaysProduct Specifications- Other Name: Motor Assembly, Power Window Regulator; Power Window Motor, Rear Right; Motor; Motor Assembly, Power Window Regulator, Rear Passenger Side
- Position: Rear Passenger Side


Toyota Window Motor, Front Driver Side Part Number: 85720-0C010
$316.64 MSRP: $452.09You Save: $135.45 (30%)Product Specifications- Other Name: Motor Assembly, Power Window Regulator; Power Window Motor, Front Left; Motor Assembly, Power Window Regulator, Front Driver Side; Power Window Motor
- Position: Front Driver Side


Toyota Window Motor, Front Driver Side Part Number: 85720-02040
$316.64 MSRP: $452.09You Save: $135.45 (30%)Ships in 1-3 Business DaysProduct Specifications- Other Name: Motor Assembly, Power Window Regulator; Power Window Motor, Front Left; Door Lock Actuator Motor; Motor; Motor Assembly, Power Window Regulator, Front Driver Side; Power Window Motor
- Position: Front Driver Side
- Replaces: 85720-08010


Toyota Window Motor Part Number: 85710-42070
$316.64 MSRP: $452.09You Save: $135.45 (30%)Ships in 1-2 Business DaysProduct Specifications- Other Name: Motor Assembly, Power Window Regulator; Power Window Motor, Front Right, Rear Left, Rear Right; Door Lock Actuator Motor; Motor; Power Window Regulator Assemblies for Passenger and Driver Side.


Toyota Window Motor, Driver Side Part Number: 85710-0C020
$316.64 MSRP: $452.09You Save: $135.45 (30%)Ships in 1-2 Business DaysProduct Specifications- Other Name: Motor Assembly, Power Window Regulator; Power Window Motor, Rear Left; Element; Motor; Motor Assembly, Power Window Regulator, Driver Side
- Position: Driver Side

Toyota Window Motor, Front Passenger Side Part Number: 85710-0C010
$316.64 MSRP: $452.09You Save: $135.45 (30%)Ships in 1 Business DayProduct Specifications- Other Name: Motor Assembly, Power Window Regulator; Power Window Motor, Front Right; Motor Assembly, Power Window Regulator, Front Passenger Side; Power Window Motor
- Position: Front Passenger Side


Toyota Motor Assembly, Power Window Regulator, Driver Side Part Number: 85720-60290
$338.07 MSRP: $482.69You Save: $144.62 (30%)Ships in 1-3 Business DaysProduct Specifications- Other Name: Motor Assembly, Power Window Regulator; Door Lock Actuator Motor; Window Motor
- Position: Driver Side


Toyota Window Motor, Passenger Side Part Number: 85710-0C140
$338.07 MSRP: $482.69You Save: $144.62 (30%)Ships in 1-3 Business DaysProduct Specifications- Other Name: Motor Assembly, Power Window Regulator; Power Window Motor, Rear; Motor; Motor Assembly, Power Window Regulator, Passenger Side
- Position: Passenger Side


Toyota Window Motor, Driver Side Part Number: 85720-WB001
$43.35 MSRP: $60.35You Save: $17.00 (29%)Ships in 1-2 Business DaysProduct Specifications- Other Name: Motor Assembly, Power Window Regulator; Power Window Motor, Front Left; Motor Assembly, Power Window Regulator, Driver Side; Power Window Motor
- Position: Driver Side
| Page 1 of 17 |Next >
1-20 of 338 Results
Toyota Window Motor
OEM parts deliver unmatched quality you can rely on. They pass extensive quality control inspections. Toyota produces them to the official factory specifications. This process helps prevent defects and imperfections. So you can get exceptional lifespan and a flawless fit. Need new OEM Toyota Window Motor? You'll love our wide selection of genuine options. Shop in minutes and skip the hunt. Our prices are unbeatable, you'll save time and money. It's easy to shop and find the right piece. Our committed customer service team gives professional help from start to finish. Every part includes a manufacturer's warranty. We ship quickly, your parts will arrive fast at your door.
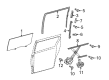
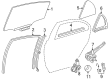
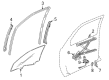
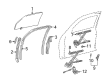
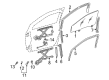
Toyota Window Motor activates your glass both up and down and presents you with air or cover at the press of a button. Toyota turned out to be a small 1937 workshop and emerged as a worldwide icon by reducing the time spent on the production line, letting problems surface early, and correcting them before any customer ever notices. Toyota continues to improve Hybrid Synergy Drive, which entails removing powerful and yet economical battery-assisted engines into compacts, sedans, and SUVs to ensure customers have a quicker pull and reduced trips to gas pumps. Toyota then installed the engines, suspension, and cabin hardpoints on the modular TNGA to reduce weight, lower the hoods, and reduce crash zones to ensure that all models steer with the same surefooted feel. Toyota customers in every corner of the world compliment that discipline and the resulting odometers go into the deep six figures with quiet cabins and service schedules not that heavy on wallets. The interior of the door contains Window Motor, which is the companion of the regulator, and is applied to convert electrical energy to smooth mechanical movement that opens or closes the pane. Window Motor is impervious to wet weather, heat, and shocks of rough roads, and thus the switch provides the same sharp response several years after. Keep windows sealed in pouring rain and drop them down in sunshine to cool the air in the cab, without the passenger having to do anything to make it more comfortable; this is Window Motor. The wiring harnesses applied in the lineup are compatible with Window Motor, eliminating the dilemma of splices and making every button press a satisfying experience.
Toyota Window Motor Parts and Q&A
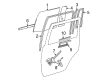
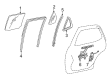
- Q: How to remove the Window Motor on Toyota Camry?A:The procedure begins by removing the front door lower frame bracket garnish before moving to the front door inside handle bezel plug and followed by assist grip cover and courtesy light assembly and finally front door trim board sub-assembly with front door inside handle sub-assembly. Start by removing the front door inner glass Weather Strip as well as the front No. 1 speaker assembly and front door service hole cover and front door glass sub-assembly. To proceed further disassemble the front door by removing its regulator sub-assembly followed by the power window motor. Start the rear door work by first taking out its inside handle bezel plug followed by assist grip cover and moving to rear door trim board sub-assembly then ending with rear door inside handle sub-assembly. Next you should eliminate the rear door inner glass Weather Strip and rear door service hole cover together with the rear door glass run and rear door lower window frame sub-assembly. Finish the installation by taking out the rear door quarter window glass followed by the rear door glass sub-assembly then the rear door window regulator sub-assembly and ending with the removal of the rear power window regulator motor assembly.
- Q: How to remove the Window Motor for the rear door on Toyota Tundra?A:The first step to remove the rear door power window regulator motor begins with disconnecting the negative battery cable but includes a 90-second wait period to deactivate Air Bags and seat belts pretensioners. Both Double Cab and CrewMax owners must begin repairs with the removal of rear inside handle bezel plug LH then moving to rear upper door armrest base panel LH and finally removing rear door frame garnish LH. Begin by taking out the courtesy light assembly together with the rear door trim board sub-assembly LH and the rear No. 2 door trim bracket. Then extract the LH-side rear door service hole cover and the rear door glass run LH and the rear door rear lower window frame sub-assembly LH. First disconnect the rear door glass sub-assembly LH before completing the removal of the rear door window regulator sub-assembly LH. Use a T25 "TORX" driver to carefully remove the three screws which secure the electrical power window regulator motor assembly LH and maintain motor safety from falling and quitting.


Related Toyota Parts
 Toyota Emblem
 Toyota Windshield Wiper
 Toyota Cigarette Lighter
 Toyota Door Lock Cylinder
 Toyota Fuel Door Hinge
 Toyota Lift Support
 Toyota Subwoofer
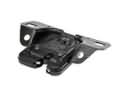 Toyota Trunk Latch
 Toyota Window Regulator
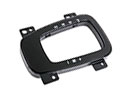 Toyota Shift Indicator
 Toyota Fuel Door Release Cable
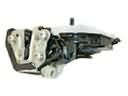 Toyota Rear Passenger Door Handle Latch
Browse Toyota Window Motor by Models
Tacoma 4Runner Camry Tundra Corolla RAV4 Highlander Prius Sienna Land Cruiser Pickup FJ Cruiser 86 Sequoia T100 Avalon Celica Supra Yaris Matrix MR2 Solara Venza GR86 Echo C-HR Cressida Grand Highlander Paseo Previa Prius C Prius Prime bZ4X Corolla Cross Corolla iM Crown Crown Signia GR Corolla Mirai MR2 Spyder Prius V Tercel Van Yaris iA Prius Plug-In GR Supra Prius AWD-e RAV4 Prime