×
ToyotaParts- Hello
- Login or Register
- Quick Links
- Live Chat
- Track Order
- Parts Availability
- RMA
- Help Center
- Contact Us
- Shop for
- Toyota Parts
- Scion Parts
My Garage
My Account
Cart
OEM Toyota Solara Window Motor
Window Lift Motor- Select Vehicle by Model
- Select Vehicle by VIN
Select Vehicle by Model
orMake
Model
Year
Select Vehicle by VIN
For the most accurate results, select vehicle by your VIN (Vehicle Identification Number).
3 Window Motors found

Toyota Solara Window Motor, Driver Side Part Number: 85720-AA080
$388.23 MSRP: $568.95You Save: $180.72 (32%)Ships in 1-3 Business Days
Toyota Solara Window Motor, Passenger Side Part Number: 85710-AA060
Toyota Solara Window Motor, Driver Side Part Number: 85720-06050
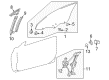
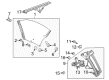
Toyota Solara Window Motor
Choose genuine Window Motor that pass strict quality control tests. You can trust the top quality and lasting durability. Shopping for OEM Window Motor for your Toyota Solara? Our website is your one-stop destination. We stock an extensive selection of genuine Toyota Solara parts. The price is affordable so you can save more. It only takes minutes to browse and find the exact fit. Easily add to cart and check out fast. Our hassle-free return policy will keep you stress-free. We process orders quickly for swift delivery. Your parts will arrive faster, so you can get back on the road sooner.
In the middle of the Solara power window system, Toyota Solara Window Motor harmonizes convenience and sportiness that characterizes the coupe. The Toyota Solara is a vehicle that drivers are in awe of due to its smooth appearance, comfortable interior, and competent nature in handling their daily commute especially as they feel their travels are more of recreational outings. The Solara has a competent but approachable personality due to responsive steering, a properly adjusted suspension and considerate interior touches that are sure to command attention on the road. Due to durability, Toyota owners complain that their car will serve long without much ado and that the real parts are compatible when they require some service. The special Solara Window Motor by Toyota is designed to transfer electrical power into motion which is smooth up and down and each glass panel moves smoothly and safely. This small Window Motor is directly connected with the regulator, acts immediately upon the switch, and eliminates hand strain besides being a touch of modern luxury. Secure casings and accurate gears epitomize the Toyota quality standards and thus the Window Motor continues to run even after years of commuting to work and seasonal changes in temperature. Noise or slowness, should it arise, is easily replaced by changing the Window Motor, and factory feel is restored. It can be easily installed, first of all, one needs to disconnect the battery, then detach the door trim, unbolt the old unit, screw on the new one, reconnect the wiring, test, and refit panels.
Related Toyota Solara Parts
 Toyota Solara Interior Door Handle
 Toyota Solara Window Regulator
 Toyota Solara Armrest
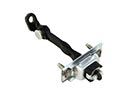 Toyota Solara Door Check
 Toyota Solara Door Hinge
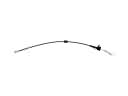 Toyota Solara Door Latch Cable
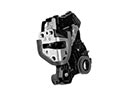 Toyota Solara Door Lock
 Toyota Solara Door Lock Actuator
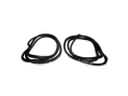 Toyota Solara Door Seal
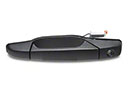 Toyota Solara Exterior Door Handle
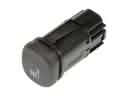 Toyota Solara Seat Heater Switch
 Toyota Solara Weather Strip
Browse Toyota Solara Window Motor by Years
2008 2007 2006 2005 2004