×
ToyotaParts- Hello
- Login or Register
- Quick Links
- Live Chat
- Track Order
- Parts Availability
- RMA
- Help Center
- Contact Us
- Shop for
- Toyota Parts
- Scion Parts
My Garage
My Account
Cart
OEM Toyota Tacoma Crankshaft Position Sensor
Engine Crankshaft Position Sensor- Select Vehicle by Model
- Select Vehicle by VIN
Select Vehicle by Model
orMake
Model
Year
Select Vehicle by VIN
For the most accurate results, select vehicle by your VIN (Vehicle Identification Number).
12 Crankshaft Position Sensors found


Toyota Tacoma Camshaft Position Sensor, Driver Side Part Number: 90919-T5005
$106.16 MSRP: $149.02You Save: $42.86 (29%)Ships in 1-3 Business Days


Toyota Tacoma Crankshaft Position Sensor Part Number: 90919-05098
$109.13 MSRP: $153.18You Save: $44.05 (29%)Ships in 1-2 Business Days


Toyota Tacoma Sensor, Camshaft Position Part Number: 90080-19014
$71.44 MSRP: $85.29You Save: $13.85 (17%)Ships in 1-2 Business Days


Toyota Tacoma Camshaft Position Sensor, Passenger Side Part Number: 90919-05061
$127.71 MSRP: $180.79You Save: $53.08 (30%)Ships in 1 Business Day


Toyota Tacoma Crankshaft Position Sensor Part Number: 90919-05059
$137.23 MSRP: $194.26You Save: $57.03 (30%)Ships in 1 Business Day


Toyota Tacoma Crankshaft Position Sensor Part Number: 90919-05016
$172.71 MSRP: $244.50You Save: $71.79 (30%)Ships in 1-2 Business Days


Toyota Tacoma Sensor, Crank Position Part Number: 90919-A5003
$73.81 MSRP: $103.61You Save: $29.80 (29%)Ships in 1-3 Business Days


Toyota Tacoma Crankshaft Position Sensor Part Number: 90919-05073
$116.00 MSRP: $162.83You Save: $46.83 (29%)Ships in 1-3 Business Days


Toyota Tacoma Crankshaft Position Sensor Part Number: 90919-05020
$140.75 MSRP: $199.25You Save: $58.50 (30%)Ships in 1-3 Business Days
Toyota Tacoma Sensor, Crank Position Part Number: 90919-A5005
$105.22 MSRP: $147.69You Save: $42.47 (29%)Ships in 1-3 Business Days
Toyota Tacoma Sensor, Camshaft Position Part Number: 90919-A5007
$105.57 MSRP: $148.19You Save: $42.62 (29%)Ships in 1-3 Business Days
Toyota Tacoma Sensor, Crank Position Part Number: 90919-A5006
$104.39 MSRP: $146.53You Save: $42.14 (29%)Ships in 1-3 Business Days
Toyota Tacoma Crankshaft Position Sensor
Choose genuine Crankshaft Position Sensor that pass strict quality control tests. You can trust the top quality and lasting durability. Shopping for OEM Crankshaft Position Sensor for your Toyota Tacoma? Our website is your one-stop destination. We stock an extensive selection of genuine Toyota Tacoma parts. The price is affordable so you can save more. It only takes minutes to browse and find the exact fit. Easily add to cart and check out fast. Our hassle-free return policy will keep you stress-free. We process orders quickly for swift delivery. Your parts will arrive faster, so you can get back on the road sooner.
Toyota Tacoma Crankshaft Position Sensor Parts and Q&A
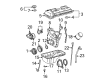
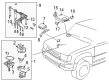
- Q: How to install the Crankshaft Position Sensor on Toyota Tacoma?A:The installation process for the 2TR-FE crankshaft position sensor starts with applying engine oil to its O-ring followed by bolt installation while checking for O-ring damage during this step and tightening the bolt to 8.5 Nm torque level (87 kgf-cm, 75 in-lbf). Firmly secure the crankshaft position sensor connector apart from connecting it to the two wire harness clamps. When installing the five bolts on the idle pulley assembly with bracket (w/ air conditioning) maintain uniform tightness while following the specified bolt sequence to apply 21 Nm (214 kgf-cm, 16 ft-lbf) to bol Install the compressor along with its magnetic clutch before adding the fan and generator V belt (both components part of the air conditioning system). Install the engine under cover sub-assembly Number One as part of the 4WD and Pre-Runner models installation. Attach the cable to the negative battery terminal by tightening it to 3.9 Nm (40 kgf-cm, 35 in-lbf).
- Q: How to remove the Crankshaft Position Sensor on Toyota Tacoma?A:Users need to start Crankshaft Position Sensor removal for the 2TR-FE engine control system by disconnecting the negative battery cable. For 4WD and Pre-Runner models you need to remove engine under cover sub-assembly No.1. The first step involves removing the fan and generator V belt (with air-conditioning) as well as separating the compressor and magnetic clutch (with air-conditioning). Users should extract the idle pulley assembly with bracket (with air conditioning) by unfastening its 5 bolts in this step. To remove the crankshaft position sensor start by disconnecting its connector before removing two wire harness clamps and unbolting it from the engine block before extraction.


Related Toyota Tacoma Parts
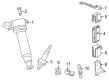
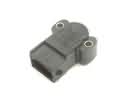 Toyota Tacoma Throttle Position Sensor
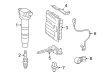
 Toyota Tacoma Ignition Coil
 Toyota Tacoma Engine Control Module
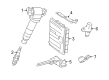
 Toyota Tacoma Spark Plug
 Toyota Tacoma Coolant Temperature Sensor
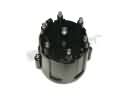 Toyota Tacoma Distributor Cap
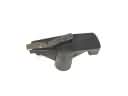 Toyota Tacoma Distributor Rotor
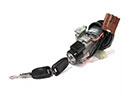 Toyota Tacoma Igniter
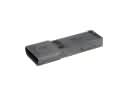 Toyota Tacoma Ignition Control Module
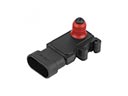 Toyota Tacoma MAP Sensor
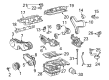
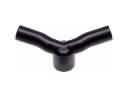 Toyota Tacoma PCV Hose
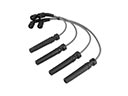 Toyota Tacoma Spark Plug Wire