My Garage
Cart
Make sure this part fits

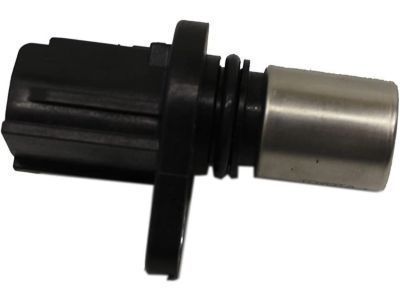
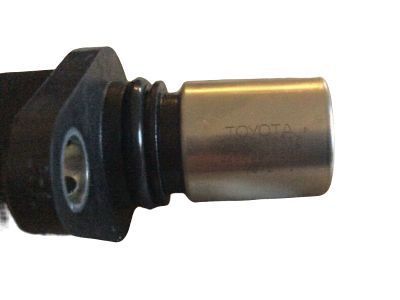
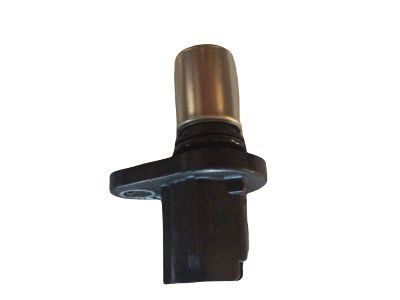
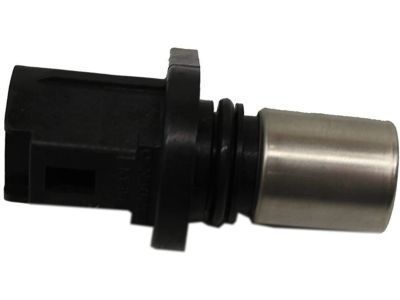
Toyota 90080-19014
Sensor, Camshaft Position

1997-2015 Toyota 9008019014

Customer Questions & Expert Answers (114)
Toyota 90080-19014 Sensor, Camshaft Position
  • Part Description
    Sensor, Crank Position; Cam Position; Engine Camshaft; Crankshaft; RPM Sensor
  • Replaces
    90919-05026
  • Manufacturer
    Toyota
Make sure this part fits
$66.23 MSRP: $79.06
You Save: $12.83 (17%)
Ships in 1-2 Business Days
1
ADD TO CART
  • Related Parts
  • Product Specifications
  • Vehicle Fitment
  • Customer Questions & Expert Answers
  • Product Specifications

    BrandGenuine Toyota
    Manufacturer Part Number90080-19014
    Part DescriptionSensor, Crank Position; Cam Position; Engine Camshaft; Crankshaft; RPM Sensor
    Item Dimensions4.0 x 2.8 x 2.1 inches
    Item Weight0.50 Pounds
    ConditionNew
    Fitment TypeDirect Replacement
    Replaces90919-05026
    ManufacturerToyota
    SKU90080-19014
    WarrantyThis genuine Toyota part is guaranteed by Toyota's factory warranty.
    Shipping & ReturnShipping Policy Return Policy
    Warning: California's Proposition 65
  • Vehicle Fitment

    Year Make Model Trim Engine
    2005-2010 Scion tCBase, Spec4 Cyl 2.4 L GAS
    2008-2015 Scion xBBase4 Cyl 2.4 L GAS
    2003-2005, 1997-2000 Toyota 4RunnerBase, Limited, Sport, SR54 Cyl 2.7 L GAS, 6 Cyl 4.0 L GAS
    2000-2004 Toyota AvalonXL, XLS6 Cyl 3.0 L GAS
    2002-2011 Toyota CamryBase, CE, Hybrid, LE, SE, XLE4 Cyl 2.4 L FULL HYBRID EV-GAS (FHEV), 4 Cyl 2.4 L GAS, 6 Cyl 3.0 L GAS, 6 Cyl 3.3 L GAS
    2000-2005 Toyota CelicaGT, GTS4 Cyl 1.8 L GAS
    1998-2012 Toyota CorollaBase, CE, L, LE, S, VE, XLE, XRS4 Cyl 1.8 L GAS, 4 Cyl 2.4 L GAS
    2001-2010 Toyota HighlanderBase, Hybrid, Hybrid Limited, Limited, Sport4 Cyl 2.4 L GAS, 6 Cyl 3.0 L GAS, 6 Cyl 3.3 L FULL HYBRID EV-GAS (FHEV), 6 Cyl 3.3 L GAS
    2000-2005 Toyota MR2 SpyderBase4 Cyl 1.8 L GAS
    2003-2013 Toyota MatrixBase, S, XR, XRS4 Cyl 1.8 L GAS, 4 Cyl 2.4 L GAS
    View More
  • Customer Questions & Expert Answers

    Q:
    Will 90080-19014 fit my vehicle? Posted by ToyotaPartsNow Specialist
    A:
    Find out if part number 90080-19014 is the right fit for your car by Selecting Your Vehicle model.
    Posted by ToyotaPartsNow Specialist
    Q:
    How to replace the Camshaft Position Sensor on Scion tC? Posted by Customer
    A:
    Begin by disconnecting the negative battery terminal before Installing the Camshaft Position Sensor because initialization of power windows along with sliding roof will be required following reconnection. Disassembly of the engine cover sub-assembly No.1 enables sensor connector separation for removal of the camshaft position sensor bolt and sensor component. A thin layer of engine oil should be applied to the O-ring of the new sensor before installation using the bolt at 9.0 N.m (90 kgf.cm, 80 in.lbf) while ensuring proper O-ring condition. After reattaching the camshaft position sensor connector it is important to tighten the battery negative terminal at 5.4 N.m (55 kgf.cm, 48 in.lbf). To finish the task check for oil leakage at the engine and reinstall engine cover sub-assembly No.1.
    Posted by ToyotaPartsNow Specialist
    Q:
    How to replace the Crankshaft Position Sensor on Scion tC? Posted by Customer
    A:
    The first step to replace the Crankshaft Position Sensor requires disconnecting the battery terminal and taking off the front fender apron seal found on the right-hand side. It is necessary to remove the engine fan and generator V belt with Special Service Tool: 09249-63010 before proceeding to the generator assembly removal. Disconnect the crankshaft position sensor connector before removing its clamp and pulling the wire harness from the clamp bracket. The crankshaft position sensor extraction requires removal of its wire harness clamp followed by its bolt. When installing the new crankshaft position sensor use engine oil to lubricate its O-ring before bolting it into place with 9.0 N.m torque (90 kgf.cm, 80 in.lbf). Confirm the O-ring remains untorn and unjammed after installation. Install the wire harness clamp first then the connector clamp before connecting the crankshaft position sensor connector while ensuring proper wire harness retention through the rib of the timing chain cover backplate. Add the generator assembly and fan and generator V belt to the vehicle by using Special Service Tool: 09249-63010. Use a torque of 5.4 N.m to reconnect the battery negative terminal followed by a leakage test of the engine oil where you will reinstall the front fender apron seal RH.
    Posted by ToyotaPartsNow Specialist
    Q:
    How to remove the Camshaft Position Sensor on Scion tC? Posted by Customer
    A:
    Disconnection of the negative battery terminal cable should start any Camshaft Position Sensor removal work. A minimum 90-second wait period helps avoid Air Bag and seat belt pretensioner activation. You should start by removing the engine cover followed by the air cleaner cap. After disconnecting the sensor connector the bolt and sensor can be removed in sequence.
    Posted by ToyotaPartsNow Specialist
    Q:
    How to replace the Camshaft Position Sensors on Toyota Avalon? Posted by Customer
    A:
    The first step to replace Camshaft Position Sensors starts with removing the V-bank cover through the use of a 5 mm hexagon wrench to detach its three cap nuts while counterclockwise turning the V-bank cover fastener until the cover can be taken off. The following step requires removal of the air cleaner hose together with its resonator. After disconnecting the two sensor connectors of the Camshaft Position Sensors you should remove their bolts together with both sensors while carefully extracting the O-rings from inside. To install both sensors professionals should add O-rings to fresh camshaft position sensors then apply the sensors with bolts and measure torque at 8 N.m (80 kgf.cm, 69 in.lbf). The V-bank cover installation process starts with reconnecting the 2 camshaft position sensor connectors followed by reinstalling the air cleaner hose with resonator and concludes by reattaching the V-bank cover with the 5 mm hexagon wrench to secure the 3 cap nuts while nursing down the V-bank cover fastener.
    Posted by ToyotaPartsNow Specialist
    Q:
    How to remove the Camshaft Position Sensor on Scion xB? Posted by Customer
    A:
    The first step to remove the Camshaft Position Sensor from the 2AZ-FE engine control system requires the removal of the No. 1 engine cover sub-assembly. The user should first separate the air cleaner cap sub-assembly with the No. 1 air cleaner hose. The sensor connector needs to be disconnected while you remove the bolt securing the sensor before extracting the sensor device.
    Posted by ToyotaPartsNow Specialist
    Q:
    How to remove the Camshaft Position Sensor on Toyota Camry? Posted by Customer
    A:
    The No. 1 engine cover sub-assembly should be the first step to remove the Camshaft Position Sensor from the 2AZ-FE engine control system. Secondly remove the air cleaner cap sub-assembly from the system. The first step is to disconnect the camshaft position sensor connector followed by removing its bolt and sensor.
    Posted by ToyotaPartsNow Specialist
    Q:
    How to remove the Crankshaft Position Sensor on Scion xB? Posted by Customer
    A:
    The first step to remove the Crankshaft Position Sensor from the 2AZ-FE engine control system requires battery terminal disconnection. Begin by removing the engine under cover rear RH while you also remove the fan & generator V belt. First disconnect the generator connector and remove its nut before disconnecting the wire harness at terminal B and eliminating the two wire harness clamps and finally removing the two bolts which secure the generator assembly. The crankshaft position sensor removal process begins with disconnecting its connector then moving on to separate the connector from the wire harness before disassembling the bolt holding the crankshaft position sensor in place.
    Posted by ToyotaPartsNow Specialist
    Q:
    How to Service and Repair the Crankshaft Position Sensor on Toyota 4Runner? Posted by Customer
    A:
    The Crankshaft Position Sensor service procedure starts with removing the engine under cover then continuing with removing the generator and generator bracket while uninstalling the 3 bolts. Make sure Bolt A receives 74.5 Nm (760 kg.cm, 55 ft.lb) torque and Bolt B reached 18 Nm (180 kg.cm, 13 ft.lb). The sensor removal begins with disconnecting the crankshaft position sensor connector followed by removing it after unscrewing both bolts that require a torque of exactly 8.5 Nm (85 kg.cm, 74 in.lb). Also detach the O-ring at this time. When installing the crankshaft position sensor apply engine oil gently to the new O-ring before its placement. To install the part operators must perform the steps in the reverse sequence of removal.
    Posted by ToyotaPartsNow Specialist
    Q:
    How to service the camshaft position sensor on Toyota Camry? Posted by Customer
    A:
    Starting the camshaft position sensor service involves taking off the No. 1 engine cover sub-assembly together with the air cleaner cap sub-assembly. First disconnect the camshaft position sensor connector before removing its bolt along with the sensor itself. The installation process requires a slim application of engine oil onto the sensor O-ring while checking for no cracking or jamming issues during this step. The camshaft position sensor installation necessitates a bolt with proper torque setting at 9.0 N.m (90 kgf.cm, 80 in.lbf) while reattaching its connector. The maintenance process requires reinstalling the air cleaner cap sub-assembly followed by engine oil leak assessment and conclusion with installation of the No. 1 engine cover sub-assembly.
    Posted by ToyotaPartsNow Specialist
    Q:
    How to remove the Crankshaft Position Sensor on Toyota Camry? Posted by Customer
    A:
    The procedure to extract the Crankshaft Position Sensor from the 2AZ-FXE system starts with recovering refrigerant from the refrigeration system and draining the engine coolant. After unplugging the negative battery terminal wire disconnect the service plug grip. The technician must remove the No. 2 engine room side LH cover as well as the connector cover assembly to check the terminal voltage. Reconnect the No. 2 engine room side LH cover and the connector cover assembly. The next procedure requires removing the V-ribbed belt tensioner cover sub-assembly as the subsequent steps involve the removal of the V-ribbed belt then the V-ribbed belt tensioner assembly. The maintenance procedure requires removing the radiator hose outlet as well as removing the No. 1 cooler refrigerant suction hose and No. 1 cooler refrigerant discharge hose. After removing the electric inverter compressor the technician disconnects the crankshaft position sensor connector. The crankshaft position sensor removal process requires removing first the connector clamp then the wire harness clamp while taking out the wire harness clamp bracket and ending with the bolt removal to complete the operation.
    Posted by ToyotaPartsNow Specialist
    Q:
    How to replace the crankshaft position sensor on Toyota 4Runner? Posted by Customer
    A:
    The replacement process of a crankshaft position sensor begins with generator assembly removal and continues with engine under cover assembly rear extraction through breaking the 4 bolts. The cooler compressor assembly requires the removal of one bolt to disconnect the cooler compressor assembly from the suction hose sub-assembly and the cooler compressor assembly connector. After that detach the cooler compressor assembly from the V-ribbed belt tensioner assembly using four bolts. First disconnect the crankshaft position sensor connector before removing the crankshaft position sensor by taking out its mounting bolt. Open the crankshaft position sensor O-ring to the sensor using engine oil before installing it with its bolt at 9.0 N.m (92 kgf.cm, 80 in.lbf) and following by cranking the sensor connector. You should start by reinstalling the cooler compressor assembly through 4 bolts that require a torque of 25 N.m (255 kgf.cm, 18 ft.lbf). Afterward, connect the cooler compressor assembly connector and secure the suction hose sub-assembly through its bolt which needs 8.0 N.m (82 kgf.cm, 71 in.lbf) torque. Reconnect the generator assembly after reinstalling the engine under cover assembly rear through its 4 bolts while torqueing them to 29 N.m (296 kgf.cm, 21 ft.lbf).
    Posted by ToyotaPartsNow Specialist
    Q:
    How to remove the Crankshaft Position Sensor on Scion xB? Posted by Customer
    A:
    The first step to remove the Crankshaft Position Sensor from the 2AZ-FE engine control system is disconnecting the cable from the negative battery terminal. Start by separating the engine under cover rear RH and then disconnecting the fan & generator V belt. First disconnect the generator connector before removing its nut to free terminal B wire harness. Separate the wire harness clamps and remove the two generator assembly bolts as the next step. Completion of the crankshaft position sensor removal requires detachment of the connector followed by wire harness separation from its connector and then removal of the bolt that secures the crankshaft position sensor.
    Posted by ToyotaPartsNow Specialist
    Q:
    How to service the Camshaft Position Sensor on Toyota Celica? Posted by Customer
    A:
    The service of Camshaft Position Sensor begins by extracting the No. 2 cylinder head cover. The first step for servicing the 1ZZ-FE sensor includes disconnecting its connector while you remove the bolt to detach the camshaft position sensor while applying 8.8 N.m (90 kgf.cm, 78 in.lbf) torque. The 2ZZ-GE sensor installation requires disconnecting its connector before unbolt the two mounting bolts and removing the camshaft position sensor with sufficient torque at 8.8 N.m (90 kgf.cm, 78 in.lbf). You must install the components in the reverse sequence of disassembly.
    Posted by ToyotaPartsNow Specialist
    Q:
    How to install the Camshaft Position Sensor for the Exhaust and Intake Sides on Toyota Highlander? Posted by Customer
    A:
    The first step of installing an Exhaust Side Camshaft Position Sensor requires the application of engine oil to the O-ring while checking that it remains intact until bolting. Apply Toyota Genuine Adhesive 1344, Three Bond 1344, or equivalent adhesive to 2 or 3 threads of the bolt. Mount the sensor with the bolt using appropriate torque of 10 Nm (102 kgf-cm, 7 ft-lbf) before connecting the sensor connector. The installation protocol for the Intake Side duplicates the Exhaust Side procedures by applying engine oil to the O-ring before using adhesive on bolt threads; then install the sensor with bolt torque at 10 Nm (102 kgf-cm, 7 ft-lbf) followed by sensor connector connection. The No. 1 Engine Cover Sub-Assembly installation follows oil leak inspection procedures.
    Posted by ToyotaPartsNow Specialist
    Q:
    How to service the Camshaft Position Sensor on Toyota Corolla? Posted by Customer
    A:
    The servicing process for the Camshaft Position Sensor begins with disconnecting the sensor connector followed by bolt removal along with the sensor. Installation torque must reach 9 N.m (92 kgf.cm, 79 in.lbf). After uninstallation the reinstallation procedure occurs in the opposite sequence.
    Posted by ToyotaPartsNow Specialist
    Q:
    How to install the camshaft position sensor on Toyota Matrix? Posted by Customer
    A:
    The installation process begins with applying engine oil to the O-ring of the sensor before sensor insertion. Install the camshaft position sensor to its location with the bolt while torquing it to 9.0 Nm then check it against 92 kgf-cm or 80 in-lbf. The camshaft position sensor connector needs to be connected after installation. The installation order is to place the air cleaner cap sub-assembly alongside hose and perform an examination for engine oil leaks. Completion of the installation process includes the No. 1 engine cover sub-assembly.
    Posted by ToyotaPartsNow Specialist
    Q:
    How to install the crankshaft position sensor on Toyota Matrix? Posted by Customer
    A:
    Lightly oil the O-ring on the sensor before installing the crankshaft position sensor by applying torque of 9.0 Nm while avoiding O-ring distortion. Follow the procedure of bolt installation by applying the specified 9.0 Nm torque (92 kgf-cm, 80 in-lbf) and stay away from O-ring twisting during the process. The wire harness installation should follow the crankshaft position sensor connector clamp before connecting the crankshaft position sensor connector. The generator assembly should be installed after the sensor together with V-ribbed belt and engine under cover RH. The last step includes inspecting for oil leakage after connecting the cable to the negative battery terminal.
    Posted by ToyotaPartsNow Specialist
    Q:
    How to service the Camshaft Position Sensor on Toyota Solara? Posted by Customer
    A:
    The first step when servicing the Camshaft Position Sensor on the 2AZ-FE engine control system requires removal of the air cleaner assembly. You should first disconnect the sensor connector then remove the bolt to take out the sensor. Technical specifications for bolt tightening torque are available in the standard bolt chart but they lack proper torque recommendation.
    Posted by ToyotaPartsNow Specialist
    Q:
    How to replace the Camshaft Position Sensor on Toyota Sienna? Posted by Customer
    A:
    The first step to replace a Camshaft Position Sensor requires use of a 5 mm hexagon wrench to remove three cap nuts and loosen the V-bank cover fastener counterclockwise before removing the cover. Begin by disconnecting the air cleaner hose with resonator and then disconnect the 2 camshaft position sensor connectors. After that detach the 2 camshaft position sensors from their bolts while also extracting the O-rings attached to them. You must install new O-rings on the sensors before installing them with their bolts and torquing them to 8.0 N.m (80 kgf.cm, 69 in.lbf). The procedure ends with reconnecting the two camshaft position sensor connectors. Reassemble the air cleaner hose with resonator by securing it through the 3 cap nuts using a 5 mm hexagon wrench then push down the V-bank cover fastener.
    Posted by ToyotaPartsNow Specialist
    Q:
    What are the steps to disconnect the sensor for the 2008 Scion tC? Posted by Customer
    A:
    Disconnect the sensor connector, remove the connector clamp, take the wire harness out of the wire harness clamp bracket, remove the wire harness clamp, and then remove the bolt and sensor.
    Posted by ToyotaPartsNow Specialist
    See expert answers on similar Crankshaft Position Sensor
    Q:
    What is the first step to install the Crankshaft Position Sensor for the 2AZ-FE engine control system for the 2008 Scion tC? Posted by Customer
    A:
    Ensure the O-ring is not cracked or jammed.
    Posted by ToyotaPartsNow Specialist
    See expert answers on similar Crankshaft Position Sensor
    Q:
    What is the next step after securing the wire harness for the 2010 Scion tC? Posted by Customer
    A:
    Install the generator assembly, followed by the fan and generator V belt.
    Posted by ToyotaPartsNow Specialist
    See expert answers on similar Crankshaft Position Sensor
    Q:
    What is the final step in removing the Camshaft Position Sensor for the 2009 Scion tC? Posted by Customer
    A:
    Disconnect the sensor connector, then remove the bolt and the sensor itself.
    Posted by ToyotaPartsNow Specialist
    See expert answers on similar Camshaft Position Sensor
    Q:
    What should be applied to the O-ring before installation for the 2010 Scion tC? Posted by Customer
    A:
    A light coat of engine oil.
    Posted by ToyotaPartsNow Specialist
    See expert answers on similar Camshaft Position Sensor
    Q:
    What is the final step to remove the crankshaft position sensor for the 2008 Scion xB? Posted by Customer
    A:
    Disconnect its connector, separate the connector from the wire harness, and remove the bolt securing the crankshaft position sensor.
    Posted by ToyotaPartsNow Specialist
    See expert answers on similar Crankshaft Position Sensor
    Q:
    What should be done after removing the engine cover for the 2008 Scion xB? Posted by Customer
    A:
    Next, take off the air cleaner cap sub-assembly along with the No. 1 air cleaner hose.
    Posted by ToyotaPartsNow Specialist
    See expert answers on similar Camshaft Position Sensor
    Q:
    How do you remove the crankshaft position sensor for the 2006 Scion tC? Posted by Customer
    A:
    Disconnect the sensor connector, remove the connector clamp, take out the wire harness from the wire harness clamp bracket, remove the wire harness clamp, and finally remove the bolt and sensor.
    Posted by ToyotaPartsNow Specialist
    See expert answers on similar Crankshaft Position Sensor
    Q:
    What is the final step in the installation process for the 2009 Scion xB? Posted by Customer
    A:
    Inspect for any oil leaks.
    Posted by ToyotaPartsNow Specialist
    See expert answers on similar Crankshaft Position Sensor
    Q:
    What is the first step to remove the Crankshaft Position Sensor from the 2AZ-FE engine control system for the 2009 Scion tC? Posted by Customer
    A:
    Disconnect the cable from the negative battery terminal and wait at least 90 seconds to prevent airbag and seat belt pretensioner activation.
    Posted by ToyotaPartsNow Specialist
    See expert answers on similar Crankshaft Position Sensor
    Q:
    What is the final step in the replacement process for the 2004 Toyota Camry? Posted by Customer
    A:
    Reinstall the engine under cover on the right-hand side.
    Posted by ToyotaPartsNow Specialist
    See expert answers on similar Crankshaft Position Sensor
    Q:
    What is the first step to install the Camshaft Position Sensor for the 2AZ-FE engine control system for the 2008 Toyota Camry? Posted by Customer
    A:
    Apply a light coat of engine oil to the O-ring of the sensor, ensuring that the O-ring is not cracked or jammed during installation.
    Posted by ToyotaPartsNow Specialist
    See expert answers on similar Camshaft Position Sensor
    Q:
    What is the next step after removing the front fender apron seal for the 2005 Toyota Camry? Posted by Customer
    A:
    Disconnect the sensor connector and remove the bolt, clamp, and sensor.
    Posted by ToyotaPartsNow Specialist
    See expert answers on similar Crankshaft Position Sensor
    Q:
    What is the final step in the process for the 2000 Toyota Avalon? Posted by Customer
    A:
    Reinstall the RH fender apron seal.
    Posted by ToyotaPartsNow Specialist
    See expert answers on similar Crankshaft Position Sensor
    Q:
    What is the next step after installing the new sensor for the 2002 Toyota Avalon? Posted by Customer
    A:
    Reconnect the crankshaft position sensor connector.
    Posted by ToyotaPartsNow Specialist
    See expert answers on similar Crankshaft Position Sensor
    Q:
    What should be inspected after installing the air cleaner components for the 2009 Scion xB? Posted by Customer
    A:
    Inspect for engine oil leaks.
    Posted by ToyotaPartsNow Specialist
    See expert answers on similar Camshaft Position Sensor
    Q:
    What is the proper way to install the new sensor for the 2005 Toyota Camry? Posted by Customer
    A:
    Install the sensor with the bolt, ensuring a torque of 9.0 N.m (92 kgf.cm, 80 in.lbf).
    Posted by ToyotaPartsNow Specialist
    See expert answers on similar Camshaft Position Sensor
    Q:
    What is the required torque for securing the crankshaft position sensor for the 2000 Toyota 4Runner? Posted by Customer
    A:
    7.8 Nm (80 kg.cm, 69 in.lb).
    Posted by ToyotaPartsNow Specialist
    See expert answers on similar Crankshaft Position Sensor
    Q:
    What should be done after installing the new sensor for the 2004 Toyota Avalon? Posted by Customer
    A:
    Reconnect the crankshaft position sensor connector.
    Posted by ToyotaPartsNow Specialist
    See expert answers on similar Crankshaft Position Sensor
    Q:
    How is installation performed for the 2000 Toyota 4Runner? Posted by Customer
    A:
    Installation is performed in the reverse order of removal.
    Posted by ToyotaPartsNow Specialist
    See expert answers on similar Camshaft Position Sensor
    Q:
    What should be done last during the installation process for the 2002 Toyota Avalon? Posted by Customer
    A:
    Reinstall the air cleaner hose with resonator and the V-bank cover using the 5 mm hexagon wrench to secure it with the 3 cap nuts and press down the V-bank cover fastener.
    Posted by ToyotaPartsNow Specialist
    See expert answers on similar Camshaft Position Sensor
    Q:
    What components need to be removed before accessing the crankshaft position sensor for the 2007 Scion tC? Posted by Customer
    A:
    Remove the front fender apron seal RH, the fan and generator V belt, and the generator assembly.
    Posted by ToyotaPartsNow Specialist
    See expert answers on similar Crankshaft Position Sensor
    Q:
    What is the final step in servicing the Camshaft Position Sensor for the 2000 Toyota 4Runner? Posted by Customer
    A:
    Reinstall the No.2 timing belt cover.
    Posted by ToyotaPartsNow Specialist
    See expert answers on similar Camshaft Position Sensor
    Q:
    How do you install the new crankshaft position sensor for the 2003 Toyota Avalon? Posted by Customer
    A:
    Install the new crankshaft position sensor using the bolt, ensuring it is torqued to 8 N.m (80 kgf.cm, 69 in.lbf).
    Posted by ToyotaPartsNow Specialist
    See expert answers on similar Crankshaft Position Sensor
    Q:
    What is the first step to service the Camshaft Position Sensor for the 2000 Toyota Celica? Posted by Customer
    A:
    Remove the No.2 cylinder head cover.
    Posted by ToyotaPartsNow Specialist
    See expert answers on similar Camshaft Position Sensor
    Q:
    What is the first step to replace the camshaft position sensors for the 2004 Toyota Avalon? Posted by Customer
    A:
    Remove the V-bank cover using a 5 mm hexagon wrench to take off the 3 cap nuts and loosen the cover fastener counterclockwise before removing the cover itself.
    Posted by ToyotaPartsNow Specialist
    See expert answers on similar Camshaft Position Sensor
    Q:
    What is the final step after reconnecting the battery for the 2007 Scion tC? Posted by Customer
    A:
    Reinstall the engine cover and perform initialization, as certain systems require this after disconnecting and reconnecting the cable from the negative battery terminal.
    Posted by ToyotaPartsNow Specialist
    See expert answers on similar Camshaft Position Sensor
    Q:
    What is the next step after installing the sensor for the 2008 Scion tC? Posted by Customer
    A:
    Connect the sensor connector.
    Posted by ToyotaPartsNow Specialist
    See expert answers on similar Camshaft Position Sensor
    Q:
    What is the final step in the process for the 2005 Toyota 4Runner? Posted by Customer
    A:
    Reinstall the engine under cover assembly rear with the 4 bolts, torquing to 29 Nm (296 kgf.cm, 21 ft.lbf), and then reinstall the generator assembly.
    Posted by ToyotaPartsNow Specialist
    See expert answers on similar Crankshaft Position Sensor
    Q:
    What is the first step to install the crankshaft position sensor for the 2010 Scion xB? Posted by Customer
    A:
    Apply a light coat of engine oil to the O-ring.
    Posted by ToyotaPartsNow Specialist
    See expert answers on similar Crankshaft Position Sensor
    Q:
    What is the first step to service the Camshaft Position Sensor on the 2AZ-FE engine control system for the 2010 Scion xB? Posted by Customer
    A:
    Remove the No. 1 engine cover sub-assembly.
    Posted by ToyotaPartsNow Specialist
    See expert answers on similar Camshaft Position Sensor
    Q:
    What should be applied to the O-ring before installation for the 2006 Scion tC? Posted by Customer
    A:
    A light coat of engine oil.
    Posted by ToyotaPartsNow Specialist
    See expert answers on similar Camshaft Position Sensor
    Q:
    What needs to be removed along with the camshaft position sensors for the 2000 Toyota Avalon? Posted by Customer
    A:
    Remove the bolts along with the 2 camshaft position sensors and take off the O-rings from the sensors.
    Posted by ToyotaPartsNow Specialist
    See expert answers on similar Camshaft Position Sensor
    Q:
    What is the acceptable resistance range for the crankshaft position sensor when hot for the 2003 Toyota Celica? Posted by Customer
    A:
    The resistance should be between 2,065 - 3,225 Ohm when hot (from 50 °C to 100 °C).
    Posted by ToyotaPartsNow Specialist
    See expert answers on similar Crankshaft Position Sensor
    Q:
    What is the first step to service the Camshaft Position Sensor for the 2001 Toyota Corolla? Posted by Customer
    A:
    Disconnect the camshaft position sensor connector.
    Posted by ToyotaPartsNow Specialist
    See expert answers on similar Camshaft Position Sensor
    Q:
    What is the final step in the process for the 2007 Toyota Camry? Posted by Customer
    A:
    Reconnect the cable to the negative battery terminal.
    Posted by ToyotaPartsNow Specialist
    See expert answers on similar Crankshaft Position Sensor
    Q:
    What is the first step to service the Camshaft Position Sensor for the 2001 Toyota Celica? Posted by Customer
    A:
    Remove the No.2 cylinder head cover.
    Posted by ToyotaPartsNow Specialist
    See expert answers on similar Camshaft Position Sensor
    Q:
    What is the final step after installing the sensor for the 2005 Toyota Highlander? Posted by Customer
    A:
    Finally, reinstall the air cleaner assembly.
    Posted by ToyotaPartsNow Specialist
    See expert answers on similar Camshaft Position Sensor
    Q:
    What is the next step after installing the sensor for the 2008 Toyota Camry? Posted by Customer
    A:
    Connect the crankshaft position sensor connector.
    Posted by ToyotaPartsNow Specialist
    See expert answers on similar Crankshaft Position Sensor
    Q:
    What should be done for installation of the new sensors for the 2003 Toyota Avalon? Posted by Customer
    A:
    Place new O-rings on the new camshaft position sensors, secure them with bolts, and torque to 8 N.m (80 kgf.cm, 69 in.lbf).
    Posted by ToyotaPartsNow Specialist
    See expert answers on similar Camshaft Position Sensor
    Q:
    What should be done after removing the intake manifold for the 2002 Toyota Corolla? Posted by Customer
    A:
    Disconnect the sensor connector and remove the 2 bolts to disconnect the sensor.
    Posted by ToyotaPartsNow Specialist
    See expert answers on similar Crankshaft Position Sensor
    Q:
    What is the required torque during reinstallation of the crankshaft position sensor for the 2001 Toyota Celica? Posted by Customer
    A:
    Ensure a torque of 8.8 N.m (90 kgf.cm, 78 in.lbf) during reinstallation.
    Posted by ToyotaPartsNow Specialist
    See expert answers on similar Crankshaft Position Sensor
    Q:
    What is the procedure for installation for the 2000 Toyota Celica? Posted by Customer
    A:
    Installation follows the reverse order of removal.
    Posted by ToyotaPartsNow Specialist
    See expert answers on similar Crankshaft Position Sensor
    Q:
    What is the first step to service the Camshaft Position Sensor for the 2000 Toyota Corolla? Posted by Customer
    A:
    Disconnect the camshaft position sensor connector.
    Posted by ToyotaPartsNow Specialist
    See expert answers on similar Camshaft Position Sensor
    Q:
    What is the first step to service the Camshaft Position Sensor for the 2002 Toyota Celica? Posted by Customer
    A:
    Remove the No.2 cylinder head cover.
    Posted by ToyotaPartsNow Specialist
    See expert answers on similar Camshaft Position Sensor
    Q:
    What is the next step after disconnecting the crank position sensor connector for the 2009 Toyota Corolla? Posted by Customer
    A:
    Remove the bolt and the crank position sensor itself.
    Posted by ToyotaPartsNow Specialist
    See expert answers on similar Crankshaft Position Sensor
    Q:
    How do you install the No. 1 crank position sensor on the intake camshaft side for the 2009 Toyota Corolla? Posted by Customer
    A:
    Install the No. 1 crank position sensor with the bolt, ensuring a torque of 10 Nm (102 kgf-cm, 7 ft-lbf), and then connect the No. 1 crank position sensor connector.
    Posted by ToyotaPartsNow Specialist
    See expert answers on similar Camshaft Position Sensor
    Q:
    How do you install the camshaft position sensor for the 2009 Toyota Camry? Posted by Customer
    A:
    Install the camshaft position sensor using the bolt, tightening it to a torque of 9.0 Nm (90 kgf-cm, 80 in-lbf).
    Posted by ToyotaPartsNow Specialist
    See expert answers on similar Camshaft Position Sensor
    Q:
    What is the next step after disconnecting the connector for the 2001 Toyota Avalon? Posted by Customer
    A:
    Remove the bolt and the crankshaft position sensor.
    Posted by ToyotaPartsNow Specialist
    See expert answers on similar Crankshaft Position Sensor
    Q:
    What is the installation process for the crankshaft position sensor for the 2005 Toyota Highlander? Posted by Customer
    A:
    Place the sensor and clamp back with the bolt, ensuring a torque of 9.0 N.m (92 kgf.cm, 80 in.lbf), and reconnect the sensor connector.
    Posted by ToyotaPartsNow Specialist
    See expert answers on similar Crankshaft Position Sensor
    Q:
    What is the first step to remove the Crankshaft Position Sensor from the 1AR-FE engine control system for the 2009 Toyota Highlander? Posted by Customer
    A:
    Remove the front fender apron seal RH.
    Posted by ToyotaPartsNow Specialist
    See expert answers on similar Crankshaft Position Sensor
    Q:
    What is the final step in the process for the 2006 Toyota Highlander? Posted by Customer
    A:
    Reinstall the engine under cover No.1 by installing the 6 screws and 2 clips.
    Posted by ToyotaPartsNow Specialist
    See expert answers on similar Crankshaft Position Sensor
    Q:
    What is the procedure for installation for the 2002 Toyota Celica? Posted by Customer
    A:
    Installation follows the reverse order of removal.
    Posted by ToyotaPartsNow Specialist
    See expert answers on similar Crankshaft Position Sensor
    Q:
    What is the first step to service the Crankshaft Position Sensor for the 2001 Toyota Corolla? Posted by Customer
    A:
    First, remove the intake manifold.
    Posted by ToyotaPartsNow Specialist
    See expert answers on similar Crankshaft Position Sensor
    Q:
    What needs to be removed after disconnecting the battery for the 2009 Toyota Camry? Posted by Customer
    A:
    Remove the front right wheel and the front right fender apron.
    Posted by ToyotaPartsNow Specialist
    See expert answers on similar Crankshaft Position Sensor
    Q:
    What is the final step after installing the sensor for the 2007 Toyota Highlander? Posted by Customer
    A:
    Reinstall the air cleaner assembly.
    Posted by ToyotaPartsNow Specialist
    See expert answers on similar Camshaft Position Sensor
    Q:
    What should be installed after the camshaft position sensor for the 2010 Toyota Camry? Posted by Customer
    A:
    Install the air cleaner case sub-assembly, air cleaner cap sub-assembly, and air cleaner inlet assembly.
    Posted by ToyotaPartsNow Specialist
    See expert answers on similar Camshaft Position Sensor
    Q:
    What is the first step to service the Camshaft Position Sensor for the 2009 Toyota Highlander? Posted by Customer
    A:
    Remove the No. 1 engine cover sub-assembly.
    Posted by ToyotaPartsNow Specialist
    See expert answers on similar Camshaft Position Sensor
    Q:
    What is the first step to service the Crankshaft Position Sensor for the 2000 Toyota Corolla? Posted by Customer
    A:
    First, remove the intake manifold.
    Posted by ToyotaPartsNow Specialist
    See expert answers on similar Crankshaft Position Sensor
    Q:
    What is the first step to service the Camshaft Position Sensor for the 2006 Toyota Highlander? Posted by Customer
    A:
    First, remove the air cleaner assembly.
    Posted by ToyotaPartsNow Specialist
    See expert answers on similar Camshaft Position Sensor
    Q:
    What components need to be removed next for the 2008 Toyota Highlander? Posted by Customer
    A:
    Remove the cool air intake duct seal, battery, No. 2 air cleaner inlet, and No. 1 air cleaner inlet.
    Posted by ToyotaPartsNow Specialist
    See expert answers on similar Crankshaft Position Sensor
    Q:
    What is the first step to service the Crankshaft Position Sensor for the 2007 Toyota Highlander? Posted by Customer
    A:
    Remove the engine under cover No.1 by taking out the 6 screws and 2 clips.
    Posted by ToyotaPartsNow Specialist
    See expert answers on similar Crankshaft Position Sensor
    Q:
    What is the first step to remove the Camshaft Position Sensor on a 2AZ-FE engine for the 2009 Toyota Matrix? Posted by Customer
    A:
    First, remove the No. 1 engine cover sub-assembly.
    Posted by ToyotaPartsNow Specialist
    See expert answers on similar Camshaft Position Sensor
    Q:
    What should be checked after reconnecting the battery terminal for the 2008 Toyota RAV4? Posted by Customer
    A:
    Check for engine oil leakage.
    Posted by ToyotaPartsNow Specialist
    See expert answers on similar Camshaft Position Sensor
    Q:
    What is the next step after installing the V-Ribbed Belt components for the 2010 Toyota Camry? Posted by Customer
    A:
    Install the Service Plug Grip, connect the cable to the negative battery terminal, and add engine coolant.
    Posted by ToyotaPartsNow Specialist
    See expert answers on similar Crankshaft Position Sensor
    Q:
    What is the final step in removing the crankshaft position sensor for the 2009 Toyota Matrix? Posted by Customer
    A:
    Remove the bolt and the crankshaft position sensor.
    Posted by ToyotaPartsNow Specialist
    See expert answers on similar Crankshaft Position Sensor
    Q:
    What should be checked before installing the new sensor for the 2006 Toyota RAV4? Posted by Customer
    A:
    Ensure the O-ring is not cracked or jammed.
    Posted by ToyotaPartsNow Specialist
    See expert answers on similar Crankshaft Position Sensor
    Q:
    What is the next step after the sensor installation for the 2008 Toyota RAV4? Posted by Customer
    A:
    Install the generator assembly onto the vehicle.
    Posted by ToyotaPartsNow Specialist
    See expert answers on similar Crankshaft Position Sensor
    Q:
    What is the next step after connecting the sensor connector for the 2007 Toyota RAV4? Posted by Customer
    A:
    Reinstall the air cleaner cap.
    Posted by ToyotaPartsNow Specialist
    See expert answers on similar Camshaft Position Sensor
    Q:
    What should be done after removing the fender apron seal for the 2003 Toyota Sienna? Posted by Customer
    A:
    Disconnect the crankshaft position sensor connector.
    Posted by ToyotaPartsNow Specialist
    See expert answers on similar Crankshaft Position Sensor
    Q:
    What is the first step to service the Crankshaft Position Sensor for the 2006 Toyota Sienna? Posted by Customer
    A:
    Remove the front fender apron seal on the right-hand side by using a clip remover to take out the clip and then removing the 2 bolts.
    Posted by ToyotaPartsNow Specialist
    See expert answers on similar Crankshaft Position Sensor
    Q:
    How do you install the crankshaft position sensor for the 2008 Toyota Sienna? Posted by Customer
    A:
    Install the sensor using the bolt, ensuring a torque of 9.0 Nm (92 kgf-cm, 80 in-lbf).
    Posted by ToyotaPartsNow Specialist
    See expert answers on similar Crankshaft Position Sensor
    Q:
    How should the new Crankshaft Position Sensor be installed for the 2004 Toyota Solara? Posted by Customer
    A:
    Ensure it is torqued to 9.0 N.m (92 kgf.cm, 80 in.lbf).
    Posted by ToyotaPartsNow Specialist
    See expert answers on similar Crankshaft Position Sensor
    Q:
    What is the final step after reinstalling the generator assembly for the 2007 Toyota RAV4? Posted by Customer
    A:
    Reconnect the cable to the negative battery terminal and check for any engine oil leakage.
    Posted by ToyotaPartsNow Specialist
    See expert answers on similar Crankshaft Position Sensor
    Q:
    What is the first step to install the Camshaft Position Sensor for the 2AZ-FE Engine Control System for the 2008 Toyota Solara? Posted by Customer
    A:
    Apply a light coat of engine oil to the O-ring on the sensor.
    Posted by ToyotaPartsNow Specialist
    See expert answers on similar Camshaft Position Sensor
    Q:
    What is the first step to service the crankshaft position sensor for the 2007 Toyota Sienna? Posted by Customer
    A:
    First, remove the compressor and magnetic clutch.
    Posted by ToyotaPartsNow Specialist
    See expert answers on similar Crankshaft Position Sensor
    Q:
    What is the next step after securing the new sensor for the 2002 Toyota Tacoma? Posted by Customer
    A:
    Reconnect the sensor connector to the bracket and the sensor.
    Posted by ToyotaPartsNow Specialist
    See expert answers on similar Crankshaft Position Sensor
    Q:
    What is the next step after installing the new sensor for the 2003 Toyota Tacoma? Posted by Customer
    A:
    Reconnect the sensor connector.
    Posted by ToyotaPartsNow Specialist
    See expert answers on similar Camshaft Position Sensor
    Q:
    What are the final steps after installing the Crankshaft Position Sensor for the 2006 Toyota Solara? Posted by Customer
    A:
    Reinstall the front fender apron seal and the engine under cover on the right-hand side.
    Posted by ToyotaPartsNow Specialist
    See expert answers on similar Crankshaft Position Sensor
    Q:
    What should be done after removing the fender apron seal for the 2001 Toyota Sienna? Posted by Customer
    A:
    Disconnect the crankshaft position sensor connector and remove the bolt along with the crankshaft position sensor.
    Posted by ToyotaPartsNow Specialist
    See expert answers on similar Crankshaft Position Sensor
    Q:
    What should be installed after the Crankshaft Position Sensor for the 2008 Toyota Solara? Posted by Customer
    A:
    Next, install the Front Fender Apron Seal RH.
    Posted by ToyotaPartsNow Specialist
    See expert answers on similar Crankshaft Position Sensor
    Q:
    How should the new camshaft position sensors be installed for the 2001 Toyota Sienna? Posted by Customer
    A:
    Place new O-rings on the new camshaft position sensors, secure them with bolts, and torque to 8.0 N.m (80 kgf.cm, 69 in.lbf) before reconnecting the sensor connectors.
    Posted by ToyotaPartsNow Specialist
    See expert answers on similar Camshaft Position Sensor
    Q:
    What is the first step to replace the Crankshaft Position Sensor for the 2003 Toyota Tacoma? Posted by Customer
    A:
    First, remove the engine under cover.
    Posted by ToyotaPartsNow Specialist
    See expert answers on similar Crankshaft Position Sensor
    Q:
    What should be done after removing the front fender apron seal for the 2007 Toyota Solara? Posted by Customer
    A:
    Disconnect the sensor connector, then remove the bolt, clamp, and sensor.
    Posted by ToyotaPartsNow Specialist
    See expert answers on similar Crankshaft Position Sensor
    Q:
    What is the final step in the process for the 2002 Toyota Tacoma? Posted by Customer
    A:
    Reinstall the No.2 timing belt cover.
    Posted by ToyotaPartsNow Specialist
    See expert answers on similar Camshaft Position Sensor
    Q:
    What is the first step to replace the Crankshaft Position Sensor for the 2000 Toyota Tacoma? Posted by Customer
    A:
    First, remove the engine under cover.
    Posted by ToyotaPartsNow Specialist
    See expert answers on similar Crankshaft Position Sensor
    Q:
    What should be done after removing the engine under cover for the 2001 Toyota Tacoma? Posted by Customer
    A:
    Disconnect the sensor connector and remove the bolt and sensor.
    Posted by ToyotaPartsNow Specialist
    See expert answers on similar Crankshaft Position Sensor
    Q:
    What is the first step to replace the Camshaft Position Sensor for the 2005 Toyota Solara? Posted by Customer
    A:
    First, remove the air cleaner assembly.
    Posted by ToyotaPartsNow Specialist
    See expert answers on similar Camshaft Position Sensor
    Q:
    What should be done after removing the throttle body for the 2000 Toyota Tacoma? Posted by Customer
    A:
    Next, disconnect the sensor connector and remove the bolt and sensor.
    Posted by ToyotaPartsNow Specialist
    See expert answers on similar Camshaft Position Sensor
    Q:
    What is the next step after installing the new sensor for the 2001 Toyota Tacoma? Posted by Customer
    A:
    Reconnect the sensor connector.
    Posted by ToyotaPartsNow Specialist
    See expert answers on similar Camshaft Position Sensor
    Q:
    How should the new crankshaft position sensor be installed for the 2004 Toyota Sienna? Posted by Customer
    A:
    Ensure it is torqued to 8.0 N.m (80 kgf.cm, 71 in.lbf).
    Posted by ToyotaPartsNow Specialist
    See expert answers on similar Crankshaft Position Sensor
    Q:
    How should the new crankshaft position sensor be installed for the 2005 Toyota Sienna? Posted by Customer
    A:
    Ensure it is torqued to 8.0 N.m (80 kgf.cm, 71 in.lbf).
    Posted by ToyotaPartsNow Specialist
    See expert answers on similar Crankshaft Position Sensor
    Q:
    What is the final step after installing the sensor for the 2006 Toyota Solara? Posted by Customer
    A:
    Reinstall the air cleaner assembly and check the connection of the vacuum hose.
    Posted by ToyotaPartsNow Specialist
    See expert answers on similar Camshaft Position Sensor
    Q:
    What is the first step to service the Camshaft Position Sensor for the 2007 Toyota Solara? Posted by Customer
    A:
    Remove the air cleaner assembly.
    Posted by ToyotaPartsNow Specialist
    See expert answers on similar Camshaft Position Sensor
    If you have any questions about this product, please don't hesitate to ask us. We will be happy to help you!

OEM Toyota 90080-19014, Excellent Performance and Perfect Fitment

To ensure reliability, purchase Toyota part # 90080-19014 Sensor, Camshaft Position. It is sometimes referred to as Toyota Camshaft Position Sensor, Toyota Crankshaft Position Sensor. OEM parts are unrivaled in terms of quality. They go through extensive quality control inspections and are produced in accordance with Toyota's official factory specifications. All of these remove defects and imperfections. So you can relax knowing they promise exceptional lifespan and flawless fitment.

ToyotaPartsNow.com is a leading supplier of genuine Toyota parts such as Toyota 9008019014 Sensor, Camshaft Position. At ToyotaPartsNow.com, we have a wide variety of OEM Toyota parts available at competitive prices. Our comprehensive range of genuine Toyota parts come with a manufacturer's warranty for peace of mind. We also prioritize customer satisfaction, providing a hassle-free return policy and expedited delivery for all our parts. For detailed Toyota parts information, click here.
Choose ToyotaPartsNow for discounted prices, exceptional service and fast delivery