- Hello
- Login or Register
- Quick Links
- Live Chat
- Track Order
- Parts Availability
- RMA
- Help Center
- Contact Us
- Shop for
- Toyota Parts
- Scion Parts
Popular OEM Toyota Venza Parts
- Body & Hardware Parts View More >
- Electrical Parts View More >
- Engine Parts View More >
- Air & Fuel Delivery Parts View More >
- Belts & Cooling Parts View More >
- Steering Parts View More >
- Suspension Parts View More >
- Emission Control & Exhaust Parts View More >
- A/C & Heating Parts View More >
- Charging & Starting Parts View More >
- Brakes Parts View More >
- Headlights & Lighting Parts View More >
Why Buy Genuine Toyota Venza Parts From ToyotaPartsNow.com
ToyotaPartsNow.com highlights the reliability of OEM Toyota Venza parts right at your fingertips. Our skilled staff assists customers in selecting the right Toyota Venza parts and provides expert help with any unique part requests. At ToyotaPartsNow.com, we make all Toyota Venza parts available to you quickly and efficiently through our fast order and reliable ship process. Our service is designed to make finding the correct Toyota Venza parts fast and easy whether you are an amateur or a professional. We offer access to a broad inventory that includes a wide range of Toyota years and variants. Affordable prices, quick processing and professional service are also our specialty to ensure your car remains in top condition with OEM Toyota Venza parts. You can feel confident shopping with us because all Toyota Venza parts you purchase from our store are of genuine quality and built to last.
Since its 2008 market release the Toyota Venza mid-size crossover SUV has undergone substantial changes while its product development followed Toyota's Calty Design Studios' design principles. The first generation Toyota Venza used K-chassis construction and provided customers with a choice between its 2.7L four-cylinder 1AR-FE engine and 3.5L V6 2GR-FE engine which combined with a six-speed automatic transmission to deliver balanced road performance at 21 city mpg and 29 highway mpg for the four-cylinder model. The Toyota Venza introduced its second generation in 2021 as a hybrid-only model that now comes with the(all-wheel-drive system improving driving abilities and fuel economy. Brand XU80 Harrier series from Japan serves as the base for this version and introduces advanced safety features which include traction control and stability control to provide secure driving practices. Through the combination of a 2.5L four-cylinder engine and electric motors the Toyota Venza achieves power delivery efficiency. A CVT operating in a seamless manner provides an easy driving experience by enabling prompt acceleration together with decreased engine noise levels. All Toyota drivers benefit from reliable performance because the company ensures genuine parts meet exact factory requirements throughout the Venza model.
The Toyota Venza has a number of problems, which can be classified according to their location in the car and their areas of concern. To begin with the Toyota Venza electrical system can be faulty with the factory alarm which may sound at the wrong time. This problem is usually related to the defective Toyota Venza hood latch assembly that can be easily fixed to patch the alarm behavior. Occurrence of a large oil leak with the Toyota Venza is due to the fracture in a VVT-i oil line, and becomes an issue to the engine system. Such a serious leakage might prompt low oil pressure messages and if ignored, it may cause serious engine damage. In order to rectify this, the faulty oil line will need to be repaired and the engine compartment cleaned. Finally, the Toyota Venza cooling system may be affected by a leakage of the water pump and as a result, there may be overheating and coolant may leak inside the vehicle. The water pump mechanical seal may leak and therefore the water pump and water pump gasket will need to be replaced to restore the cooling system. All these problems shed light on the need to conduct early repairs and provide timely updates in the form of replacing parts with OEM Toyota parts to maintain the performance of the Venza.
Toyota Venza Parts and Q&A
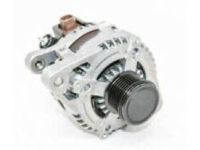
- Q: How to install the alternator assembly on Toyota Venza?A:Installation of the generator assembly; Use 2 bolts to install 52 Nm. Connect the terminal cap, adjoin the wire harness clamp bracket with a 10 Nm bolt, the generator wire with a 9.8 Nm nut. Install the V-ribbed belt, engine cover, and negative battery terminal connection.
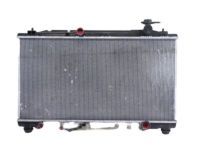
- Q: How to install the radiator assembly on Toyota Venza?A:To install the radiator assembly, attach the fan assembly, lower supports, and cushions. Connect wire harness clamps and install the cooler condenser with bolts. Install the upper support, connect hoses, and assemble the hood lock, horns, grille, and air cleaner. Add coolant, check for leaks, and install under covers.
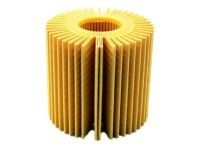
- Q: How to Properly Replace an Oil Filter on Toyota Venza?A:To change the oil filter, drain the engine, take off the oil filter cap and make sure the O-ring is installed properly. Take the filter off, clean the cap and put in another filter and O-ring with the help of a special tool. Seal the cap and drain plug, pour in new oil and ensure that there are no leakages.


