×
ToyotaParts- Hello
- Login or Register
- Quick Links
- Live Chat
- Track Order
- Parts Availability
- RMA
- Help Center
- Contact Us
- Shop for
- Toyota Parts
- Scion Parts
My Garage
My Account
Cart
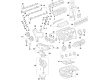
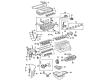
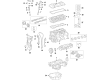
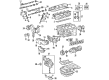
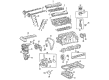
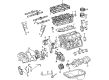
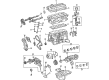
OEM Toyota Timing Cover
Engine Timing Cover- Select Vehicle by Model
- Select Vehicle by VIN
Select Vehicle by Model
orMake
Model
Year
Select Vehicle by VIN
For the most accurate results, select vehicle by your VIN (Vehicle Identification Number).
158 Timing Covers found


Toyota Cover Sub-Assembly, Timing Belt, Passenger Side Part Number: 11304-AC010
$104.51 MSRP: $146.69You Save: $42.18 (29%)Ships in 1-3 Business DaysProduct Specifications- Other Name: Cover Sub-Assembly, Timing Chain; Cover, Timing Chain Or Belt; Timing Cover Gasket; Timing Cover Seal; Timing Cover
- Manufacturer Note: (L)
- Position: Passenger Side
- Replaces: 11304-50020


Toyota Timing Cover Part Number: 11310-0T041
$445.69 MSRP: $653.17You Save: $207.48 (32%)Ships in 1-3 Business DaysProduct Specifications- Other Name: Engine Timing Cover; Front Cover; Cover Sub-Assembly, Timing Chain Or Belt
- Replaces: 11310-0T040, 11310-37010


Toyota Front Cover Part Number: 11310-0T040
$445.69 MSRP: $653.17You Save: $207.48 (32%)Ships in 1-3 Business DaysProduct Specifications- Other Name: Cover Assembly, Timing Chain Or Belt; Timing Cover; Cover Sub-Assembly, Timing Chain Or Belt
- Manufacturer Note: (L)
- Replaced by: 11310-0T041


Toyota Timing Cover Part Number: 11310-0P050
$691.88 MSRP: $1013.96You Save: $322.08 (32%)Ships in 1-3 Business DaysProduct Specifications- Other Name: Cover Assembly, Timing Chain Or Belt; Engine Timing Cover; Engine Oil Pump; Front Cover; Cover Assembly, Timing Chain


Toyota Timing Cover Part Number: 11310-31014
$703.92 MSRP: $1031.60You Save: $327.68 (32%)Ships in 1-3 Business DaysProduct Specifications- Other Name: Cover Assembly, Timing Chain Or Belt; Engine Timing Cover; Engine Oil Pump; Front Cover
- Replaces: 11310-31013, 11310-0P030


Toyota Cover, Timing Belt, Upper Inner Part Number: 11323-20030
$175.20 MSRP: $250.15You Save: $74.95 (30%)Ships in 1-2 Business DaysProduct Specifications- Other Name: Timing Cover
- Position: Upper Inner


Toyota Timing Cover Part Number: 11310-0H011
$237.76 MSRP: $339.47You Save: $101.71 (30%)Ships in 1-3 Business DaysProduct Specifications- Other Name: Cover Assembly, Timing Chain Or Belt; Engine Timing Cover; Front Cover; Cover Sub-Assembly, Timing Chain Or Belt
- Replaces: 11310-28071


Toyota Timing Cover Part Number: 11310-28081
$247.20 MSRP: $352.95You Save: $105.75 (30%)Ships in 1-3 Business DaysProduct Specifications- Other Name: Cover Assembly, Timing Chain Or Belt; Engine Timing Cover; Front Cover; Cover Sub-Assembly, Timing Chain Or Belt
- Replaces: 11310-28080, 11321-28030, 11310-28050


Toyota Timing Cover Part Number: 11321-88601
$296.48 MSRP: $423.31You Save: $126.83 (30%)Product Specifications- Other Name: Cover, Timing Chain; Engine Timing Cover; Front Cover; Cover Sub-Assembly, Timing Chain Or Belt
- Replaces: 11321-88600


Toyota Timing Cover Part Number: 11310-0V020
$308.95 MSRP: $441.11You Save: $132.16 (30%)Product Specifications- Other Name: Cover Assembly, Timing Chain Or Belt; Engine Timing Cover; Front Cover; Cover Sub-Assembly, Timing Chain Or Belt; Cover Assembly, Timing Chain
- Replaces: 11310-36040, 11310-0V030, 11310-36020


Toyota Cover, Timing Belt, Lower Part Number: 11321-0A020
$50.18 MSRP: $69.84You Save: $19.66 (29%)Ships in 1 Business DayProduct Specifications- Other Name: Timing Cover
- Manufacturer Note: (L)
- Position: Lower
- Replaces: 11321-20030


Toyota Timing Cover Part Number: 11325-46042
$55.91 MSRP: $77.83You Save: $21.92 (29%)Ships in 1-3 Business DaysProduct Specifications- Other Name: Cover, Timing Belt; Front Cover; Inner Cover; Inner Timing Cover
- Replaces: 11325-46041, 11325-46040


Toyota Timing Cover Part Number: 11325-46032
$56.27 MSRP: $78.33You Save: $22.06 (29%)Ships in 1-2 Business DaysProduct Specifications- Other Name: Cover, Timing Belt; Front Cover; Inner Cover
- Replaces: 11325-46031, 11325-46030


Toyota Timing Cover, Lower Part Number: 11321-62900
$55.56 MSRP: $77.32You Save: $21.76 (29%)Ships in 1-3 Business DaysProduct Specifications- Other Name: Cover, Timing Belt; Engine Timing Cover, Lower; Lower Cover; Lower Timing Cover; Cover Sub-Assembly, Timing Chain Or Belt
- Position: Lower


Toyota Timing Cover Part Number: 11303-46011
$63.62 MSRP: $89.30You Save: $25.68 (29%)Product Specifications- Other Name: Cover Sub-Assembly, Timing Chain; Front Cover; Outer Cover; Cover Sub-Assembly, Timing Belt


Toyota Timing Cover, Lower Part Number: 11302-74040
$70.61 MSRP: $99.11You Save: $28.50 (29%)Ships in 1-3 Business DaysProduct Specifications- Other Name: Cover Sub-Assembly, Timing Chain; Engine Timing Cover, Lower; Front Cover; Lower Timing Cover; Outer Timing Cover; Cover Sub-Assembly, Timing Chain Or Belt
- Position: Lower


Toyota Timing Cover, Upper Outer Part Number: 11303-74050
$74.05 MSRP: $103.95You Save: $29.90 (29%)Ships in 1-3 Business DaysProduct Specifications- Other Name: Cover Sub-Assembly, Timing Chain; Engine Timing Cover, Outer Upper; Front Cover; Upper Timing Cover; Outer Timing Cover; Cover, Timing Chain Or Belt
- Position: Upper Outer


Toyota Timing Cover, Upper Outer Part Number: 11303-20040
$91.00 MSRP: $127.73You Save: $36.73 (29%)Ships in 1-3 Business DaysProduct Specifications- Other Name: Cover Sub-Assembly, Timing Chain; Engine Timing Cover, Outer Upper; Front Cover; Upper Timing Cover; Outer Timing Cover; Cover, Timing Belt
- Manufacturer Note: (J)
- Position: Upper Outer
- Replaces: 11303-0A031, 11303-0A030


Toyota Timing Cover, Driver Side Part Number: 11308-AC010
$102.25 MSRP: $143.53You Save: $41.28 (29%)Ships in 1-2 Business DaysProduct Specifications- Other Name: Cover Sub-Assembly, Timing Chain; Engine Timing Cover, Left Upper; Front Cover; Upper Timing Cover; Outer Timing Cover; Cover Sub-Assembly, Timing Belt, Driver Side
- Manufacturer Note: (L)
- Position: Driver Side
- Replaces: 11308-50030


Toyota Cover, Timing Belt Part Number: 11302-46031
$63.86 MSRP: $89.64You Save: $25.78 (29%)Product Specifications- Other Name: Cover Sub-Assembly, Timing Chain; Timing Cover
| Page 1 of 8 |Next >
1-20 of 158 Results
Toyota Timing Cover
OEM parts deliver unmatched quality you can rely on. They pass extensive quality control inspections. Toyota produces them to the official factory specifications. This process helps prevent defects and imperfections. So you can get exceptional lifespan and a flawless fit. Need new OEM Toyota Timing Cover? You'll love our wide selection of genuine options. Shop in minutes and skip the hunt. Our prices are unbeatable, you'll save time and money. It's easy to shop and find the right piece. Our committed customer service team gives professional help from start to finish. Every part includes a manufacturer's warranty. We ship quickly, your parts will arrive fast at your door.
Toyota Timing Cover prevents the entry of grit into the timing system, as well as protects the engine rhythm. Growing out of the frugality of 1930s Japan, today Toyota is stamping on the lines that pursue zero waste and celebrate swift problem solving. The lean assembly is less expensive, but the company continues to invest effort in hybrid solutions, such as a better Hybrid Synergy Drive that can trot over miles on electricity. The same TNGA chassis also sheds weight, lowers the center of gravity, and tightens the handling such that even ordinary commuters will feel planted. Drivers remain loyal to Toyota since the cars tolerate maltreatment, consume little fuel, and seldom leave the owner in shock upon realizing that the car has failed. International coverage implies that components will be ready nearly everywhere, and the distance will be stacked miles ahead of competitors. Timing Cover is a part that consists of bolts placed over the crank snout and cam gears, covering them against road grit, puddles, and loose strands of the belt. Fabricated of cast aluminum or plastic molding, the Timing Cover works with a rubber gasket to trap in oil to keep the chain slick and silent as well as high tension at high revolutions. Should the Timing Cover crack or twist, the oil dumps, heat, and valves can hit the pistons within a few seconds. By replacing the Timing Cover prior to such eventualities, every four-stroke cycle is safeguarded and the lifespan that owners of Toyota desire is preserved. That ounce of prevention is much cheaper than the re-creation of a bent valve train, cementing Toyota reliability over the following hundred thousand miles.
Toyota Timing Cover Parts and Q&A
- Q: How to remove and replace the timing cover on Toyota 4Runner?A:Special Service Tool 09226-10010 coupled with a hammer needs to be used for installing the timing chain cover oil seal properly before greening the lip of the seal with MP grease. Begin by clearing all old packing (FIPG) materials while maintaining contact surfaces of the timing chain cover along with cylinder head and cylinder block free from contamination. The LH cylinder head requires a new O-ring while continuous threads of Toyota Genuine Seal Packing Black or Three Bond 1207B and equivalent materials run at specified locations. Seal Packing 1282B and Three Bond 1282B or equivalent must be used when working on the water pump part. Apply the seal packing on the timing chain cover only within three minutes before installation then secure the fasteners within 15 minutes while avoiding packing at the designated area. Attach the oil pump drive rotor to the crankshaft timing gear before using 24 bolts along with 2 nuts to fasten it securely with a 23 Nm (235 kgf-cm, 17 ft-lbf) torque specification. The oil filter bracket sub-assembly requires new gasket installation before securing it with 3 bolts and 2 nuts, torque should be set to 19 Nm (194 kgf-cm, 14 ft-lbf). Install the VVT sensor as well as the camshaft timing oil control valve assembly before positioning both cylinder head cover sub-assemblies (LH and RH). Finish the installation by tightening the ignition coil assembly to 10 Nm (102 kgf-cm, 7 ft-lbf) followed by the intake air surge tank then add the oil sub-assembly and strainer sub-assembly of No.2 oil before securing the crankshaft pulley and sub-assemblies of No.2 idler pulley along with the V-ribbed belt tensioner and cooler compressor assembly but retain the generator assembly and vane pump based on need. Install the water inlet followed by the oil level gauge guide and air cleaner assembly and connect the ventilation hose No.2. Fully tighten all components after you install the fan with fluid coupling and the fan and generator V belt. Secure the radiator support seal upper while installing the battery together with the differential carrier assembly front and power steering link assembly. End your task by adding engine oil and coolant while inspecting for leaks before installing the V-bank cover along with its two nuts tightened to 7.5 Nm (76 kgf-cm, 66 in-lbf).
- Q: How to replace the timing cover or timing chain case oil seal on Toyota Camry?A:The replacement process for timing gear case or timing chain case oil seal begins by dismissing bolts from the front wheel RH and engine moving control rod with bracket, front fender apron seal RH and engine cover sub-assembly No.1. The procedure starts by removing engine mounting stay No.2 RH and engine mounting bracket No.2 RH. Then the sequence continues with fan and generator V belt before removing them both. Special Service Tool enables the removal of the crankshaft pulley bolt along with its pulley after bolt loosening. The oil seal on the timing gear case or timing chain case should be removed using Special Service Tool: 09308-10010, 09950-60010 (09951-00200). The installation procedure begins with applying MP grease to the lip of a new oil seal while keeping it clear of external contaminants before using Special Service Tool: 09223-22010 and a hammer to tap the oil seal until the surface reaches the rear oil seal retainer edge followed by wiping off excess grease from the crankshaft. Install the crankshaft pulley by positioning its set key into the key groove then securing it with the pulley bolt at 170 Nm (1,733 kgf-cm, 125 ft. lbs.). Follow with installation of the fan and generator V belt along with engine mounting bracket No.2 RH and engine mounting stay No.2 RH according to their respective torque specifications of 52 Nm and 64 Nm. The installation process requires attachment of the engine moving control rod with bracket through its 3 bolts to a torque of 64 Nm (653 kgf-cm, 47 ft. lbs.). Afterward replace the front wheel RH and verify there are no engine oil leaks.


Related Toyota Parts
 Toyota Timing Chain
 Toyota Camshaft
 Toyota Timing Belt
 Toyota Crankshaft Pulley
 Toyota Engine Mount
 Toyota Timing Chain Tensioner
 Toyota Balance Shaft Gear
 Toyota Cam Gear
 Toyota Camshaft Seal
 Toyota Crankshaft Seal
 Toyota Rod Bearing
 Toyota Spool Valve
Browse Toyota Timing Cover by Models
Tacoma 4Runner Camry Tundra Corolla RAV4 Highlander Prius Sienna Land Cruiser Pickup FJ Cruiser 86 Sequoia T100 Avalon Celica Supra Yaris Matrix MR2 Solara Venza GR86 Echo C-HR Cressida Grand Highlander Paseo Prius Prime Corolla Cross Corolla iM Crown Crown Signia GR Corolla MR2 Spyder Prius V Starlet Tercel Van Yaris iA Prius Plug-In GR Supra Prius AWD-e RAV4 Prime