×
ToyotaParts- Hello
- Login or Register
- Quick Links
- Live Chat
- Track Order
- Parts Availability
- RMA
- Help Center
- Contact Us
- Shop for
- Toyota Parts
- Scion Parts
My Garage
My Account
Cart
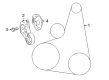
OEM Toyota Drive Belt
Serpentine Belt- Select Vehicle by Model
- Select Vehicle by VIN
Select Vehicle by Model
orMake
Model
Year
Select Vehicle by VIN
For the most accurate results, select vehicle by your VIN (Vehicle Identification Number).
192 Drive Belts found


Toyota Serpentine Belt Part Number: 90916-A2037
$61.13 MSRP: $85.81You Save: $24.68 (29%)Ships in 1-3 Business DaysProduct Specifications- Other Name: Belt, V-Ribbed; Serpentine Belt Drive Kit; Drive Belt; V-Belt; Belt, V(For Fan & Alternator)
- Replaces: 90916-02768, 90916-A2025


Toyota Serpentine Belt Part Number: 90916-A2016
$34.76 MSRP: $48.39You Save: $13.63 (29%)Ships in 1-3 Business DaysProduct Specifications- Other Name: Belt, V-Ribbed; Serpentine Belt Drive Kit; Accessory Drive Belt; Drive Belt; V-Belt; Belt, V(For Fan & Alternator)


Toyota Serpentine Belt Part Number: 90916-A2033
$63.03 MSRP: $88.48You Save: $25.45 (29%)Product Specifications- Other Name: Belt, V-Ribbed; Serpentine Belt Drive Kit; Accessory Drive Belt; Drive Belt; V-Belt; Belt, V(For Fan & Alternator)
- Manufacturer Note: (L)
- Replaces: 90916-02680, 90916-A2014, 90916-A2023, 90916-02759


Toyota Power Steering Belt Part Number: 90080-91212
$16.48 MSRP: $22.94You Save: $6.46 (29%)Ships in 1-2 Business DaysProduct Specifications- Other Name: Belt, V-Ribbed; Accessory Drive Belt; Serpentine Belt Drive Kit; Serpentine Belt; V-Belt; Belt, V(For Vane Pump); Drive Belt
- Manufacturer Note: L=880
- Replaces: 90080-91088, 99364-90880, 90080-91088-83


Toyota Belt, V(For Fan & Alternator) Part Number: 90916-02585
$47.91 MSRP: $66.69You Save: $18.78 (29%)Ships in 1-2 Business DaysProduct Specifications- Other Name: Belt, V-Ribbed; Serpentine Belt Drive Kit; Accessory Drive Belt; Serpentine Belt; Drive Belt; V-Belt
- Manufacturer Note: BANDO


Toyota Belt, V(For Fan & Alternator) Part Number: 90916-A2027
$29.15 MSRP: $40.57You Save: $11.42 (29%)Ships in 1 Business DayProduct Specifications- Other Name: Belt, V-Ribbed; Serpentine Belt Drive Kit; Serpentine Belt; Drive Belt; V-Belt


Toyota Serpentine Belt Part Number: 90916-A2001
$48.03 MSRP: $66.85You Save: $18.82 (29%)Ships in 1-3 Business DaysProduct Specifications- Other Name: Belt, V-Ribbed; Serpentine Belt Drive Kit; Accessory Drive Belt; Drive Belt; V-Belt; Alternator Belt; Belt, V(For Fan & Alternator)
- Manufacturer Note: L=2120


Toyota Serpentine Belt Part Number: 90916-A2015
$52.57 MSRP: $73.17You Save: $20.60 (29%)Ships in 1-3 Business DaysProduct Specifications- Other Name: Belt, V-Ribbed; Serpentine Belt Drive Kit; Accessory Drive Belt; Drive Belt; V-Belt; Belt, V(For Fan & Alternator)
- Manufacturer Note: L=2150
- Replaces: 99367-H2150


Toyota Serpentine Belt Part Number: 90916-A2021
$25.56 MSRP: $35.58You Save: $10.02 (29%)Ships in 1-3 Business DaysProduct Specifications- Other Name: Belt, V-Ribbed; Serpentine Belt Drive Kit; Accessory Drive Belt; Drive Belt; V-Belt; Belt, V(For Fan & Alternator)
- Replaces: 90916-02667


Toyota Alternator Belt Part Number: 90080-91090
$18.15 MSRP: $25.27You Save: $7.12 (29%)Product Specifications- Other Name: Belt, V-Ribbed; Accessory Drive Belt; Serpentine Belt; Belt, V(For Fan & Alternator)
- Manufacturer Note: L=1050
- Replaces: 90080-91090-83


Toyota A/C Belt Part Number: 99364-20870-78
$16.36 MSRP: $22.77You Save: $6.41 (29%)Ships in 1-3 Business DaysProduct Specifications- Other Name: V-Belt; Accessory Drive Belt; Serpentine Belt Drive Kit; Serpentine Belt; Drive Belt
- Replaces: 90082-93002, 99364-20870


Toyota Serpentine Belt Part Number: 90916-02708
$42.05 MSRP: $58.54You Save: $16.49 (29%)Ships in 1 Business DayProduct Specifications- Other Name: Belt, V-Ribbed; Serpentine Belt Drive Kit; Accessory Drive Belt; Drive Belt; V-Belt; Alternator Belt; Belt, V(For Fan & Alternator)
- Replaces: 90916-02640


Toyota Belt, V-Ribbed Part Number: 90916-02586
$51.97 MSRP: $72.34You Save: $20.37 (29%)Ships in 1-3 Business DaysProduct Specifications- Other Name: Serpentine Belt Drive Kit; Accessory Drive Belt; Serpentine Belt; Drive Belt; V-Belt
- Replaces: 90916-02463, 90916-02231


Toyota Serpentine Belt Part Number: 90916-02705
$22.45 MSRP: $31.25You Save: $8.80 (29%)Ships in 1-3 Business DaysProduct Specifications- Other Name: Belt, V-Ribbed; Serpentine Belt Drive Kit; Accessory Drive Belt; Drive Belt; V-Belt; Alternator Belt; Belt, V(For Fan & Alternator)
- Manufacturer Note: AIR CONDITIONER COMPRESSOR-WITHOUT
- Replaces: 90916-02556, 90916-02543


Toyota Belt, V (Cooler Compressor To Crankshaft Pulley) Part Number: 99366-31040
$27.59 MSRP: $38.41You Save: $10.82 (29%)Ships in 1-2 Business DaysProduct Specifications- Other Name: Belt, V-Ribbed; Accessory Drive Belt; Serpentine Belt
- Replaces: 99366-21040-83, 99366-21040, 99366-D1040, 90080-91147


Toyota Power Steering Belt Part Number: 99364-81070
$21.86 MSRP: $30.42You Save: $8.56 (29%)Ships in 1-3 Business DaysProduct Specifications- Other Name: Belt, V-Ribbed; Accessory Drive Belt; Serpentine Belt; Belt, V(For Vane Pump)
- Manufacturer Note: L=1070
- Replaces: 99364-21070-83, 99364-21070, 90080-91126


Toyota Serpentine Belt Part Number: 90916-A2020
$24.96 MSRP: $34.75You Save: $9.79 (29%)Ships in 1-2 Business DaysProduct Specifications- Other Name: Belt, V-Ribbed; Serpentine Belt Drive Kit; Accessory Drive Belt; Drive Belt; V-Belt; Belt, V(For Fan & Alternator)
- Replaces: 90916-02646, 90916-02645


Toyota Serpentine Belt Part Number: 90916-02664
$34.28 MSRP: $47.72You Save: $13.44 (29%)Ships in 1-2 Business DaysProduct Specifications- Other Name: Belt, V-Ribbed; Serpentine Belt Drive Kit; Accessory Drive Belt; Drive Belt; V-Belt; Belt, V(For Fan & Alternator)
- Replaces: 99366-K1230


Toyota Serpentine Belt Part Number: 90080-91134-83
$28.31 MSRP: $39.40You Save: $11.09 (29%)Ships in 1-3 Business DaysProduct Specifications- Other Name: Belt, V Ribbed; Serpentine Belt Drive Kit; Accessory Drive Belt; Drive Belt; V-Belt
- Replaces: 90080-91138, 90080-91138-83, 90080-91134


Toyota Serpentine Belt Part Number: 90916-02652
$39.90 MSRP: $55.53You Save: $15.63 (29%)Ships in 1-3 Business DaysProduct Specifications- Other Name: Belt, V-Ribbed; Serpentine Belt Drive Kit; Accessory Drive Belt; Drive Belt; V-Belt; Belt, V(For Fan & Alternator)
- Manufacturer Note: 2AZ-FE,*195,BANDO
| Page 1 of 10 |Next >
1-20 of 192 Results
Toyota Drive Belt
OEM parts deliver unmatched quality you can rely on. They pass extensive quality control inspections. Toyota produces them to the official factory specifications. This process helps prevent defects and imperfections. So you can get exceptional lifespan and a flawless fit. Need new OEM Toyota Drive Belt? You'll love our wide selection of genuine options. Shop in minutes and skip the hunt. Our prices are unbeatable, you'll save time and money. It's easy to shop and find the right piece. Our committed customer service team gives professional help from start to finish. Every part includes a manufacturer's warranty. We ship quickly, your parts will arrive fast at your door.
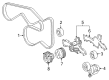
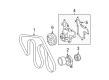
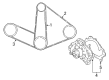
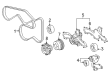
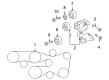
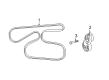
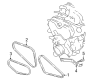
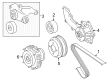
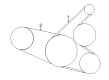
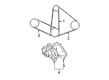
Toyota Drive Belt is applied to rotate crankshaft power to important engine components in a reliable and consistent manner. The approach that made Toyota gain worldwide loyalty was to produce cars using a lean production system that reduces waste, allows line workers to identify problems quickly, and directs the saved effort directly to improved driving experiences. In hybrids, plug-in models and traditional powered vehicles, Toyota continues improving its Hybrid Synergy Drive technology to ensure that drivers experience greater torque, reduced fuel costs, and fewer trips to the gas pump. The new TNGA platform reduces center of gravity, sharpens handling, and bakes additional crash protection, which has Toyota viewing efficiency and safety as mutually exclusive objectives. Its recent plug-in RAV4 extends the electric range to 42 miles and the gas engine just switches on when necessary, highlighting how Toyota manages to strike a balance between practicality and creativity in day-to-day commuters. Drive Belt in the engine bay, a belt that encompasses the crankshaft pulley and rotates around the engine components of the alternator, water pump, power-steering device, and A/C compressor and cuts down the frictional loss. The current serpentine Drive Belt is made of synthetic rubber and cords that run internally and do not crack or become stretchy even after over 100,000 miles of mixed idling and highway pulls. In contrast with the old V-belts which could only carry one component, one Drive Belt can hold the components and it is easy to route, minimizes the number of replacement parts, and creates more space in the engine layouts. Once wear has become evident in the form of glazing, frays or squeals, a new Drive Belt is slipped on in minutes and full component power is available again before it is too late.
Toyota Drive Belt Parts and Q&A
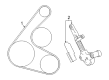
- Q: How to replace the fan and generator drive belt on Toyota 4Runner?A:For a successful fan and generator V belt replacement one must start by removing the engine under cover sub-assembly No.1 through its 4 bolt removal. The V-ribbed belt removal step begins by slowing the belt tension through counterclockwise motion on the belt tensioner. Start the V-ribbed belt tensioner assembly inspection process by rotating it clockwise followed by counter-clockwise motion to confirm no obstacles exist before performing a tensioner replacement if needed. The correct procedure for installing the new V-ribbed belt involves first turning the belt tensioner counterclockwise followed by placing it within the holes before applying a 6 mm (0.24 inch) bar to maintain tension. After installing the V-ribbed belt, users should take out the 6 mm (0.24 inch) bar as they continue to turn the belt tensioner counterclockwise. Struggling during belt installation requires position of the V-ribbed belt across all components except the P/S pump before accomplishing tension release for fitting the belt to the P/S pump. Reinstall the engine under cover sub-assembly No.1 through the 4 bolts while tightening them to 29 Nm (296 kgf-cm, 21 ft. lbs.).
- Q: How to service the drive belt on Toyota Tacoma?A:The first procedure for drive belt service involves removal of the PS pump drive belt on 2RZ-FE, 3RZ-FE, and 5VZ-FE engines followed by the engine under cover. The proper next step includes beginning by loosening the idle pulley lock nut to 39 N.m (400 kgf.cm, 29 ft.lbf) before removing the compressor drive belt through releasing the drive belt tension using the adjusting bolt. Before placing the new drive belt properly in position temporarily tighten the idle pulley lock nut to 2.5 N.m (25 kgf.cm, 22 in.lbf). You can achieve proper drive belt tension by adjusting the bolt to 160 + 25 lbf for new belts while used belts need 100 + 25 lbf. The replacement process ends by securing the idle pulley lock nut to 39 N.m (400 kgf.cm, 29 ft.lbf) and reattaching the PS pump drive belt before the engine under cover restoration.


Related Toyota Parts
 Toyota Water Pump Gasket
 Toyota Radiator
 Toyota Coolant Reservoir
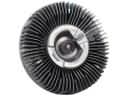 Toyota Fan Clutch
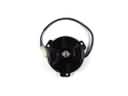 Toyota Fan Motor
 Toyota Thermostat Housing
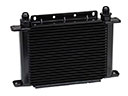 Toyota Transmission Oil Cooler
 Toyota Water Pump Pulley
 Toyota Cooling Fan Assembly
 Toyota Cooling Fan Module
 Toyota Thermostat Gasket
 Toyota Water Hose
Browse Toyota Drive Belt by Models
Tacoma 4Runner Camry Tundra Corolla RAV4 Highlander Prius Sienna Land Cruiser Pickup FJ Cruiser 86 Sequoia T100 Avalon Celica Supra Yaris Matrix MR2 Solara Venza GR86 Echo C-HR Cressida Grand Highlander Paseo Previa Corolla Cross Corolla iM Crown GR Corolla MR2 Spyder Starlet Tercel Van Yaris iA GR Supra