×
ToyotaParts- Hello
- Login or Register
- Quick Links
- Live Chat
- Track Order
- Parts Availability
- RMA
- Help Center
- Contact Us
- Shop for
- Toyota Parts
- Scion Parts
My Garage
My Account
Cart
OEM Scion xB Timing Chain
Engine Timing Chain- Select Vehicle by Model
- Select Vehicle by VIN
Select Vehicle by Model
orMake
Model
Year
Select Vehicle by VIN
For the most accurate results, select vehicle by your VIN (Vehicle Identification Number).
3 Timing Chains found


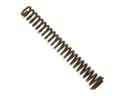
Scion xB Timing Chain Part Number: 13507-28010
$92.18 MSRP: $129.39You Save: $37.21 (29%)Ships in 1-2 Business Days

Scion xB Timing Chain Part Number: 13506-0H011
$268.87 MSRP: $383.89You Save: $115.02 (30%)Ships in 1-2 Business Days
Scion xB Timing Chain Part Number: 13506-21050
$209.11 MSRP: $298.55You Save: $89.44 (30%)Ships in 1-3 Business Days
Scion xB Timing Chain
Choose genuine Timing Chain that pass strict quality control tests. You can trust the top quality and lasting durability. Shopping for OEM Timing Chain for your Scion xB? Our website is your one-stop destination. We stock an extensive selection of genuine Scion xB parts. The price is affordable so you can save more. It only takes minutes to browse and find the exact fit. Easily add to cart and check out fast. Our hassle-free return policy will keep you stress-free. We process orders quickly for swift delivery. Your parts will arrive faster, so you can get back on the road sooner.
Scion xB Timing Chain is such a critical element that speaks volumes of the Scion xB series cars' reliability and performance. This metal chain is very important as it facilitates the respective rotation of the camshaft and crankshaft, to provide the correct valve timing for the engine. While the Scion xB Timing Chain is made in such a way that it will not easily get damaged as that of the rubber timing belts, it will also not need to be changed very often thus making the vehicle more efficient and lasting longer. Applicable for with the Scion xB with 1.5L 1NZ-FE and 2.4L 2AZ-FE engine options, the Timing Chain plays a critical role of determining a car's efficiency and power. The aspects of safety have also been included in the design of Scion xB with both generations receiving good results in safety tests. But care must be taken to ensure that the unit gets adequate lubrication and checks are made on the tensioner and the chain guides so as to avert problems that may develop in future such as rathling noises that are suggestive of wear. The major feature that makes Scion xB Timing Chain famous in the market of autos is its durability and the fact that it works as an influential parameter of improving the cars' engines' operation. In sum, the Scion xB Timing Chain is not just an element; it is a representation of the high level of engineering that is part of the Scion xB making sure that the consumer has a safe and efficient drive.
Scion xB Timing Chain Parts and Q&A
- Q: How to replace the timing chain on Scion xB?A:Start timing chain replacement by removing the right-hand front wheel and then remove the 4 nuts from the cylinder head cover No. 2. To remove Ignition Coil No. 1 start by unscrewing its 4 bolts then eliminating the 4 coils from their installation. Use 9 bolts and 2 nuts to take out the cylinder head cover sub-assembly, after both ventilation hoses are detached from their location on the cylinder head cover. Begin by removing the fan along with the generator V belt, then move on to detach the generator assembly, engine under cover RH, and drain the engine oil and coolant. Unwind the Water Pump's vane pump V belt and pulley and assembly while awaiting the removal of crankshaft damper sub-assembly which requires setting No.1 cylinder to its TDC position in compression and aligning timing marks. Use Special Service Tool: 09213-58012 (91111-50845) along with 09330-00021 to detach the pulley bolt. Special Service Tool: 09950-50013 (09951-05010, 09952-05010, 09953-05020, 09954-05021) may be required to eliminate the damper. The technician should disconnect the oil control valve connector before removing its bolt and the O-ring and valve simultaneously. Start by placing a wooden block with a jack supporting the engine and then remove the liquid tube bolt and finally unfasten the 5 bolts and nut. Disconnect the engine mounting insulator sub-assembly RH by removing the Crankshaft Position Sensor and Rh bolt fixing the liquid tube. The first step involves unrouting four bolts from the transverse engine mounting bracket before proceeding to take out the oil pump assembly and its seal. Remove the chain tensioner assembly No. 1 without turning the crankshaft while removing it. Begin by rotating the Camshaft counterclockwise to a 40 degrees position from TDC first. The tensioner plunger demands force while the application of a 2.5mm-diameter bar should secure the plunger in position. Start by removing the chain tensioner slipper alongside its partner component the chain vibration damper No. 1. Finally extract the chain sub-assembly from the location. The procedure to install the new chain sub-assembly requires setting the crankshaft at ATDC 40 to 140 degrees then aligning the intake and exhaust timing sprockets at ATDC 20 degrees before resetting the crankshaft at ATDC 20 degrees. Connect the two 9.0 Nm (92 kgf-cm, 80 in. lbs.) dampener bolts to the chain vibration damper. Align the matchmarks present on the intake camshaft timing sprocket, exhaust camshaft timing gear and crankshaft timing sprocket. Now install the chain tensioner slipper together with the chain tensioner through bolts tightened to 9.0 Nm (92 kgf-cm, 80 in. lbs.). Uninstall the bar from the chain tensioner to verify the intake and exhaust camshaft timing sprocket tension. Utilize Special Service Tool: 09950-60010 (09951-00250, 09951-00380, 09952-06010) to install the oil pump seal and afterwards install the oil pump assembly followed by the water pump assembly. First mount the engine bracket across with four 55 Nm (561 kgf-cm, 41 ft. lbs.) bolts followed by the installation of the right-hand engine mounting insulator with five bolts and specific torque nut. Follow engine oil lubrication of an integrated O-ring while torquing the camshaft timing oil control valve assembly to 7.5 Nm (76 kgf-cm, 66 in. lbs.) before installing the crankshaft position sensor and water pump pulley with Special Service Tool: 09960-10010 (09962-01000, 09963-00600), respectively The crankshaft damper sub-assembly installation requires proper alignment of the pin hole followed by use of Special Service Tools 09330-00021, 09213-58012 (91111-50845) for the pulley bolt torquing procedure at 128 Nm (1,305 kgf-cm, 95 ft. lbs.). Applicants must use seal packing (Part No. 08826-00080 or equivalent) on the cylinder head cover sub-assembly before installing its 9 bolts along with 2 seal washers and 2 nuts at 10 Nm (102 kgf-cm, 7.4 ft. lbs.) torque. Reinstallation of the ignition coil No. 1 requires 9.0 Nm (92 kgf-cm, 80 in. lbs.) at the same time as the cylinder head cover No. 2 installation. Both V belts should be readjusted before installing the generator assembly and vane pump V belt and fan V belt together. The job begins with measuring Drive Belt tension before installing the oil pan drain plug and new gasket at 38Nm (382kgf-cm/28ft.lbs.). The engine under cover requires both 5.0Nm (51kgf-cm/44in.lbs.) for bolt and nut. The last steps include engine oil addition followed by leak inspection and cooling system inspection and leak examination.