My Garage
Cart
Make sure this part fits

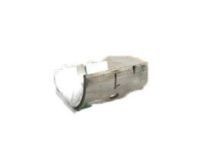
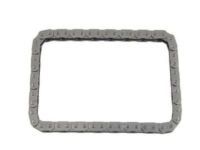
Toyota 13506-0H011
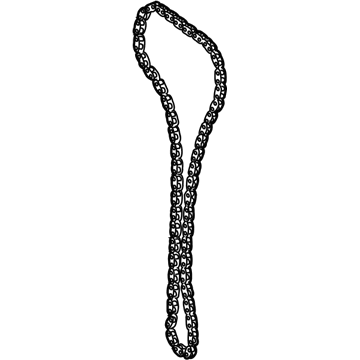
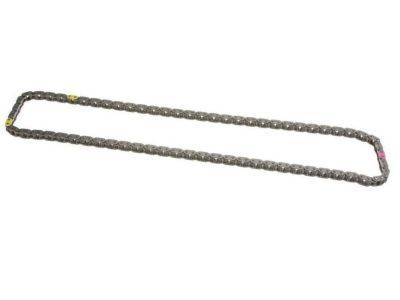
Timing Chain

2001-2015 Toyota 135060H011

Customer Questions & Expert Answers (40)
Toyota 13506-0H011 Timing Chain
  • Part Description
    Chain Sub-Assembly, Timing; Engine Timing Chain
  • Part Name Code
    13506
  • Replaces
    13506-28020, 13506-0H031, 13506-28010, 13506-28011, 13506-28021, 13506-0H010
  • Manufacturer
    Toyota
Make sure this part fits
$260.95 MSRP: $372.57
You Save: $111.62 (30%)
Ships in 1-2 Business Days
1
ADD TO CART
  • Related Parts
  • Product Specifications
  • Vehicle Fitment
  • Customer Questions & Expert Answers
  • Product Specifications

    BrandGenuine Toyota
    Part Name Code13506
    Manufacturer Part Number13506-0H011
    Part DescriptionChain Sub-Assembly, Timing; Engine Timing Chain
    Other NamesChain Sub-Assembly
    Item Dimensions6.8 x 3.4 x 1.4 inches
    Item Weight1.20 Pounds
    ConditionNew
    Fitment TypeDirect Replacement
    Replaces13506-28020, 13506-0H031, 13506-28010, 13506-28011, 13506-28021, 13506-0H010
    ManufacturerToyota
    SKU13506-0H011
    WarrantyThis genuine Toyota part is guaranteed by Toyota's factory warranty.
    Shipping & ReturnShipping Policy Return Policy
    Warning: California's Proposition 65
  • Vehicle Fitment

    Year Make Model Trim Engine
    2005-2010 Scion tCBase, Spec4 Cyl 2.4 L GAS
    2008-2015 Scion xBBase4 Cyl 2.4 L GAS
    2002-2011 Toyota CamryBase, CE, Hybrid, LE, SE, XLE4 Cyl 2.4 L FULL HYBRID EV-GAS (FHEV), 4 Cyl 2.4 L GAS
    2009-2010 Toyota CorollaXRS4 Cyl 2.4 L GAS
    2001-2007 Toyota HighlanderBase4 Cyl 2.4 L GAS
    2009-2013 Toyota MatrixS, XRS4 Cyl 2.4 L GAS
    2001-2008 Toyota RAV4Base, L, Limited, Sport4 Cyl 2.0 L GAS, 4 Cyl 2.4 L GAS, BATTERY EV (EV/BEV)
    2002-2008 Toyota SolaraSE, SE Sport, SLE, Sport4 Cyl 2.4 L GAS
  • Customer Questions & Expert Answers

    Q:
    Is 13506-0H011 a good match for my car? Posted by ToyotaPartsNow Specialist
    A:
    Find out if part number 13506-0H011 is the right fit for your car by Selecting Your Vehicle model.
    Posted by ToyotaPartsNow Specialist
    Q:
    How to remove the timing chain on Toyota Camry? Posted by Customer
    A:
    Beginning the process of timing chain removal on 2AZ-FE requires users to disconnect the negative battery cable. Begin the process by taking off both the No. 1 engine cover sub-assembly and front wheel RH and the left and right engine under covers. Prerequisite actions start with removing the front fender apron seal on the right-hand side while draining out engine oil. Start by taking off the front exhaust pipe assembly followed by the No. 2 engine mounting stay RH and engine moving control rod sub-assembly and No. 2 engine mounting bracket RH. The work sequence starts by eliminating the V-ribbed belt, generator assembly, vane pump assembly, ignition coil assembly followed by ventilator hose separations. The two bolts and two engine wires must be removed first before taking out the eight bolts and two nuts to separate the cylinder head cover sub-assembly. First place the No. 1 cylinder at TDC/Compression position before removing the crankshaft pulley and crank position sensor. Uninstall the oil pan sub-assembly after disassembling 12 bolts and 2 nuts from the interface between the crankcase and oil pan sub-assembly and using an oil pan seal cutter. When removing the No. 1 chain tensioner assembly do not rotate the crankshaft. Install engine hangers by using bolts which require 38 Nm (387 kgf-cm, 28 ft-lbf) torque level followed by sling device attachment. A chain block will lift the engine upward before removing the V-ribbed belt tensioner assembly and both the engine mounting insulator and the engine mounting bracket RH. Follow the directions to take off the timing chain cover sub-assembly and associated components which include timing chain case oil seal, No. 1 crankshaft position sensor plate, chain tensioner slipper, No. 1 chain vibration damper and timing chain guide, chain sub-assembly, crankshaft timing sprocket, and No. 2 chain sub-assembly.
    Posted by ToyotaPartsNow Specialist
    Q:
    How to replace the timing chain on Scion tC? Posted by Customer
    A:
    The first step to replace the 2AZ-FE engine timing chain requires removal of the timing chain cover oil seal through screwdriver tapping combined with hammer usage. Place the oil seal retainer on wooden blocks and use Special Service Tool: 09223-22010 together with a hammer to fasten the new oil seal until it meets the timing gear case edge. Shield the lip of the oil seal while keeping it free of foreign substances and tap straight into the seal rather than at any angle. Caretakers should use MP grease sparingly when lubricating the new oil seal lip.
    Posted by ToyotaPartsNow Specialist
    Q:
    How to replace the timing chain on Scion tC? Posted by Customer
    A:
    Begin the 2AZ-FE engine timing chain replacement by extracting the timing chain cover oil seal through screwdriver and hammer tapping motion. First set the new oil seal retainer on wood blocks and apply Special Service Tool: 09223-22010 to drive the oil seal into position by hammering until it reaches the same level as the timing gear case edge. Maintaining an uncovered lip surface while keeping foreign substances away from the area will get better results when you use this approach to install the oil seal. To achieve better sealing performance you should apply a thin layer of MP grease on the new oil seal's lip.
    Posted by ToyotaPartsNow Specialist
    Q:
    How to remove the timing chain on Toyota Camry? Posted by Customer
    A:
    The first step for removing the timing chain from a 2AZ-FE engine requires users to disconnect the cable of the negative battery terminal. Remove the sequential parts including No. 1 engine cover sub-assembly, front wheel RH, engine under cover LH, engine under cover RH, and front fender apron seal RH. The driver should begin by draining the engine oil before he removes the front exhaust pipe assembly. The service requires removal of the No. 2 engine mounting stay RH followed by removing the engine moving control rod sub-assembly and the No. 2 engine mounting bracket RH. The technician should first remove the V-ribbed belt followed by the generator assembly then the vane pump assembly and ignition coil assembly. The ventilation hoses need disconnecting before uninstalling the cylinder head cover sub-assembly through removal of its 2 bolts and 8 bolts and 2 nuts. Locate the No. 1 cylinder at its TDC/Compression position before you remove both the crankshaft pulley and crank position sensor. The oil pan sub-assembly removal requires the removal of 12 bolts along with 2 nuts from the main assembly before using an oil pan seal cutter to precisely cut through the sealer. The process to remove the No. 1 chain tensioner assembly demands care because turning the crankshaft should only happen when the assembly is present. Connect engine hangers through bolts before torquing them to 38 Nm (387 kgf-cm, 28 ft-lbf) and link a sling device to the hangers along with a chain block. The V-ribbed belt tensioner assembly can be removed after lifting the engine with a chain block before proceeding to detach the engine mounting insulator by securing a chain hoist to the hangers. Start by handling the engine mounting bracket RH and after that the timing chain cover sub-assembly then follow with the timing chain case oil seal removal. Drive out the crankshaft position sensor plate as well as the chain tensioner slipper and No. 1 chain vibration damper and timing chain guide. After disconnecting the chain sub-assembly you should take out the crankshaft timing sprocket. To finish the procedure you need to turn the crankshaft 90 degrees counterclockwise until the adjusting hole of the oil pump drive shaft sprocket lines up with the oil pump groove, insert a 4 mm diameter bar to secure the gear, and afterward remove the nut and bolt, chain tensioner plate, spring, chain tensioner, oil pump driven sprocket, and chain.
    Posted by ToyotaPartsNow Specialist
    Q:
    How to remove and replace the timing chain on Toyota RAV4? Posted by Customer
    A:
    Engine oil drainage should start before the removal of the RH engine under cover, PS vane pump, ABS actuator, RH engine mounting insulator, drive belt, generator and air cleaner assembly and ignition coils. The first step to remove the cylinder head cover starts with disconnecting the two PCV hoses and unscrewing eight bolts and two nuts. Set No. 1 cylinder to TDC/compression by turning the crankshaft pulley to match its groove with timing mark 0 at the same time aligning the camshaft timing sprocket and VVT timing sprocket timing marks to the No. 1 and No. 2 bearing caps. Turn the crankshaft 1 time when the marks are not aligned. Use Special Service Tools: 09213-54015, 09330-00021 to remove the crankshaft pulley followed by chain tensioner, drive belt tensioner, crankshaft position sensor and oil pan before taking off the timing chain cover while avoiding surface damage. You must remove the crank angle sensor plate as well as the chain tensioner slipper, chain vibration damper, timing chain guide, timing chain, crankshaft timing sprocket and camshaft timing sprocket and VVT timing sprocket while avoiding separation of the VVT timing sprocket. Check the timing chain and sprockets for signs of wear as well as elongation before making replacements. Special Service Tools 09309-37010 or 09308-10010 help when installing a new crankshaft front oil seal. A hammer will be required to perform the installation. Start the installation process by fitting the camshaft timing sprocket along with the VVT timing sprocket then torque them to 54 Nm (551 kgf-cm, 40 ft. lbs.). Follow the second step of placing Cylinder No. 1 at TDC/compression position to install the chain vibration damper along with crankshaft timing sprocket and timing chain that must align their marks correctly. Install the timing chain guide followed by the chain tensioner slipper and crank angle sensor plate onto the cover. Use the correct seal packing (Part No. 08826-00080 or equivalent) and tighten bolts and nuts to TORQ values. Herpetty install the drive belt tensioner with the crankshaft position sensor and oil pan then the crankshaft pulley by setting 180 Nm (1,836 kgf-cm, 132 ft. lbs.). The last steps involve setting chain tension followed by valve timing inspection before installing head covers, coils, vane pump, generator, insulation, belt, ABS unit, air breather components, and engine cover then filling oil before starting the engine to detect leaks while rechecking oil levels.
    Posted by ToyotaPartsNow Specialist
    Q:
    How to install the timing chain sub-assembly on Toyota Highlander? Posted by Customer
    A:
    The first step for timing chain sub-assembly installation requires aligning the No. 1 cylinder at TDC/compression by regulating camshaft timing sprocket and bearing cap (No. 1 and No. 2) timing marks followed by crankshaft alignment using the crankshaft pulley bolt to elevate the set key position. The installation of the crankshaft timing sprocket requires that the mark link displays its gold or orange color while the Special Service Tool: 09309-37010 helps secure the sprocket in place as the link touches the timing mark. Install the timing chain by revealing the mark links which possess a red or yellow color before integrating the camshaft timing gears and camshaft timing sprockets. Energetically install the chain tensioner slipper to 19 Nm (194 kgf-cm, 14 ft. lbs.), making subsequent installations of the crankshaft position sensor plate No.1 then the timing chain or belt cover subassembly. Seal Packing must be placed in a continuous bead (2.0 mm (0.079 inch) wide and 3.0 to 4.0 mm (0.12 to 0.16 inch)) after cleaning the contact surface for installation of the timing chain cover using Toyota Genuine Seal Packing Black or Three Bond 1207B or equivalent. The installation requires 14 bolts and 2 nuts with torques of Bolt A is 9.0 Nm (92 kgf-cm, 80 inch lbs.), Bolt B is 25 Nm (255 kgf-cm, 18 ft. lbs.), Bolt After installing the drive belt tensioner stud bolt to 10 Nm (102 kgf-cm, 7 ft. lbs.) torque, install chain tensioner assembly No.1 and V-ribbed belt tensioner assembly followed by engine mounting bracket RH with its 3 bolts torqued to 54 Nm (551 kgf-cm, 40 ft. lbs.). First elevate the engine to install transverse engine mounting insulator RH using 4 nuts before tightening Bolt A to 95 Nm (969 kgf-cm, 70 ft. lbs.) and Bolt B to 87 Nm (887 kgf-cm, 64 ft. lbs.). Afterward, secure the steering gear return hose clamp to the frame with a 8.0 Nm (82 kgf-cm, 71 inch lbs.) bolt and the engine mounting insulator FR uses a 87 Nm (887 kgf-cm, 64 ft. lbs.) bolt. First install the oil pan sub-assembly with crankshaft position sensor and crankshaft pulley by setting the key into the key groove and using Special Service Tools: 09213-54015 (91651-60855), 09330-00021 to bolt it with 180 Nm (1,835 kgf-cm, 133 ft. lbs.) torque while using a light engine oil on the bolt threads and washer contact areas. The chain tensioner assembly No.1 installation requires operators to free the ratchet pawl while pushing the plunger and hooking the pin then adding new gaskets before tightening the nuts to 9.0 Nm (92 kgf-cm, 80 inch lbs.). The plunger knock pin and slipper should be examined by rotating the crankshaft both counterclockwise and clockwise. Finally, install the cylinder head cover sub-assembly, ignition coil assembly with a torque of 19 Nm (194 kgf-cm, 14 ft. lbs.), vane pump assembly, generator assembly, engine wire, fan and generator V belt, engine mounting bracket No.2 RH with a torque of 52 Nm (531 kgf-cm, 38 ft. lbs.), engine mounting stay No.2 RH with a torque of 64 Nm (653 kgf-cm, 47 ft. lbs.), engine moving control rod w/bracket, exhaust pipe assembly front, front wheel RH, and hood sub-assembly with a torque of 13 Nm (133 kgf-cm, 10 ft. lbs.), then add engine oil and inspect for engine oil leaks.
    Posted by ToyotaPartsNow Specialist
    Q:
    How to service and repair the timing chain on Toyota Solara? Posted by Customer
    A:
    Start the timing chain service and repair procedure by removing the hood sub-assembly, front wheel RH, engine under covers LH and RH, and front fender apron seal RH. After draining the oil you must install a new gasket before torquing the drain plug to 25 Nm (255 kgf-cm, 18 ft. lbs.). Start by removing the front exhaust pipe assembly along with the engine moving control rod with bracket, engine mounting stay No.2 RH, engine mounting bracket No.2 RH, fan and generator V belt, No.1 engine cover sub-assembly, engine wire, generator assembly, vane pump assembly, ignition coil assembly, and ventilation hoses. The cylinder head cover sub-assembly needs removal when you disconnect the engine wire harness clamp followed by unscrewing 8 bolts and 2 nuts. With Special Service Tools 09960-10010 (09962-01000, 09963-01000) personnel can position the crankshaft pulley to its TDC position and compression stroke. After fixing the pulley with this tool personnel must loosen the bolt then remove the bolt through Special Service Tools 09950-40011 (09951-04010, 09952-04010, 09953-04030, 09954-04010, 09955-04041, 09957-04010, 91111-51014). To access the oil pan sub-assembly remove its 12 bolts and 2 nuts alongside Special Service Tool: 09032-00100 to carefully cut the sealer. Put in engine hangers initially then take away the No.1 chain tensioner assembly and V-ribbed belt tensioner assembly. Operators should use a stud bolt to detach the drive belt tensioner followed by removing 14 bolts and 2 nuts to separate the engine mounting insulator along with the engine mounting bracket RH and timing chain or belt cover sub-assembly. After separation, use a tool to pry the timing chain cover out. First remove the No.1 crankshaft position sensor plate followed by chain tensioner slipper, chain vibration damper No.1, chain sub-assembly and crankshaft timing gear or sprocket. The installation procedure requires inserting the crankshaft key into the left horizontal plane and facing the timing marks with the mark links before tightening the oil pump driven sprocket temporarily. After fitting the chain tensioner plate and nut it is necessary to rotate the crankshaft until the crankshaft key reaches its top position. The installation includes chain vibration damper No.1 followed by chain sub-assembly and chain tensioner slipper and crankshaft position sensor plate No.1 before adding timing chain or belt cover sub-assembly which requires appropriate seal packing. The specified torque values must guide the installation of V-ribbed belt tensioner assembly together with engine mounting bracket RH, engine mounting insulator, and oil pan sub-assembly. The replacement process ends with the installation of No.1 chain tensioner assembly, crankshaft position sensor, crankshaft pulley, cylinder head cover sub-assembly, ignition coil assembly, vane pump assembly, generator assembly, engine wire, fan and generator V belt, engine mounting bracket No.2 RH, engine mounting stay No.2 RH, engine moving control rod with bracket, front exhaust pipe assembly, front wheel RH, and hood sub-assembly, using engine oil and performing leak checks.
    Posted by ToyotaPartsNow Specialist
    Q:
    How do you remove the oil pan sub-assembly for the 2005 Scion tC? Posted by Customer
    A:
    Install engine hangers and use Special Service Tool: 09032-00100 to cut off the applied sealer.
    Posted by ToyotaPartsNow Specialist
    See expert answers on similar Timing Chain
    Q:
    What is the next step after supporting the engine for the 2009 Scion tC? Posted by Customer
    A:
    Remove the front engine mounting insulator and the ignition coil assembly.
    Posted by ToyotaPartsNow Specialist
    See expert answers on similar Timing Chain
    Q:
    What components need to be removed while lifting the engine slightly for the 2010 Scion tC? Posted by Customer
    A:
    Remove the ignition coil assembly, cylinder head cover sub-assembly by disconnecting the ventilation hoses and engine wire, and the V-ribbed belt tensioner assembly.
    Posted by ToyotaPartsNow Specialist
    See expert answers on similar Timing Chain
    Q:
    What is the procedure for removing the oil pan sub-assembly for the 2008 Scion tC? Posted by Customer
    A:
    Install the No. 1 and No. 2 engine hangers, hold the engine with a chain block, and remove the 12 bolts and 2 nuts. Cut off the applied sealer with Special Service Tool: 09032-00100 to detach the oil pan carefully.
    Posted by ToyotaPartsNow Specialist
    See expert answers on similar Timing Chain
    Q:
    What components need to be removed initially for the 2006 Scion tC? Posted by Customer
    A:
    Remove the hood sub-assembly, front wheel RH, engine under covers RH and LH, front fender apron seal RH, and No. 1 engine cover sub-assembly by taking off the 2 nuts.
    Posted by ToyotaPartsNow Specialist
    See expert answers on similar Timing Chain
    Q:
    What is the first step to replace the timing chain for the 2002 Toyota Camry? Posted by Customer
    A:
    Remove the hood sub-assembly, front wheel RH, engine under covers LH and RH, and front fender apron seal RH.
    Posted by ToyotaPartsNow Specialist
    See expert answers on similar Timing Chain
    Q:
    What is the final step for installing the timing chain cover for the 2006 Toyota Camry? Posted by Customer
    A:
    Install timing chain or belt cover sub-assembly after removing any old packing (FIPG) material and applying seal packing, ensuring to install the chain cover within 3 minutes after applying seal packing.
    Posted by ToyotaPartsNow Specialist
    See expert answers on similar Timing Chain
    Q:
    What should be checked after completing the installation for the 2007 Toyota Camry? Posted by Customer
    A:
    Check for engine oil and exhaust gas leaks, ignition timing, and reinstall the front fender apron seal RH, engine under covers, front wheel RH, and No. 1 engine cover sub-assembly.
    Posted by ToyotaPartsNow Specialist
    See expert answers on similar Timing Chain
    Q:
    What is the procedure for installing the V-ribbed belt tensioner assembly for the 2008 Toyota Camry? Posted by Customer
    A:
    For the spring type, tighten the bolt and then the nut to 60 Nm (607 kgf-cm, 44 ft-lbf), ensuring not to pull out the pin when replacing it. For the non-spring type, install the tensioner with the bolt and nut, also torqued to 60 Nm (607 kgf-cm, 44 ft-lbf).
    Posted by ToyotaPartsNow Specialist
    See expert answers on similar Timing Chain
    Q:
    What components are reinstalled after the timing chain or belt cover for the 2005 Toyota Camry? Posted by Customer
    A:
    Install the V-ribbed belt tensioner assembly (torque: 59.5 Nm (607 kgf-cm, 44 ft. lbs.)), engine mounting bracket RH (3 bolts, torque: 54 Nm (551 kgf-cm, 40 ft. lbs.)), and engine mounting insulator RH (4 nuts, torque: 95 Nm (969 kgf-cm, 70 ft. lbs. for nut A and 87 Nm (888 kgf-cm, 64 ft. lbs. for nut B)).
    Posted by ToyotaPartsNow Specialist
    See expert answers on similar Timing Chain
    Q:
    What tools are needed to remove the crankshaft pulley for the 2007 Scion tC? Posted by Customer
    A:
    Use Special Service Tools: 09213-54015 (91651-60855), 09330-00021, and 09950-50013 (09951-05010, 09952-05010, 09953-05020, 09954-05021).
    Posted by ToyotaPartsNow Specialist
    See expert answers on similar Timing Chain
    Q:
    How do you remove the engine mounting insulator for the 2010 Toyota Camry? Posted by Customer
    A:
    Use a chain hoist to remove the engine mounting insulator by disconnecting the front insulator and removing the 4 nuts from the right insulator, then raise the engine to remove it.
    Posted by ToyotaPartsNow Specialist
    See expert answers on similar Timing Chain
    Q:
    How do you install the engine mounting insulator RH for the 2009 Toyota Camry? Posted by Customer
    A:
    Raise the engine to install the engine mounting insulator RH with 4 nuts (Nut A - 95 Nm (969 kgf-cm, 70ft-lbf), Nut B - 87 Nm (888 kgf-cm, 64ft-lbf)).
    Posted by ToyotaPartsNow Specialist
    See expert answers on similar Timing Chain
    Q:
    What is the procedure for locking the oil pump driven sprocket for the 2006 Toyota Highlander? Posted by Customer
    A:
    Align the adjusting hole of the oil pump driven sprocket with the groove of the oil pump, lock the sprocket in position with a bar (4 mm (0.16 inch)), and install the nut, torquing to 30 Nm (306 kgf-cm, 22 ft. lbs.).
    Posted by ToyotaPartsNow Specialist
    See expert answers on similar Timing Chain
    Q:
    How do you install the chain tensioner plate for the 2002 Toyota Highlander? Posted by Customer
    A:
    Insert the damper spring into the adjusting hole, and install the chain tensioner plate by a nut, torquing to 12 Nm (122 kgf-cm, 9 ft. lbs.).
    Posted by ToyotaPartsNow Specialist
    See expert answers on similar Timing Chain
    Q:
    What is the next step after removing the cylinder head cover for the 2001 Toyota Highlander? Posted by Customer
    A:
    Set No.1 cylinder to TDC/compression, then remove the crankshaft pulley (13471 / 98-13) using Special Service Tool: 09213-54015 (91651-60855), 09330-00021, and remove the crank position sensor (11301K / 98-9).
    Posted by ToyotaPartsNow Specialist
    See expert answers on similar Timing Chain
    Q:
    What is the procedure for tightening the oil pump driven sprocket for the 2007 Toyota Highlander? Posted by Customer
    A:
    Temporarily tighten the oil pump driven sprocket with the nut, insert the damper spring into the adjusting hole, and install the chain tensioner plate with the nut torqued to 12 Nm (122 kgf-cm, 9.0 ft. lbs.).
    Posted by ToyotaPartsNow Specialist
    See expert answers on similar Timing Chain
    Q:
    What should be done after removing the crankshaft pulley for the 2003 Toyota Highlander? Posted by Customer
    A:
    Remove the crankshaft position sensor and oil pan sub-assembly by taking out 12 bolts and 2 nuts, using Special Service Tool: 09032-00100 to cut off the applied sealer.
    Posted by ToyotaPartsNow Specialist
    See expert answers on similar Timing Chain
    Q:
    What components are removed after the crankshaft pulley for the 2004 Toyota Highlander? Posted by Customer
    A:
    Remove the crankshaft position sensor, oil pan sub-assembly, chain tensioner assembly No.1, and V-ribbed belt tensioner assembly.
    Posted by ToyotaPartsNow Specialist
    See expert answers on similar Timing Chain
    Q:
    What should be done after installing the chain tensioner plate for the 2003 Toyota Camry? Posted by Customer
    A:
    Install chain vibration damper No.1, torque to 9.0 Nm (92 kgf-cm, 80 inch lbs.), and chain sub-assembly, ensuring No.1 cylinder is at TDC/compression.
    Posted by ToyotaPartsNow Specialist
    See expert answers on similar Timing Chain
    Q:
    What should be done after removing the engine mounting components for the 2005 Toyota Highlander? Posted by Customer
    A:
    Remove the fan and generator V belt, engine cover sub-assembly No.1, disconnect the engine wire, and remove the generator assembly and vane pump assembly without disconnecting the hose.
    Posted by ToyotaPartsNow Specialist
    See expert answers on similar Timing Chain
    Q:
    How do you set No. 1 cylinder to TDC/compression for the 2003 Toyota RAV4? Posted by Customer
    A:
    Turn the crankshaft pulley to align its groove with timing mark 0 and ensure the timing marks of the camshaft and VVT timing sprockets align with the bearing caps; if not, turn the crankshaft 1 revolution and align the marks.
    Posted by ToyotaPartsNow Specialist
    See expert answers on similar Timing Chain
    Q:
    What tools are used for replacing the crankshaft front oil seal for the 2001 Toyota RAV4? Posted by Customer
    A:
    Use Special Service Tool: 09309-37010 if the timing chain cover is removed, or Special Service Tool: 09308-10010 if it is installed.
    Posted by ToyotaPartsNow Specialist
    See expert answers on similar Timing Chain
    Q:
    What components should be installed after setting No. 1 cylinder for the 2002 Toyota RAV4? Posted by Customer
    A:
    Install the chain vibration damper, crankshaft timing sprocket, timing chain, timing chain guide, chain tensioner slipper, crank angle sensor plate, and timing chain cover with proper seal packing and torque specifications.
    Posted by ToyotaPartsNow Specialist
    See expert answers on similar Timing Chain
    Q:
    What components need to be removed after the chain tensioner for the 2004 Toyota RAV4? Posted by Customer
    A:
    Remove the drive belt tensioner, crankshaft position sensor, oil pan, and timing chain cover.
    Posted by ToyotaPartsNow Specialist
    See expert answers on similar Timing Chain
    Q:
    What is the first step to remove the timing chain for the 2007 Toyota RAV4? Posted by Customer
    A:
    Disconnect the cable from the negative battery terminal and wait at least 90 seconds to prevent airbag and seat belt pretensioner activation.
    Posted by ToyotaPartsNow Specialist
    See expert answers on similar Timing Chain
    Q:
    What should be done after removing the initial components for the 2004 Toyota Solara? Posted by Customer
    A:
    Drain the engine oil and install a new gasket and drain plug, torquing to 25 Nm (255 kgf-cm, 18 ft. lbs.).
    Posted by ToyotaPartsNow Specialist
    See expert answers on similar Timing Chain
    Q:
    What is the procedure for removing the crankshaft pulley for the 2005 Toyota Solara? Posted by Customer
    A:
    Set No.1 cylinder to TDC/compression, then remove the crankshaft pulley using Special Service Tool: 09960-10010 to fix the pulley and loosen the bolt, followed by removing the bolt and pulley with Special Service Tool: 09950-40011.
    Posted by ToyotaPartsNow Specialist
    See expert answers on similar Timing Chain
    Q:
    What components need to be removed after disconnecting the battery for the 2006 Toyota RAV4? Posted by Customer
    A:
    Remove the radiator support opening cover, front wheel RH, No. 1 engine under cover, front fender apron RH, and No. 1 engine cover by taking off the 2 nuts.
    Posted by ToyotaPartsNow Specialist
    See expert answers on similar Timing Chain
    Q:
    What should be done after removing the covers for the 2008 Toyota RAV4? Posted by Customer
    A:
    Drain the engine oil, then remove the front exhaust pipe, front suspension member reinforcement RH, fan and generator V belt, and generator assembly.
    Posted by ToyotaPartsNow Specialist
    See expert answers on similar Timing Chain
    Q:
    What should be removed next in the process for the 2007 Toyota Solara? Posted by Customer
    A:
    Remove No.1 chain tensioner assembly, V-ribbed belt tensioner assembly, and install engine hangers.
    Posted by ToyotaPartsNow Specialist
    See expert answers on similar Timing Chain
    Q:
    What is the procedure for removing the No.2 chain sub-assembly for the 2008 Toyota Solara? Posted by Customer
    A:
    Turn the crankshaft counterclockwise by 90°, align the adjusting hole of the oil pump driven sprocket with the groove of the oil pump, temporarily lock the sprocket in position with a 4 mm (0.16 in.) bar, and remove the nut, followed by the bolt, chain tensioner plate, spring, chain tensioner, oil pump driven sprocket, and chain.
    Posted by ToyotaPartsNow Specialist
    See expert answers on similar Timing Chain
    If you have any questions about this product, please don't hesitate to ask us. We will be happy to help you!

OEM Toyota 13506-0H011, Excellent Performance and Perfect Fitment

To ensure reliability, purchase Toyota part # 13506-0H011 Timing Chain. It is sometimes referred to as Toyota Timing Chain. OEM parts are unrivaled in terms of quality. They go through extensive quality control inspections and are produced in accordance with Toyota's official factory specifications. All of these remove defects and imperfections. So you can relax knowing they promise exceptional lifespan and flawless fitment.

ToyotaPartsNow.com is a leading supplier of genuine Toyota parts such as Toyota 135060H011 Timing Chain. At ToyotaPartsNow.com, we have a wide variety of OEM Toyota parts available at competitive prices. Our comprehensive range of genuine Toyota parts come with a manufacturer's warranty for peace of mind. We also prioritize customer satisfaction, providing a hassle-free return policy and expedited delivery for all our parts. For detailed Toyota parts information, click here.
Choose ToyotaPartsNow for discounted prices, exceptional service and fast delivery