×
ToyotaParts- Hello
- Login or Register
- Quick Links
- Live Chat
- Track Order
- Parts Availability
- RMA
- Help Center
- Contact Us
- Shop for
- Toyota Parts
- Scion Parts
My Garage
My Account
Cart
OEM Toyota Sunroof
Moonroof- Select Vehicle by Model
- Select Vehicle by VIN
Select Vehicle by Model
orMake
Model
Year
Select Vehicle by VIN
For the most accurate results, select vehicle by your VIN (Vehicle Identification Number).
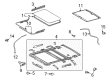
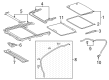
107 Sunroofs found


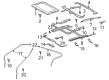
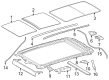
Toyota Glass Assembly PRIMER Part Number: 63201-20200
$500.30 MSRP: $733.19You Save: $232.89 (32%)Ships in 1-3 Business DaysProduct Specifications- Other Name: Panel Sub-Assembly, Sliding Roof; Sunroof Glass; Glass Sub-Assembly, Sliding Roof
- Manufacturer Note: *TEM,T=4.0,DARK GRAY
- Replaces: 63201-20182-D0, 63201-20181-B0, 63201-20190, 63201-20182-F0, 63201-20182-A0, 63201-20192, 63201-20182-B0, 63201-20180-B0, 63201-20182-J0, 63201-20180-A0, 63201-20191


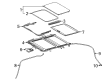
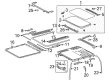
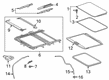
Toyota Sunroof Glass, Front Part Number: 63201-0T010
$613.12 MSRP: $898.53You Save: $285.41 (32%)Product Specifications- Other Name: Glass Sub-Assembly, Slide Door; Roof Panel Glass, Front; Glass Sub-Assembly, Sliding Roof
- Manufacturer Note: MOON ROOF-WITH,NO.1
- Position: Front


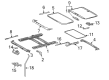
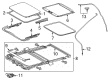
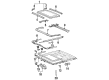
Toyota Sunroof Glass Part Number: 63201-06060
$668.16 MSRP: $979.20You Save: $311.04 (32%)Ships in 1-3 Business DaysProduct Specifications- Other Name: Glass Sub-Assembly, Slide Door; Glass Sub-Assembly, Sliding Roof


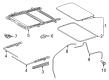
Toyota Sunroof Glass Part Number: 63201-42100
$673.27 MSRP: $986.69You Save: $313.42 (32%)Ships in 1-3 Business DaysProduct Specifications- Other Name: Glass Sub-Assembly, Slide Door; Glass Sub-Assembly, Sliding Roof


Toyota Sunroof Glass Part Number: 63201-02081
$673.27 MSRP: $986.69You Save: $313.42 (32%)Ships in 1-3 Business DaysProduct Specifications- Other Name: Glass Sub-Assembly, Slide Door; Glass Sub-Assembly, Sliding Roof
- Manufacturer Note: T=4.0,GRAY,MOON ROOF-TILT & SLIDE MOON ROOF
- Replaces: 63201-02080


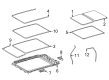
Toyota Sunroof Panel Part Number: 63201-42072
$777.35 MSRP: $1139.22You Save: $361.87 (32%)Ships in 1-3 Business DaysProduct Specifications- Other Name: Glass Sub-Assembly, Slide Door; Sunroof Glass; Glass Sub-Assembly, Sliding Roof
- Manufacturer Note: *TEM,T=4.0,GRAY
- Replaces: 63201-42050, 63201-42070


Toyota Glass Part Number: 63201-35090
$839.21 MSRP: $1229.87You Save: $390.66 (32%)Ships in 1-3 Business DaysProduct Specifications- Other Name: Glass Sub-Assembly, Slide Door; Sunroof Glass; Housing


Toyota Glass, Rear Part Number: 63201-08031
$901.86 MSRP: $1321.69You Save: $419.83 (32%)Ships in 1-3 Business DaysProduct Specifications- Other Name: Glass Sub-Assembly, Slide Door; Sunroof Glass, Rear; Glass Sub-Assembly, Sliding Roof
- Manufacturer Note: MOON ROOF-WITH(FRONT & REAR)
- Position: Rear
- Replaces: 63201-08030


Toyota Glass Assembly Part Number: 63201-60132
$934.33 MSRP: $1369.27You Save: $434.94 (32%)Ships in 1-3 Business DaysProduct Specifications- Other Name: Glass Sub-Assembly, Slide Door; Sunroof Glass; Glass Sub-Assembly, Sliding Roof
- Replaces: 63201-60090, 63201-60131, 63201-60091


Toyota Sunroof Glass Part Number: 63201-0T020
$1084.59 MSRP: $1589.49You Save: $504.90 (32%)Product Specifications- Other Name: Glass Sub-Assembly, Slide Door; Glass Sub-Assembly, Sliding Roof
- Manufacturer Note: MOON ROOF-WITH,NO.2

Toyota Sunroof Glass Part Number: 63201-02120
$552.96 MSRP: $810.37You Save: $257.41 (32%)Ships in 1-3 Business DaysProduct Specifications- Other Name: Glass Sub-Assembly, Slide Door; Glass Sub-Assembly, Roof Window

Toyota Sunroof Glass Part Number: 63201-AE010
$1075.86 MSRP: $1576.68You Save: $500.82 (32%)Ships in 1-3 Business DaysProduct Specifications- Other Name: Glass Sub-Assembly, Slide Door; Glass; Glass Sub-Assembly, Sliding Roof

Toyota Sunroof Glass, Rear Part Number: 63201-0C040
$1054.88 MSRP: $1545.94You Save: $491.06 (32%)Ships in 1-3 Business DaysProduct Specifications- Other Name: Glass Sub-Assembly, Slide Door; Sunroof Glass, Rear; Glass Sub-Assembly, Sliding Roof
- Position: Rear

Toyota Sunroof Glass, Front Part Number: 63201-0E150
$1106.05 MSRP: $1620.92You Save: $514.87 (32%)Ships in 1-3 Business DaysProduct Specifications- Other Name: Glass Sub-Assembly, Slide Door; Sunroof Glass, Front; Glass Sub-Assembly, Sliding Roof
- Manufacturer Note: MOON ROOF-WITH(PANORAMA ROOF)
- Position: Front

Toyota Sunroof Panel Part Number: 63201-42020-B1
$418.51 MSRP: $613.33You Save: $194.82 (32%)Ships in 1-3 Business DaysProduct Specifications- Other Name: Glass Sub-Assembly, Slide Door; Sunroof Glass; Glass Sub-Assembly, Sliding Roof
- Manufacturer Note: *TEM,T=4.0,GRAY,LT.GRAY,TRIM1#

Toyota Sunroof Glass Part Number: 63204-52070
$483.61 MSRP: $708.74You Save: $225.13 (32%)Ships in 1-3 Business DaysProduct Specifications- Other Name: Panel Sub-Assembly, Sliding Roof; Glass Sub-Assembly, Sliding Roof

Toyota Glass Sub-Assembly, Slide Door Part Number: 63201-35110
$525.38 MSRP: $769.95You Save: $244.57 (32%)Ships in 1-2 Business DaysProduct Specifications- Other Name: GLASS SUB-ASSY, SLID

Toyota Sunroof Glass Part Number: 63201-0A040
$529.92 MSRP: $776.60You Save: $246.68 (32%)Ships in 1-3 Business DaysProduct Specifications- Other Name: Glass Sub-Assembly, Slide Door; Glass Sub-Assembly, Sliding Roof
- Manufacturer Note: MOON ROOF-WITH

Toyota Sunroof Glass Part Number: 63201-0R080
$551.14 MSRP: $807.71You Save: $256.57 (32%)Ships in 1-3 Business DaysProduct Specifications- Other Name: Glass Sub-Assembly, Slide Door; Glass Sub-Assembly, Sliding Roof


Toyota Glass Sub-Assembly, Sliding Roof Part Number: 63201-60023
Product Specifications- Other Name: Glass Sub-Assembly, Slide Door
- Manufacturer Note: *TT,T=4.0,BRONZE
- Replaces: 63201-60022
| Page 1 of 6 |Next >
1-20 of 107 Results
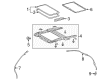
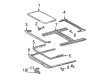
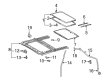
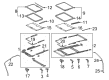
Toyota Sunroof
OEM parts deliver unmatched quality you can rely on. They pass extensive quality control inspections. Toyota produces them to the official factory specifications. This process helps prevent defects and imperfections. So you can get exceptional lifespan and a flawless fit. Need new OEM Toyota Sunroof? You'll love our wide selection of genuine options. Shop in minutes and skip the hunt. Our prices are unbeatable, you'll save time and money. It's easy to shop and find the right piece. Our committed customer service team gives professional help from start to finish. Every part includes a manufacturer's warranty. We ship quickly, your parts will arrive fast at your door.
Toyota Sunroof allows the light to penetrate inside and gives drivers a touch of a button to access fresh air. Toyota began in Japan in 1937 and became international by mastering lean manufacturing that reduces waste, empowers crews, and keeps production lines running with quality that is worth years of daily abuse, giving the company a reputation for cars that endure years of abuse daily. Toyota continued the pace with further refinements on its Hybrid Synergy Drive and abandoned the technology in city runabouts, family sedans, and large crossovers to allow drivers to save on fuel without losing on speed, proving the brand to be efficient to everyone. TNGA, which is a common chassis recipe that reduces center of gravity, sharpens steering, and increases crash protection, and plug-in versions such as the RAV4 are also launched by Toyota, extending electric range to commute distances without leaving anyone stranded on longer hauls. Toyota equips the 4Runner with a power-tilt Sunroof with a sealed glide track preventing trail dust, an aerodynamic deflector that keeps the buffeting down to allow a conversation to continue, a push-slide panel that opens wide to fast ventilation, and a sealed glide track to prevent trail dust. The use of Sunroofs also cuts down on the use of air-conditioning during warm weather, which cuts down on fuel consumption and provides genuine sunlight to the occupants rather than the dulled dome lights. The Sunroof lines blend with roof sheet metal and thus the truck retains its macho stance and yet it provides an unhindered view of the sky at the camp, enhancing the overall experience of having a Sunroof.
Toyota Sunroof Parts and Q&A
- Q: How to service and repair the Sunroof on Toyota Tacoma?A:Begin servicing or repairing the sliding roof by removing the sunshade trim followed by 2 screws to unfasten the lock handle and lock base with the addition of removing the lock garnish and proceeding to detach the lock handle and holders with two bolts then finish by removing the lock base and spacer using two screws. Start by untucking the wind deflector panel clip before inserting a screwdriver to separate it from its position on each side of the roof. The removable roof auxiliary catch needs to be unscrewed first before you can remove the inner Weather Strip and sliding roof opening trim and assist grip and sun visors together with holders in addition to the inner rear view mirror. Unclip the quarter trim from one side and repeat on the other side being sensitive to avoid breaking the quarter trim or front pillar garnish. The next steps involve taking off the front pillar garnish together with the front section of the roof headlining. Finish installation of the removable roof hinge case by unwiring 2 bolts (Torque: 3.4 N.m (35 kgf.cm, 30 in.lbf)) on each side. The installation steps follow the reverse sequence of uninstallation.
- Q: How to remove the Sunroof or convertible Sunroof housing on Toyota Venza?A:The first step to remove the sliding roof or convertible sliding roof housing involves opening No. 2 sliding roof glass sub-assembly fully while using a T20 "TORX" socket wrench to detach the 6 screws that hold No. 1 sliding roof glass sub-assembly. Begin by taking out the screw followed by the sliding roof side garnish LH using a T25 "TORX" socket wrench and then follow the same steps for the RH side. First fully extend the No. 2 sliding roof glass sub-assembly and then use a T25 "TORX" socket wrench to disconnect three screws which allows removal of the No. 2 sliding roof glass sub-assembly. After removing the roof headlining assembly continue by separating the curtain shield Air Bag assembly from both the left-hand and right-hand sides. Disassemble the No. 3 sliding roof glass sub-assembly through the removal of its twenty nuts. The procedure for removing the sliding roof drive gear sub-assembly starts by removing the bolt, nut along with the room light bracket before extracting both components. Move on to remove the front sliding roof housing mounting bracket LH by removing 2 bolts and 2 nuts before repeating the procedures for the RH side. Both LH and RH sides of the center sliding roof housing mounting bracket require removal of three bolts and three nuts. You need to take the bolt and nut out from the rear sliding roof housing mounting bracket LH while performing the same operation on the RH side. User safety demands two technicians to carefully remove the sliding roof housing assembly after detaching its 18 nuts (at least two technicians will prevent vehicle damage).


Related Toyota Parts
 Toyota Emblem
 Toyota Spoiler
 Toyota Door Lock Cylinder
 Toyota Instrument Cluster
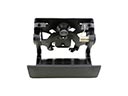 Toyota Tailgate Handle
 Toyota Window Regulator
 Toyota A/C Switch
 Toyota Liftgate Hinge
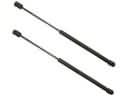 Toyota Liftgate Lift Support
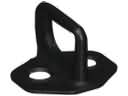 Toyota Rear Door Striker
 Toyota Sunroof Cable
 Toyota Weather Strip