×
ToyotaParts- Hello
- Login or Register
- Quick Links
- Live Chat
- Track Order
- Parts Availability
- RMA
- Help Center
- Contact Us
- Shop for
- Toyota Parts
- Scion Parts
My Garage
My Account
Cart
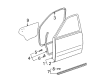
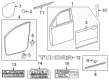
OEM Toyota Weather Strip
Door Weatherstripping- Select Vehicle by Model
- Select Vehicle by VIN
Select Vehicle by Model
orMake
Model
Year
Select Vehicle by VIN
For the most accurate results, select vehicle by your VIN (Vehicle Identification Number).
2412 Weather Strips found


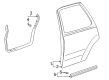
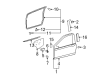
Toyota Lower Weatherstrip, Rear Part Number: 67887-0C020
$39.66 MSRP: $55.21You Save: $15.55 (29%)Ships in 1-2 Business DaysProduct Specifications- Other Name: Weatherstrip, Rear Door; Door Seal, Rear Lower; Weatherstrip, Slide Door, Passenger Side; Weatherstrip, Rear Door, Driver Side; Weatherstrip; Door Seal
- Position: Rear


Toyota Belt Weatherstrip, Outer Part Number: 68290-35031
$52.57 MSRP: $73.17You Save: $20.60 (29%)Ships in 1-3 Business DaysProduct Specifications- Other Name: Weatherstrip Assembly, Back Door Glass; Hatch Seal, Rear; Weatherstrip Assembly, Back Door Glass, Outer
- Position: Outer
- Replaces: 68290-35030


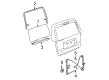
Toyota Door Weatherstrip, Passenger Side Part Number: 67861-60101
$100.95 MSRP: $141.70You Save: $40.75 (29%)Ships in 1-3 Business DaysProduct Specifications- Other Name: Weatherstrip, Front Door; Door Seal, Front Right; Weatherstrip, Front Door, Passenger Side; Weatherstrip; Door Seal
- Position: Passenger Side
- Replaces: 67861-60100


Toyota Belt Weatherstrip, Outer Part Number: 68292-35041
$38.71 MSRP: $53.88You Save: $15.17 (29%)Ships in 1-3 Business DaysProduct Specifications- Other Name: Weatherstrip, Back Door; Hatch Seal, Rear; Weatherstrip Assembly, Back Door Glass, Outer
- Position: Outer
- Replaces: 68292-35040


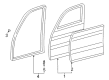
Toyota Lower Weatherstrip, Front Part Number: 67863-0C020
$56.75 MSRP: $78.99You Save: $22.24 (29%)Ships in 1-3 Business DaysProduct Specifications- Other Name: Weatherstrip, Front Door; Door Seal, Front Lower; Door Shell Seal, Front; Weatherstrip, Front Door, Upper Passenger Side; Driver Side; Door Seal
- Position: Front


Toyota Belt Molding, Outer Passenger Side Part Number: 68160-0C020
$30.58 MSRP: $42.57You Save: $11.99 (29%)Ships in 1-3 Business DaysProduct Specifications- Other Name: Weatherstrip Assembly, Front Door Glass; Door Window Belt Weatherstrip, Front Right; Door Belt Molding, Front Right; Belt Weatherstrip; Weatherstrip Assembly, Front Door Glass, Outer Passenger Side; Weatherstrip
- Position: Outer Passenger Side


Toyota Belt Molding, Outer Driver Side Part Number: 68210-52130
$36.56 MSRP: $50.88You Save: $14.32 (29%)Ships in 1-3 Business DaysProduct Specifications- Other Name: Weatherstrip Assembly, Front Door Glass; Door Belt Molding, Front Left; Weatherstrip Assembly, Front Door Glass, Outer Driver Side
- Position: Outer Driver Side


Toyota Front Weatherstrip Part Number: 63251-17030
$163.78 MSRP: $231.86You Save: $68.08 (30%)Ships in 1-3 Business DaysProduct Specifications- Other Name: Weatherstrip, Converter; Windshield Frame Weatherstrip Seal; Convertible Top Seal, Front; Weatherstrip, Removable Roof, Front
- Position: Front


Toyota Belt Weatherstrip, Inner Driver Side Part Number: 68174-60060
$30.34 MSRP: $42.23You Save: $11.89 (29%)Ships in 1-2 Business DaysProduct Specifications- Other Name: Weatherstrip, Rear Door; Door Window Belt Weatherstrip, Rear Left; Weatherstrip, Rear Door Glass, Inner Driver Side; Weatherstrip
- Position: Inner Driver Side


Toyota Belt Molding, Outer Driver Side Part Number: 68210-0C020
$31.30 MSRP: $43.56You Save: $12.26 (29%)Ships in 1-3 Business DaysProduct Specifications- Other Name: Weatherstrip Assembly, Front Door Glass; Door Window Belt Weatherstrip, Front Left; Door Belt Molding, Front Left; Belt Weatherstrip; Weatherstrip Assembly, Front Door Glass, Outer Driver Side; Weatherstrip
- Position: Outer Driver Side

Toyota Belt Molding, Outer Passenger Side Part Number: 68160-52130
$36.56 MSRP: $50.88You Save: $14.32 (29%)Ships in 1-3 Business DaysProduct Specifications- Other Name: Weatherstrip Assembly, Front Door Glass; Door Belt Molding, Front Right; Weatherstrip Assembly, Front Door Glass, Outer Passenger Side
- Position: Outer Passenger Side

Toyota Weatherstrip, Front Door, Driver Side Part Number: 67862-60101
$100.95 MSRP: $141.70You Save: $40.75 (29%)Ships in 1-3 Business DaysProduct Specifications- Other Name: Weatherstrip, Front Door; Weatherstrip; Door Seal
- Position: Driver Side
- Replaces: 67862-60100


Toyota Belt Molding, Outer Driver Side Part Number: 68230-52130
$23.29 MSRP: $32.42You Save: $9.13 (29%)Ships in 1-2 Business DaysProduct Specifications- Other Name: Weatherstrip Assembly, Rear Door Glass; Door Belt Molding, Rear Left; Weatherstrip Assembly, Rear Door Glass, Outer Driver Side
- Position: Outer Driver Side

Toyota Belt Molding, Outer Passenger Side Part Number: 68180-52130
$23.29 MSRP: $32.42You Save: $9.13 (29%)Ships in 1-2 Business DaysProduct Specifications- Other Name: Weatherstrip Assembly, Rear Door Glass; Door Belt Molding, Rear Right; Weatherstrip Assembly, Rear Door Glass, Outer Passenger Side
- Position: Outer Passenger Side


Toyota Weatherstrip, Front Part Number: 63251-08020
$51.85 MSRP: $72.17You Save: $20.32 (29%)Ships in 1-2 Business DaysProduct Specifications- Other Name: Weatherstrip, Sliding; Sunroof Seal, Front; Weatherstrip, Sliding Roof
- Position: Front


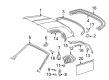
Toyota Weatherstrip, Rear Part Number: 64461-52032
$75.00 MSRP: $105.27You Save: $30.27 (29%)Ships in 1-3 Business DaysProduct Specifications- Other Name: Weatherstrip, Luggage Compartment Door; Deck Lid Seal, Rear
- Position: Rear
- Replaces: 64461-52030, 64461-52031


Toyota Belt Weatherstrip, Inner Passenger Side Part Number: 68171-0C030
$29.15 MSRP: $40.57You Save: $11.42 (29%)Ships in 1 Business DayProduct Specifications- Other Name: Weatherstrip, Front Door; Door Window Belt Weatherstrip, Front Right, Front Right Inner; Door Seal; Weatherstrip; Weatherstrip, Front Door Glass, Inner Passenger Side
- Position: Inner Passenger Side


Toyota Belt Molding, Outer Driver Side Part Number: 68164-0C020
$29.27 MSRP: $40.74You Save: $11.47 (29%)Ships in 1-3 Business DaysProduct Specifications- Other Name: Weatherstrip, Rear Door; Door Belt Molding, Rear Left; Weatherstrip, Rear Door Glass, Outer Driver Side
- Position: Outer Driver Side


Toyota Belt Molding, Outer Driver Side Part Number: 68210-08020
$33.93 MSRP: $47.22You Save: $13.29 (29%)Ships in 1-3 Business DaysProduct Specifications- Other Name: Weatherstrip Assembly, Front Door Glass; Door Belt Molding, Front Left; Weatherstrip Assembly, Front Door Glass, Outer Driver Side
- Position: Outer Driver Side


Toyota Belt Molding, Outer Passenger Side Part Number: 68180-08020
$43.61 MSRP: $60.70You Save: $17.09 (29%)Ships in 1-3 Business DaysProduct Specifications- Other Name: Weatherstrip Assembly, Rear Door Glass; Door Belt Molding, Right; Weatherstrip Assembly, Rear Door Glass, Outer Passenger Side
- Position: Outer Passenger Side
| Page 1 of 121 |Next >
1-20 of 2412 Results
Toyota Weather Strip
OEM parts deliver unmatched quality you can rely on. They pass extensive quality control inspections. Toyota produces them to the official factory specifications. This process helps prevent defects and imperfections. So you can get exceptional lifespan and a flawless fit. Need new OEM Toyota Weather Strip? You'll love our wide selection of genuine options. Shop in minutes and skip the hunt. Our prices are unbeatable, you'll save time and money. It's easy to shop and find the right piece. Our committed customer service team gives professional help from start to finish. Every part includes a manufacturer's warranty. We ship quickly, your parts will arrive fast at your door.
Toyota Weather Strip keeps out the rain, wind, and grit to keep cabins soundproofed and dry. Toyota has built its reputation around lean production, which reduces waste and drives incessant problem solving across the world. Since the original 1937 factory until the current hybrid lines, the company continues to improve efficiency, safety, and handling. Drivers include the constant improvements like Hybrid Synergy Drive, the versatile TNGA car platform, and the new plug-in adjustments that are prominent on the road. Trust increases due to the increase in mileage, durability of parts, and new plug-in models that provide actual usable electric range each day. Toyota is another company that is cleverly incorporating battery technology into conventional engines to suit various budgets without compromising reliability. The Weather Strip incorporates EPDM rubber compounded with silicone to shed heat, oils, ultraviolet glare, and winter salt and squeeze every orifice on sedans, SUVs, and pickups across the line to dampen wind noise and maintain cabin temperature evenness on extended journeys. Weather Strip can be inserted in Toyota owners without much ado as the profile fits factory grooves. Weather Strip stands against cracking over a period, thus Toyota cabins are dry. Aging foam breaks down, and a new Weather Strip is clamped on in a few minutes, and silence is regained.
Toyota Weather Strip Parts and Q&A
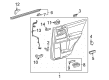
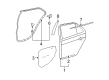
- Q: How to service the Front Door Window Glass Weather Strip on Toyota 4Runner?A:The process of servicing the Front Door Window Glass Weather Strip starts with removal of the Power Window Regulator Master Switch Assembly followed by the Front Door Lower Frame Bracket Garnish LH then Front Door Inside Handle Bezel LH followed by Front Armrest Assembly LH and Front Door Trim Board Sub-Assembly LH and Front Door Service Hole Cover LH before Outer Rear View Mirror Assembly LH and Front Door Window Frame Moulding Rear LH. The service requires removing the Front Door Glass Weather Strip Assembly Outer LH carefully by placing protective tape beneath it then removing the screw and disengaging the claw with a screwdriver or moulding remover. Begin installation by inserting the claw and screw into the Front Door Glass Weather Strip Assembly Outer LH before replacing other components such as the Front Door Window Frame Moulding Rear LH and remaining assembly pieces including the Outer Rear View Mirror Assembly LH and Front Door Service Hole Cover LH.
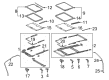
- Q: How to install the rear door window glass Weather Strip on Toyota Sienna?A:The installation process for rear door window glass Weather Strip begins when you install the Weather Strip itself to the rear door glass. The next step involves installation of the slide door window assembly with the rear door glass run following it. Introduce the rear door trim board sub-assembly followed by installing the side trim board cover rear. The last step includes the installation of rear window side garnish assembly after rear door window frame sub-assembly and rear door trim board sub-assembly.


Related Toyota Parts
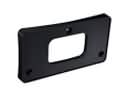 Toyota License Plate
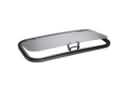 Toyota Sunroof
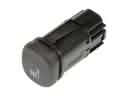 Toyota Seat Heater Switch
 Toyota Door Lock Actuator
 Toyota Car Mirror
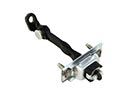 Toyota Door Check
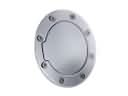 Toyota Fuel Door
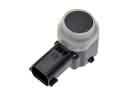 Toyota Parking Assist Sensor
 Toyota Window Regulator
 Toyota Instrument Panel Light Bulb
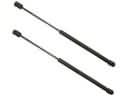 Toyota Liftgate Lift Support
 Toyota Wheelhouse
Browse Toyota Weather Strip by Models
Tacoma 4Runner Camry Tundra Corolla RAV4 Highlander Prius Sienna Land Cruiser Pickup FJ Cruiser 86 Sequoia T100 Avalon Celica Supra Yaris Matrix MR2 Solara Venza GR86 Echo C-HR Cressida Grand Highlander Paseo Previa Prius C Prius Prime bZ4X Corolla Cross Corolla iM Crown Crown Signia GR Corolla Mirai MR2 Spyder Prius V Starlet Tercel Van Yaris iA Prius Plug-In GR Supra Prius AWD-e RAV4 Prime