×
ToyotaParts- Hello
- Login or Register
- Quick Links
- Live Chat
- Track Order
- Parts Availability
- RMA
- Help Center
- Contact Us
- Shop for
- Toyota Parts
- Scion Parts
My Garage
My Account
Cart
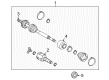
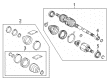
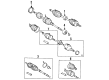
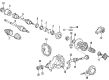
OEM Toyota Corolla Axle Shaft
Car Axle Shaft- Select Vehicle by Model
- Select Vehicle by VIN
Select Vehicle by Model
orMake
Model
Year
Select Vehicle by VIN
For the most accurate results, select vehicle by your VIN (Vehicle Identification Number).
98 Axle Shafts found


Toyota Corolla Axle Assembly, Driver Side Part Number: 43420-02B12
$280.95 MSRP: $427.68You Save: $146.73 (35%)


Toyota Corolla Axle Assembly, Passenger Side Part Number: 43410-02A03
$308.77 MSRP: $467.38You Save: $158.61 (34%)


Toyota Corolla Axle Assembly, Passenger Side Part Number: 43410-47040
$131.12 MSRP: $185.61You Save: $54.49 (30%)Ships in 1-3 Business Days


Toyota Corolla Axle Assembly, Passenger Side Part Number: 43410-12B60
$439.35 MSRP: $643.87You Save: $204.52 (32%)Ships in 1-3 Business Days


Toyota Corolla Axle Assembly, Driver Side Part Number: 43420-47040
$354.11 MSRP: $518.95You Save: $164.84 (32%)Ships in 1 Business Day

Toyota Corolla Axle Assembly, Driver Side Part Number: 43420-12B00
$402.23 MSRP: $589.48You Save: $187.25 (32%)Ships in 1-3 Business Days
Toyota Corolla Axle Assembly, Driver Side Part Number: 43420-02B62
$344.57 MSRP: $504.98You Save: $160.41 (32%)

Toyota Corolla Axle Assembly, Driver Side Part Number: 43420-02E70
$401.89 MSRP: $588.98You Save: $187.09 (32%)Ships in 1-3 Business Days
Toyota Corolla Axle Assembly, Passenger Side Part Number: 43410-02031-84
$120.21 MSRP: $170.15You Save: $49.94 (30%)Ships in 1-3 Business DaysToyota Corolla Axle Assembly, Driver Side Part Number: 43420-12330
$243.22 MSRP: $347.26You Save: $104.04 (30%)Ships in 1-3 Business Days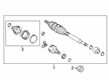
Toyota Corolla Axle Assembly, Driver Side Part Number: 43420-12B40
$375.22 MSRP: $549.89You Save: $174.67 (32%)Ships in 1-3 Business Days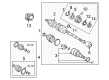
Toyota Corolla Axle Assembly, Driver Side Part Number: 43420-02360
$399.40 MSRP: $585.32You Save: $185.92 (32%)Ships in 1-3 Business DaysToyota Corolla Axle Assembly, Passenger Side Part Number: 43410-12C10
$404.96 MSRP: $593.47You Save: $188.51 (32%)Ships in 1-3 Business DaysToyota Corolla Axle Assembly, Driver Side Part Number: 43420-02E80
$401.89 MSRP: $588.98You Save: $187.09 (32%)Ships in 1-3 Business Days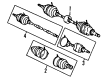
Toyota Corolla Axle Assembly, Front Part Number: 43420-12313
$399.51 MSRP: $585.48You Save: $185.97 (32%)Ships in 1-3 Business Days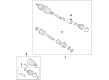
Toyota Corolla Axle Assembly, Driver Side Part Number: 43420-12A90
$402.23 MSRP: $589.48You Save: $187.25 (32%)Ships in 1-3 Business DaysToyota Corolla Axle Assembly, Driver Side Part Number: 43420-02320
$404.05 MSRP: $592.14You Save: $188.09 (32%)Ships in 1-3 Business DaysToyota Corolla Axle Assembly, Driver Side Part Number: 43420-02E82
$404.62 MSRP: $592.96You Save: $188.34 (32%)Ships in 1-3 Business Days
Toyota Corolla Axle Shafts Part Number: 42340-32090
$417.93 MSRP: $612.49You Save: $194.56 (32%)Ships in 1-3 Business Days


Toyota Corolla Axle Assembly, Passenger Side Part Number: 43410-02280
| Page 1 of 5 |Next >
1-20 of 98 Results
Toyota Corolla Axle Shaft
Choose genuine Axle Shaft that pass strict quality control tests. You can trust the top quality and lasting durability. Shopping for OEM Axle Shaft for your Toyota Corolla? Our website is your one-stop destination. We stock an extensive selection of genuine Toyota Corolla parts. The price is affordable so you can save more. It only takes minutes to browse and find the exact fit. Easily add to cart and check out fast. Our hassle-free return policy will keep you stress-free. We process orders quickly for swift delivery. Your parts will arrive faster, so you can get back on the road sooner.
Toyota Corolla Axle Shaft Parts and Q&A
- Q: How to install the axle shaft assembly on Toyota Corolla?A:The installation of the 2ZR-FE front drive shaft assembly starts with placing new front drive shaft hole snap ring LH onto the front drive inboard joint assembly before you repeat the same steps for the RH side. You should put together the front drive shaft assembly LH by aligning its inboard joint splines while using a brass bar and hammer to install it correctly. This process requires the end gap of the front drive inboard joint hole snap ring to face downward toward the ground while keeping the oil seal and inboard joint boot safe from damage. Check the drive shaft installation by examining reaction forces together with sounds before repeating this procedure on the RH side. Insert the drive shaft spline into the front axle assembly LH by pushing the axle assembly from the vehicle while ensuring both minimal damage and less than needed slice of the outboard joint boot remains. Check the front Speed Sensor for alien material during this process. Repeat this for the RH side. The front lower suspension arms LH and RH installations must be followed by connecting the tie rod end sub-assemblies LH and RH before installing the front stabilizer link assemblies LH and RH. Performs the front speed sensor connection steps for both TMC Made and non-TMC Made versions while applying the same front-side procedures. The threaded drive shaft and front axle shaft nut components require cleaning with non-residue solvent before adding a new front axle shaft nut through a 30 mm socket wrench that should be tightened to 216 Nm (2203 kgf-cm, 160 ft-lbf) while sealing with a chisel and hammer on both sides. Perform the same procedure on the RH side before torquing front wheels to 103 Nm (1050 kgf-cm, 76 ft-lbf). Both transmission systems need the addition of manual transaxle oil for manuals and automatic transaxle fluid for auto transaxles before leak inspection begins. Under the engine cover both LH and RH inspect and align the front wheels properly while checking the VSC-enabled and VSC-disabled speed sensor signals.
- Q: How to remove and replace the axle shaft assembly on Toyota Corolla?A:The first step in axle shaft assembly removal and replacement requires you to identify all components of the front drive shaft assembly used with the 2ZR-FE engine. You need to prepare all essential tools as well as parts needed for this procedure. The procedure demands proper detachment of the drive shaft through following the established guidelines which protect nearby components from harm. The new axle shaft assembly installation commences once the removal process ends by cleaning and tightening all connections with proper alignment.


Related Toyota Corolla Parts
 Toyota Corolla Control Arm
 Toyota Corolla CV Joint
 Toyota Corolla Coil Springs
 Toyota Corolla Control Arm Bushing
 Toyota Corolla CV Boot
 Toyota Corolla Axle Beam Mount
 Toyota Corolla Bump Stop
 Toyota Corolla Lateral Link
 Toyota Corolla Suspension Strut Rod
 Toyota Corolla Sway Bar Bushing
 Toyota Corolla Trailing Arm Bushing
 Toyota Corolla Wheel Seal
Browse Toyota Corolla Axle Shaft by Years
2025
2024
2023
2022
2021
2020
2019
2018
2017
2016
2015
2014
2013
2012
2011
2010
2009
2008
2007
2006
2005
2004
2003
2002
2001
2000
1999
1998
1997
1996
1995
1994
1993
1992
1991
1990
1989
1988
1987
1986
1985
1984