×
ToyotaParts- Hello
- Login or Register
- Quick Links
- Live Chat
- Track Order
- Parts Availability
- RMA
- Help Center
- Contact Us
- Shop for
- Toyota Parts
- Scion Parts
My Garage
My Account
Cart
OEM Scion Car Speakers
Audio Speakers- Select Vehicle by Model
- Select Vehicle by VIN
Select Vehicle by Model
orMake
Model
Year
Select Vehicle by VIN
For the most accurate results, select vehicle by your VIN (Vehicle Identification Number).
Part Type
Select Part Type
27 Car Speakers found


Scion Instrument Panel Speaker, Driver Side Part Number: SU003-02651
$107.52 MSRP: $140.35You Save: $32.83 (24%)Ships in 1-3 Business DaysProduct Specifications- Other Name: Speaker Assembly Bil; Speaker, Left; Speaker; Speaker Assembly, Front
- Manufacturer Note: LH
- Position: Driver Side


Scion Front Driver Speaker, Lower Part Number: 86160-21170
$120.90 MSRP: $165.87You Save: $44.97 (28%)Ships in 1-2 Business DaysProduct Specifications- Other Name: Speaker Assembly, Radio; Speaker, Front Lower; Speaker Assembly, Front
- Position: Front Lower


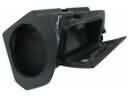
Scion Door Speaker, Rear Part Number: 86160-33620
$112.44 MSRP: $152.97You Save: $40.53 (27%)Ships in 1-3 Business DaysProduct Specifications- Other Name: Speaker Assembly, Radio; Speaker, Center, Front, Rear; Quarter Panel Speaker; Front Driver Speaker; Rear Driver Speaker; Speaker Assembly, Front; Speaker Assembly, Rear
- Position: Rear


Scion Front Driver Speaker, Rear Part Number: 86160-WB001
$14.67 MSRP: $19.80You Save: $5.13 (26%)Ships in 1-3 Business DaysProduct Specifications- Other Name: Speaker Assembly, Radio; Speaker, Center, Front, Rear; Rear Driver Speaker; Speaker Assembly, Front; Speaker Assembly, Rear
- Position: Rear


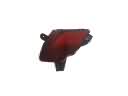
Scion Windshield Pillar Speaker, Front Part Number: 86160-02A70
$52.93 MSRP: $71.40You Save: $18.47 (26%)Ships in 1-2 Business DaysProduct Specifications- Other Name: Speaker Assembly, Radio; Speaker, Front; Tweeter; Speaker Assembly, Front
- Manufacturer Note: BACK MONITOR(REAR TELEVISION CAMERA)-WITH
- Position: Front
- Replaces: 86160-1A200


Scion Instrument Panel Speaker, Passenger Side Part Number: SU003-02650
$107.52 MSRP: $140.35You Save: $32.83 (24%)Ships in 1-3 Business DaysProduct Specifications- Other Name: Speaker Assembly Bir; Speaker, Right; Speaker; Speaker Assembly, Front
- Manufacturer Note: RH
- Position: Passenger Side

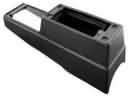
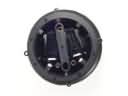
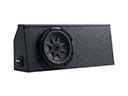
Scion Woofer Part Number: 86150-21020
$361.28 MSRP: $513.16You Save: $151.88 (30%)Ships in 1-3 Business DaysProduct Specifications- Other Name: Speaker Assembly, With Box; Speaker; Speaker Assembly, W/Box

Scion Tweeter Part Number: 86160-21160
$92.06 MSRP: $129.23You Save: $37.17 (29%)Ships in 1-3 Business DaysProduct Specifications- Other Name: Speaker Assembly, Radio; Speaker; Speaker Assembly, Front

Scion Front Driver Speaker, Driver Side Part Number: 86160-21190
$130.88 MSRP: $179.58You Save: $48.70 (28%)Ships in 1-3 Business DaysProduct Specifications- Other Name: Speaker Assembly, Radio; Speaker, Front Left Upper; Speaker Assembly, Front
- Manufacturer Note: LH
- Position: Driver Side
Scion Front Driver Speaker, Passenger Side Part Number: 86160-21180
$143.93 MSRP: $197.47You Save: $53.54 (28%)Ships in 1-3 Business DaysProduct Specifications- Other Name: Speaker Assembly, Radio; Speaker, Front Right Upper; Speaker Assembly, Front
- Manufacturer Note: RH
- Position: Passenger Side

Scion Rear Driver Speaker Part Number: 86160-2B570
$149.93 MSRP: $205.71You Save: $55.78 (28%)Ships in 1-3 Business DaysProduct Specifications- Other Name: Speaker Assembly, Radio; Speaker, Rear; Speaker Assembly, Rear
- Position: Rear

Scion Instrument Panel Speaker, Front Part Number: 86160-WB002
$68.71 MSRP: $93.46You Save: $24.75 (27%)Product Specifications- Other Name: Speaker Assembly, Radio; Speaker, Front; Speaker Assembly, Front
- Position: Front

Scion Tweeter, Passenger Side Part Number: 86160-52120
$83.35 MSRP: $113.40You Save: $30.05 (27%)Ships in 1-3 Business DaysProduct Specifications- Other Name: Speaker Assembly, Radio; Speaker, Right; Speaker Assembly, Front
- Manufacturer Note: RH
- Position: Passenger Side
Scion Tweeter, Driver Side Part Number: 86160-52260
$83.36 MSRP: $113.42You Save: $30.06 (27%)Ships in 1-3 Business DaysProduct Specifications- Other Name: Speaker Assembly, Radio; Speaker, Left; Speaker Assembly, Front
- Manufacturer Note: LH
- Position: Driver Side

Scion Tweeter, Driver Side Part Number: 86160-21130
$85.14 MSRP: $115.83You Save: $30.69 (27%)Ships in 1-3 Business DaysProduct Specifications- Other Name: Speaker Assembly, Radio; Speaker, Left; Speaker Assembly, Front
- Manufacturer Note: LH
- Position: Driver Side
Scion Tweeter, Passenger Side Part Number: 86160-21120
$85.14 MSRP: $115.83You Save: $30.69 (27%)Ships in 1-3 Business DaysProduct Specifications- Other Name: Speaker Assembly, Radio; Speaker, Right; Speaker Assembly, Front
- Manufacturer Note: RH
- Position: Passenger Side
Scion Tweeter, Passenger Side Part Number: 86160-52250
$87.54 MSRP: $119.09You Save: $31.55 (27%)Ships in 1-3 Business DaysProduct Specifications- Other Name: Speaker Assembly, Radio; Speaker, Right; Speaker Assembly, Front
- Manufacturer Note: RH
- Position: Passenger Side


Scion Tweeter Part Number: 86160-68010
$66.82 MSRP: $90.91You Save: $24.09 (27%)Product Specifications- Other Name: Speaker Assembly, Radio; Speaker; Speaker Assembly, Front


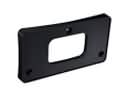
Scion Instrument Panel Speaker Part Number: 86160-52040
$96.33 MSRP: $131.05You Save: $34.72 (27%)Product Specifications- Other Name: Speaker Assembly, Radio; Speaker, Front; Speaker Assembly, Front


Scion Quarter Panel Speaker, Rear Part Number: 86160-13080
$108.89 MSRP: $148.14You Save: $39.25 (27%)Product Specifications- Other Name: Speaker Assembly, Radio; Speaker, Rear; Rear Driver Speaker; Speaker Assembly, Rear
- Position: Rear
| Page 1 of 2 |Next >
1-20 of 27 Results
Scion Car Speakers
OEM parts deliver unmatched quality you can rely on. They pass extensive quality control inspections. Scion produces them to the official factory specifications. This process helps prevent defects and imperfections. So you can get exceptional lifespan and a flawless fit. Need new OEM Scion Car Speakers? You'll love our wide selection of genuine options. Shop in minutes and skip the hunt. Our prices are unbeatable, you'll save time and money. It's easy to shop and find the right piece. Our committed customer service team gives professional help from start to finish. Every part includes a manufacturer's warranty. We ship quickly, your parts will arrive fast at your door.
Scion Car Speakers sound sharp and loud and make a turn around drive a concert. Scion abandoned the dealer dance, allowing customers to choose wild paint, trim and tech at a single price. In 2003, first-time drivers were introduced to the badge, offering the user style, fun, and no legacy baggage. Scion had created buzz by creating a virtual city and unexpected Release Series drops which disappeared during concert tickets just as quickly. One-price stickers reduced headaches and annual limited runs made each compact into a collector street toy. Scion served as a test lab of Toyota to test radical colors, interior technology and no-haggle applications before widespread adoption. Scion continues to steer the way brands go to attract young drivers who love control even after its termination in 2016. The rides have Car Speakers that have tough polypropylene-wool bass cones and silk blend treble domes and a tight crossover that completely parts the frequencies so that highs stay bright and lows hit without mud. Car Speakers can install woofer low and tweeter high, which raises the soundstage in your direction and makes the cues of direction more definite. Car Speakers require amps equal to their wattage and sensitivity, which means they sound good and loud without frying coils or snarling songs. Reinforced frames allow the Car Speakers to survive potholes, door bangs and continue playing beats even when odometers are past 100,000.
Scion Car Speakers Parts and Q&A
- Q: How to remove the luggage Car Speakers on Scion tC?A:The first step to access the luggage speaker includes uninstalling the deck board sub-assembly. You should first remove the back door scuff plate then break off the No. 1 deck board. After disconnecting the connector from the box speaker assembly you should remove its screws and bolt and extract the box speaker assembly from its position.
- Q: How to remove and install the rear Car Speakers assembly from the LH side on Scion xB?A:The first step when replacing the LH rear speaker assembly requires disconnecting the battery cable negative terminal along with a 90-second wait time to stop Air Bags and seat belt pretensioners from activating. Begin by removing the rear door scuff plate RH and LH along with rear door opening trim parts from RH and LH and finally separate the rear seat assembly. Start by detaching the back door Weather Strip together with the spare wheel cover assembly and deck trim cover rear before you disconnect the connector and remove 3 bolts from the rear speaker assembly LH. You should first establish the connector to the rear speaker assembly then install the speaker with three bolts before you reinstall the deck trim cover rear alongside the spare wheel cover assembly and back door Weather Strip and rear seat assembly followed by the rear door opening trim RH and rear door opening trim LH and finally the rear door scuff plate RH and rear door scuff plate LH. Rejoin the cable wire to the negative battery terminal as the last step.