×
ToyotaParts- Hello
- Login or Register
- Quick Links
- Live Chat
- Track Order
- Parts Availability
- RMA
- Help Center
- Contact Us
- Shop for
- Toyota Parts
- Scion Parts
My Garage
My Account
Cart
OEM Scion xD Car Speakers
Audio Speakers- Select Vehicle by Model
- Select Vehicle by VIN
Select Vehicle by Model
orMake
Model
Year
Select Vehicle by VIN
For the most accurate results, select vehicle by your VIN (Vehicle Identification Number).
3 Car Speakers found


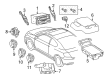
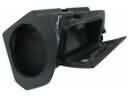
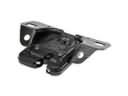
Scion xD Door Speaker, Rear Part Number: 86160-33620
$112.44 MSRP: $152.97You Save: $40.53 (27%)Ships in 1-3 Business Days


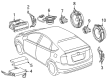
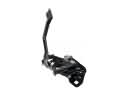
Scion xD Tweeter Part Number: 86160-68010
$66.82 MSRP: $90.91You Save: $24.09 (27%)

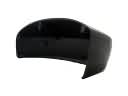
Scion xD Quarter Panel Speaker, Rear Part Number: 86160-13080
$108.89 MSRP: $148.14You Save: $39.25 (27%)
Scion xD Car Speakers
Choose genuine Car Speakers that pass strict quality control tests. You can trust the top quality and lasting durability. Shopping for OEM Car Speakers for your Scion xD? Our website is your one-stop destination. We stock an extensive selection of genuine Scion xD parts. The price is affordable so you can save more. It only takes minutes to browse and find the exact fit. Easily add to cart and check out fast. Our hassle-free return policy will keep you stress-free. We process orders quickly for swift delivery. Your parts will arrive faster, so you can get back on the road sooner.
Scion xD Car Speakers Parts and Q&A
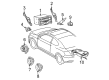
- Q: How to install the front door Car Speakers on the RH side on Scion xD?A:Set up the front door speaker on the RH side through the same installation process that applies to the LH side. You need to install the front No. 1 speaker assembly through an air riveter or hand riveter by using three strike rivets which have to be positioned specifically. When using the riveter avoid forcefully prying the rivet to protect the components but make sure the rivets contact the speaker correctly while checking for head tilt and space between all surfaces which should be pressed tightly together while installing the rivet. Next, connect the connector. Begin by fitting the front door trim board sub-assembly and afterward install the front door inside handle bezel. Insert the front No. 2 speaker assembly by using the 3 claws installed together. Install both the front door lower frame bracket garnish and the front door armrest base upper panel as the last steps.
- Q: How to remove the rear door Car Speakers on both the RH and LH sides on Scion xD?A:A complete process to remove rear door speakers from both sides starts by removing the rear door armrest base upper panel and proceeding with removing the rear door inside handle bezel and finally removing the rear door trim board sub-assembly. Apply a drill with a less than 4-millimeter bit diameter (0.16 inches) to drill out the 3 rivet heads from the rear speaker after removing its connector. Use the drill to rotate along the circumference of the rivet heads but keep the drill straight with the rivet to prevent any damage during the flange cutting process. You should handle the cut rivet since it remains extremely hot. Drilling the flange should be followed by pushing off any remaining pieces before vacuuming up the rivet debris and shavings from inside the door.