My Garage
Cart
Make sure this part fits

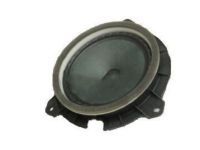
Toyota 86160-68010
Tweeter

2004-2015 Toyota 8616068010

Customer Questions & Expert Answers (18)
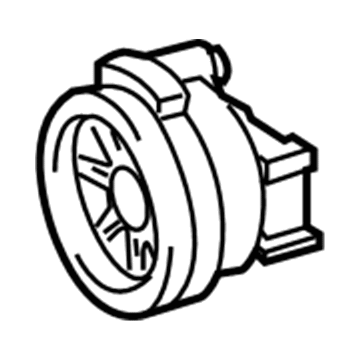
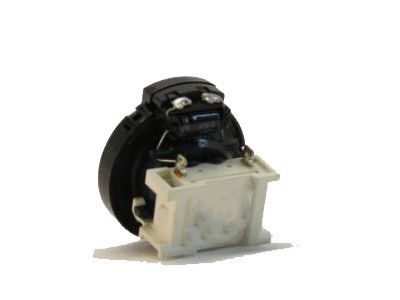
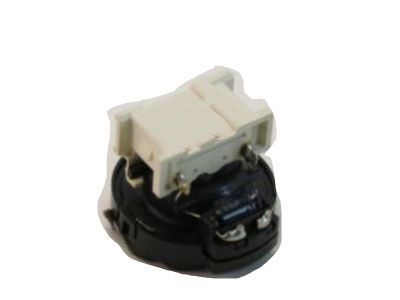
Toyota 86160-68010 Tweeter
  • Part Description
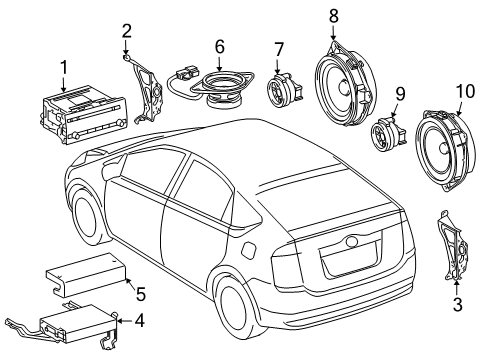
    Speaker Assembly, Radio; Speaker
  • Part Name Code
    86160P
  • Manufacturer
    Toyota
Make sure this part fits
$66.82 MSRP: $90.91
You Save: $24.09 (27%)
Ships in 1-3 Business Days
1
ADD TO CART
  • Related Parts
  • Product Specifications
  • Vehicle Fitment
  • Customer Questions & Expert Answers
  • Product Specifications

    BrandGenuine Toyota
    Part Name Code86160P
    Manufacturer Part Number86160-68010
    Part DescriptionSpeaker Assembly, Radio; Speaker
    Other NamesSpeaker Assembly, Front
    Item Weight0.70 Pounds
    ConditionNew
    Fitment TypeDirect Replacement
    Require Quantity2
    ManufacturerToyota
    SKU86160-68010
    WarrantyThis genuine Toyota part is guaranteed by Toyota's factory warranty.
    Shipping & ReturnShipping Policy Return Policy
    Warning: California's Proposition 65
  • Vehicle Fitment

    Year Make Model Trim Engine
    2012-2015 Scion iQBase4 Cyl 1.3 L GAS
    2008-2015 Scion xBBase4 Cyl 2.4 L GAS
    2008-2014 Scion xDBase4 Cyl 1.8 L GAS
    2009-2011 Toyota CorollaBase, LE, S, XLE, XRS4 Cyl 1.8 L GAS, 4 Cyl 2.4 L GAS
    2004-2009 Toyota PriusBase, Touring4 Cyl 1.5 L FULL HYBRID EV-GAS (FHEV)
  • Customer Questions & Expert Answers

    Q:
    Can you provide the right 86160-68010 for my car? Posted by ToyotaPartsNow Specialist
    A:
    Find out if part number 86160-68010 is the right fit for your car by Selecting Your Vehicle model.
    Posted by ToyotaPartsNow Specialist
    Q:
    How to remove the front door Car Speakers on the RH side on Scion xD? Posted by Customer
    A:
    The procedure for removing the RH front door speaker matches the LH side procedure when no alternate instructions are given. Start by removing the front door armrest base upper panel followed by taking off the front door lower frame bracket garnish. You must release the 3 claws before extracting the front No. 2 speaker assembly. The second step involves removing both the front door inside handle bezel together with the front door trim board sub-assembly. The procedure to get rid of the front No. 1 speaker assembly begins by breaking the speaker connector then using a drill with a bit smaller than 4 mm (0.16 in.) to remove the speaker by drilling out its 3 rivet heads. Use the drill to cut the flange while working around the rivet heads and maintain straight-line alignment to prevent any harmful damage until the platform completes the trim. After cutting the flange with the drill machine proceed with drilling until all shards are pushed out and vacuum up remaining shavings and rivet fragments from inside the door.
    Posted by ToyotaPartsNow Specialist
    Q:
    How to install the rear door Car Speakers assembly on the RH side on Scion xD? Posted by Customer
    A:
    For installation of a rear door speaker on the right-hand side use either an air or hand riveter to put 3 strike rivets in while following the right rule for order. Keep the riveter only on the rivet itself to stay safe and check that the rivets sit right next to the speaker before putting them in place. Also level out the speaker as you install it. Keep a good amount of pressure on both parts as you tighten the rivets to fill the entire gap between speaker and door. Do not alter the rivet distance from its initial position during installation. Fasten the speaker to its position after installing the connector. Start by adding the rear door trim board before you put in the rear door inside handle bezel and lastly the rear door armrest base upper panel.
    Posted by ToyotaPartsNow Specialist
    Q:
    How to remove and install the front No. 1 Car Speakers assembly from the LH side on Toyota Prius? Posted by Customer
    A:
    The initial step for removing the front No. 1 speaker assembly from the LH side begins with disconnecting the negative battery cable terminal before waiting 90 seconds to avoid Air Bag and seat belt pretensioner activation. The necessary tools for this operation include removing the front door lower frame bracket garnish LH, front door inside handle bezel LH, door pull handle, front armrest base panel upper LH and front door trim board sub-assembly LH. Remove the assembly connector from the front No. 1 speaker before drilling out 3 rivet heads using a 4 mm (0.16 in.) drill bit that stays in line with the rivet to minimize damage to its area. The drill tip should face the rivet directly to pull out the remaining fragments in a careful manner. Use a vacuum cleaner to clean interior of the door from remaining debris. The new speaker installation requires both an air riveter and hand riveter with three fresh rivets to secure it properly against the speaker. Check for any gaps between the rivets and the speaker. Once you attach the speaker connector you must reinstall the front door trim sub-assembly LH as well as the front armrest base panel upper LH along with the door pull handle and front door inside handle bezel LH and front door lower frame bracket garnish LH. The initialization process must be started following negative battery terminal cable reconnection together with any system requirements that need initialization post-battery reconnection.
    Posted by ToyotaPartsNow Specialist
    Q:
    What precautions should be taken while drilling for the 2010 Scion xB? Posted by Customer
    A:
    Exercise caution as the cut rivet will be very hot and avoid drilling at an angle.
    Posted by ToyotaPartsNow Specialist
    See expert answers on similar Car Speakers
    Q:
    How do you install the front door speaker on the RH side for the 2008 Scion xB? Posted by Customer
    A:
    Use the same procedure as for the LH side.
    Posted by ToyotaPartsNow Specialist
    See expert answers on similar Car Speakers
    Q:
    What is the first step to remove the front door speakers for the 2010 Scion xD? Posted by Customer
    A:
    Start by removing the front door armrest base upper panel.
    Posted by ToyotaPartsNow Specialist
    See expert answers on similar Car Speakers
    Q:
    What caution should be taken while drilling for the 2009 Scion xD? Posted by Customer
    A:
    Exercise caution as the cut rivet will be very hot, and avoid drilling at an angle to prevent damage.
    Posted by ToyotaPartsNow Specialist
    See expert answers on similar Car Speakers
    Q:
    What is the first step to remove the front door speaker on both the RH and LH sides for the 2009 Scion xB? Posted by Customer
    A:
    First, remove the front door armrest base upper panel.
    Posted by ToyotaPartsNow Specialist
    See expert answers on similar Car Speakers
    Q:
    What should be installed after connecting the connector for the 2008 Scion xD? Posted by Customer
    A:
    Install the front door trim board sub-assembly, followed by the front door inside handle bezel.
    Posted by ToyotaPartsNow Specialist
    See expert answers on similar Car Speakers
    Q:
    What is the next step after installing the package tray trim panel assembly for the 2009 Toyota Corolla? Posted by Customer
    A:
    Install the package tray trim belt hole cover.
    Posted by ToyotaPartsNow Specialist
    See expert answers on similar Car Speakers
    Q:
    What is the process for removing the front No. 2 speaker for the 2009 Toyota Corolla? Posted by Customer
    A:
    Remove the front door lower frame bracket garnish, then disengage the 3 claws to take out the front No. 2 speaker assembly.
    Posted by ToyotaPartsNow Specialist
    See expert answers on similar Car Speakers
    Q:
    What is the final step after reassembling the components for the 2007 Toyota Prius? Posted by Customer
    A:
    Reconnect the cable to the negative battery terminal and perform initialization, as certain systems require this after disconnecting and reconnecting the cable.
    Posted by ToyotaPartsNow Specialist
    See expert answers on similar Car Speakers
    Q:
    What is the next step after removing the FRONT ARMREST BASE PANEL UPPER LH for the 2008 Toyota Prius? Posted by Customer
    A:
    Remove the FRONT DOOR TRIM BOARD SUB-ASSEMBLY LH.
    Posted by ToyotaPartsNow Specialist
    See expert answers on similar Car Speakers
    Q:
    What is the process for installing the new speaker for the 2004 Toyota Prius? Posted by Customer
    A:
    Use an air riveter or hand riveter to install 3 new strike rivets on the Front No.1 Speaker Assy onto the front door panel, ensuring the new rivets are installed in the correct order as shown in the illustration.
    Posted by ToyotaPartsNow Specialist
    See expert answers on similar Car Speakers
    Q:
    How should the new strike rivets be installed for the 2005 Toyota Prius? Posted by Customer
    A:
    Use an air riveter or hand riveter to install 3 new strike rivets on the front No.1 speaker assembly, ensuring they are installed in the correct order and without tilt.
    Posted by ToyotaPartsNow Specialist
    See expert answers on similar Car Speakers
    Q:
    What is the first step to remove the rear speaker assembly from the LH side for the 2006 Toyota Prius? Posted by Customer
    A:
    Disconnect the cable from the negative battery terminal and wait at least 90 seconds to prevent airbag and seat belt pretensioner activation.
    Posted by ToyotaPartsNow Specialist
    See expert answers on similar Car Speakers
    Q:
    What should be done after removing the front door lower frame bracket garnish LH for the 2009 Toyota Prius? Posted by Customer
    A:
    Detach the 3 claws to remove the front No. 2 speaker assembly.
    Posted by ToyotaPartsNow Specialist
    See expert answers on similar Car Speakers
    If you have any questions about this product, please don't hesitate to ask us. We will be happy to help you!

OEM Toyota 86160-68010, Excellent Performance and Perfect Fitment

To ensure reliability, purchase Toyota part # 86160-68010 Tweeter. It is sometimes referred to as Toyota Car Speakers. OEM parts are unrivaled in terms of quality. They go through extensive quality control inspections and are produced in accordance with Toyota's official factory specifications. All of these remove defects and imperfections. So you can relax knowing they promise exceptional lifespan and flawless fitment.

ToyotaPartsNow.com is a leading supplier of genuine Toyota parts such as Toyota 8616068010 Tweeter. At ToyotaPartsNow.com, we have a wide variety of OEM Toyota parts available at competitive prices. Our comprehensive range of genuine Toyota parts come with a manufacturer's warranty for peace of mind. We also prioritize customer satisfaction, providing a hassle-free return policy and expedited delivery for all our parts. For detailed Toyota parts information, click here.
Choose ToyotaPartsNow for discounted prices, exceptional service and fast delivery