×
ToyotaParts- Hello
- Login or Register
- Quick Links
- Live Chat
- Track Order
- Parts Availability
- RMA
- Help Center
- Contact Us
- Shop for
- Toyota Parts
- Scion Parts
My Garage
My Account
Cart
OEM Toyota Clutch Disc
Friction Disc- Select Vehicle by Model
- Select Vehicle by VIN
Select Vehicle by Model
orMake
Model
Year
Select Vehicle by VIN
For the most accurate results, select vehicle by your VIN (Vehicle Identification Number).
52 Clutch Discs found


Toyota Disc Part Number: SU003-00799
$73.58 MSRP: $103.28You Save: $29.70 (29%)Ships in 1-3 Business DaysProduct Specifications- Other Name: Disk Complete-Clutch; Clutch Kit; Disc Assembly, Clutch


Toyota Disc Part Number: 31250-52050
$168.48 MSRP: $238.50You Save: $70.02 (30%)Ships in 1-3 Business DaysProduct Specifications- Other Name: Disc Assembly, Clutch; Clutch Kit


Toyota Disc Part Number: 31250-WB001
$123.25 MSRP: $174.47You Save: $51.22 (30%)Ships in 1-3 Business DaysProduct Specifications- Other Name: Disc Assembly, Clutch; Clutch Kit


Toyota Disc Part Number: 31250-20253
$122.54 MSRP: $173.47You Save: $50.93 (30%)Ships in 1-3 Business DaysProduct Specifications- Other Name: Disc Assembly, Clutch; Clutch Kit
- Replaces: 31250-20251, 31250-32031, 31250-32041, 31250-20252, 31250-33010, 31250-33011, 31250-32032, 31250-20250, 31250-32040, 31250-17040, 31250-20180, 31250-32030, 31250-32042


Toyota Disc Part Number: 31250-14186
$134.29 MSRP: $190.10You Save: $55.81 (30%)Ships in 1-3 Business DaysProduct Specifications- Other Name: Disc Assembly, Clutch; Clutch Kit
- Replaces: 31250-14184, 31250-14183, 31250-14180, 31250-14181, 31250-14185, 31250-14182


Toyota Disc Part Number: 31250-02240
$140.75 MSRP: $199.25You Save: $58.50 (30%)Ships in 1-2 Business DaysProduct Specifications- Other Name: Disc Assembly, Clutch; Clutch Kit

Toyota Disc Part Number: 31250-35481
$146.51 MSRP: $207.40You Save: $60.89 (30%)Ships in 1-2 Business DaysProduct Specifications- Other Name: Disc Assembly, Clutch; Clutch Kit
- Replaces: 31250-35480

Toyota Disc Part Number: 31250-26232
$144.28 MSRP: $204.25You Save: $59.97 (30%)Ships in 1-3 Business DaysProduct Specifications- Other Name: Disc Assembly, Clutch; Clutch Kit
- Replaces: 31250-26230, 31250-26231


Toyota Disc Part Number: 31250-14190
$144.28 MSRP: $204.25You Save: $59.97 (30%)Ships in 1-3 Business DaysProduct Specifications- Other Name: Disc Assembly, Clutch; Clutch Kit


Toyota Disc Part Number: 31250-35452
$162.49 MSRP: $230.03You Save: $67.54 (30%)Ships in 1-3 Business DaysProduct Specifications- Other Name: Disc Assembly, Clutch; Clutch Kit
- Replaces: 31250-60370, 31250-35450, 31250-35451, 31250-04080


Toyota Disc Part Number: 31250-33061
$216.79 MSRP: $309.53You Save: $92.74 (30%)Ships in 1-3 Business DaysProduct Specifications- Other Name: Disc Assembly, Clutch; Clutch Kit
- Replaces: 31250-28180, 31250-28181, 31250-42010, 31250-33060, 31250-42011


Toyota Disc Part Number: 31250-12360-84
$47.07 MSRP: $65.64You Save: $18.57 (29%)Ships in 1-3 Business DaysProduct Specifications- Other Name: Clutch Disc, Reman; Clutch Kit
- Replaces: 31250-12360, 31250-17020, 31250-12320


Toyota Disc Part Number: 31250-35370-84
$56.43 MSRP: $78.69You Save: $22.26 (29%)Ships in 1-3 Business DaysProduct Specifications- Other Name: Clutch Disc, Reman; Clutch Kit
- Replaces: 31250-22320, 31250-35370, 31250-35371, 31250-35230, 31250-35231, 31250-35371-84, 31250-35233, 31250-35232


Toyota Disc Part Number: 31250-35352-84
$90.30 MSRP: $127.01You Save: $36.71 (29%)Ships in 1-3 Business DaysProduct Specifications- Other Name: Clutch Disc, Reman; Clutch Kit
- Replaces: 31250-35352, 31250-35351, 31250-35350


Toyota Disc Part Number: 31250-52100
$96.92 MSRP: $136.05You Save: $39.13 (29%)Ships in 1-3 Business DaysProduct Specifications- Other Name: Disc Assembly, Clutch; Clutch Kit
- Replaces: 31250-20340
Toyota Disc Part Number: 31250-33042
$119.72 MSRP: $169.48You Save: $49.76 (30%)Ships in 1-3 Business DaysProduct Specifications- Other Name: Disc Assembly, Clutch; Clutch Kit
- Replaces: 31250-33041, 31250-33040


Toyota Disc Part Number: 31250-20140-84
$61.93 MSRP: $87.11You Save: $25.18 (29%)Product Specifications- Other Name: Clutch Disc, Reman; Clutch Kit
- Replaces: 31250-20142, 31250-20140, 31250-20141, 31250-20171, 31250-20170, 31250-20172, 31250-20173


Toyota Disc Part Number: 31250-05101
$122.42 MSRP: $173.31You Save: $50.89 (30%)Product Specifications- Other Name: Disc Assembly, Clutch; Clutch Kit
- Replaces: 31250-05100, 31250-05060

Toyota Disc Part Number: 31250-17054
$174.59 MSRP: $247.16You Save: $72.57 (30%)Product Specifications- Other Name: Disc Assembly, Clutch; Clutch Kit
- Replaces: 31250-17050, 31250-17051, 31250-17052, 31250-17053


Toyota Disc Part Number: 31250-35410
$209.22 MSRP: $298.72You Save: $89.50 (30%)Product Specifications- Other Name: Disc Assembly, Clutch; Clutch Kit
- Replaces: 31250-26072, 31250-35070, 31250-22101, 31250-26052, 31250-22160, 31250-60110, 31250-35101, 31250-25063, 31250-26050, 31250-26053, 31250-60111, 31250-26051, 31250-35090, 31250-35080, 31250-60060, 31250-35100
| Page 1 of 3 |Next >
1-20 of 52 Results
Toyota Clutch Disc
OEM parts deliver unmatched quality you can rely on. They pass extensive quality control inspections. Toyota produces them to the official factory specifications. This process helps prevent defects and imperfections. So you can get exceptional lifespan and a flawless fit. Need new OEM Toyota Clutch Disc? You'll love our wide selection of genuine options. Shop in minutes and skip the hunt. Our prices are unbeatable, you'll save time and money. It's easy to shop and find the right piece. Our committed customer service team gives professional help from start to finish. Every part includes a manufacturer's warranty. We ship quickly, your parts will arrive fast at your door.
Toyota Clutch Disc locks binds the engine torque to the gearbox and therefore acceleration remains straight and continuous. Toyota has perfected its legendary production system to eliminate waste, give line crews the power to stop defects immediately, and produce quality across factories on all continents in a uniform manner. The hybrid innovative developments, such as the redesigned Hybrid Synergy Drive and the versatile TNGA platform, squeeze an extra mile per gallon out of each tankful and improve cornering reaction and crash security ratings. Toyota builds loyalty among drivers worldwide by ensuring that their powertrains last long with simple service schedules to reduce downtime, hence cars spend their time on the road rather than in garages. Toyota is still launching these versatile plug-in products, such as the RAV4 Hybrid, which allows commuter cars to have silent electric range but retain the ability to travel long distances for weekend mountain hikes. The Clutch Disc is positioned between the flywheel and pressure plate and its layered friction material cuts hard when under load but releases easily, thus making every shift in the gear change a smooth one even when the pedal has been tapped quickly during city drives or mountain ascents. Torsional shocks are absorbed by the springs within the Clutch Disc hub, which reduces vibration otherwise felt as zipping vibrations along the drivetrain and inside the cabin. Drivers with a Clutch Disc have the opportunity to select organic, ceramic, or metallic linings without compromising dependable power flow to suit their individual heat tolerance, driving style, and road demands.
Toyota Clutch Disc Parts and Q&A
- Q: How to overhaul the clutch disc on Toyota Matrix?A:The clutch disc overhaul sequence begins with manual transaxle assembly extraction and continues with the removal of the clutch release fork sub-assembly that requires dismantling of the clutch release fork with its clutch release bearing from the transaxle assembly. The next step is to remove the clutch release bearing assembly from the clutch release fork and afterward extract the release fork support from the transaxle assembly together with the release bearing hub clip and the clutch release fork boot. Starting from matchmarks, loosen each set bolt gradually with one turn until spring tension releases so you can remove the 6 bolts that detach the clutch cover assembly to avoid dropping the clutch disc assembly. The technician will separate the clutch disc assembly while also maintaining a clean condition for its lining part along with the pressure plate and flywheel sub-assembly surface. Use vernier calipers to check the depth of clutch disc assembly rivet heads which must be less than 0.3 mm (0.012 inch) for proper operation or replace the assembly. You must install the clutch disc assembly into the transaxle assembly with accurate direction before verifying its runout with a dial indicator until it reaches 0.8 mm (0.031 inch) for necessary replacement. To check diaphragm spring wear within the clutch cover assembly use a vernier caliper then inspect both the depth which must be minimum 0.5 mm (0.020 inch) and the width that needs to measure 6.0 mm (0.236 inch); do a replacement when necessary. A dial indicator should be used to check the flywheel sub-assembly runout to ensure it does not exceed 0.1 mm (0.004 inch) since replacement will be required if this value is exceeded. Testing the clutch release bearing assembly with hand movement under axial force conditions requires a replacement of the assembly if necessary. Use Special Service Tool: 09301-00210 to install the clutch disc assembly before installing it into the flywheel sub-assembly with the correct orientation. Position the clutch cover assembly according to matchmarks before applying torque to 19.1 Nm (195 kgf-cm, 14 ft. lbs.) to the specified 6 bolts in the right sequence while verifying that the disc remains centered. Use a dial indicator to check the diaphragm spring tip alignment in the clutch cover assembly while inspecting the maximum non-alignment distance; this distance should not exceed 0.5 mm (0.020 inch). Adjust the assembly with Special Service Tool: 09333-00013 if necessary. Installation of the release fork support to the transaxle assembly requires torque 36.8 Nm followed by installing the release bearing hub clip and clutch release fork sub-assembly. Release hub grease (Part No. 08887-01806) must be applied to specified contact points before each component gets installed. The clutch spline grease (Part No. 08887-01706) should be applied to the input shaft spline before installing the clutch release bearing assembly. Make sure the release bearing moves easily during installation. Place the clutch release fork boot and the manual transaxle assembly as the last stage of installation.
- Q: How to service and repair the clutch disc on Toyota Tacoma?A:First service the transmission consults a manual to remove it from the engine afterward you can detach the clutch cover together with the disc while applying matchmarks to the flywheel and clutch cover by releasing spring tension one set bolt turn at a time before removing all set bolts to extract the clutch cover combined with disc being cautious to retain the clutch disc from falling. The transmission requires its boot release bearing as well as its fork should be taken out after removing the boot. The clutch disc requires inspection for damage by measuring its rivet head depth which must be at least 0.3 mm (0.012 inch); if lower replace the compromised clutch disc. Users should measure disc runout using a dial indicator with a specification of below 0.8 mm (0.031 inch) and flywheel runout of less than 0.1 mm (0.004 inch). A new item is needed for the flywheel when these parameters are exceeded. The examination for pilot bearing occurs through hand-driven rotation; if the bearing becomes stuck or shows resistance, change it by removing opposite pair of bolts using Special Service Tool: 09303-35011 to extract the old bearing then install a fresh one with Special Service Tool: 09300-30012 and provide a smooth turning performance before tightening two new bolts to prescribed torque values specific to each engine type. Examine the diaphragm spring to assess wear because maximum depth must be 0.6mm (0.024 inch) and widt should be 5.0 mm (0.197 inch). Replace the clutch cover if necessary. You should inspect the release bearing using your hands to confirm whether it needs replacement. Mount the clutch disc along with clutch cover onto the flywheel through the use of Special Service Tool: 09301-00110 by aligning the matchmarks afterward torque the clutch cover's 6 bolts to 19 Nm (195 kgf-cm, 14 ft. lbs.) while temporarily tightening No. 1 and No. 2 bolts. A dial indicator should measure the diaphragm spring tip alignment where maximum non-alignment must stay below 0.5 mm (0.020 inch). Adjust with help from Special Service Tool: 09333-00013 if necessary. The release hub grease points and clutch spline require molybdenum disulphide lithium base grease (NLGI No. 2) application of 100 g per recommendation under grease part number 08887-01706. Install the boot together with the release bearing and fork onto the transmission followed by transmission engine reinstallation.


Related Toyota Parts
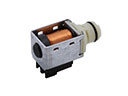 Toyota Shift Solenoid
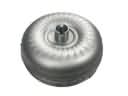 Toyota Torque Converter
 Toyota Clutch Fork
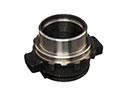 Toyota Clutch Release Bearing
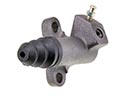 Toyota Clutch Slave Cylinder
 Toyota Flywheel
 Toyota Pilot Bearing
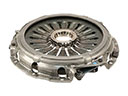 Toyota Pressure Plate
 Toyota Transmission Drain Plug
 Toyota Transmission Pan
 Toyota Automatic Transmission Shift Levers
 Toyota Clutch Slave Repair Kit