×
ToyotaParts- Hello
- Login or Register
- Quick Links
- Live Chat
- Track Order
- Parts Availability
- RMA
- Help Center
- Contact Us
- Shop for
- Toyota Parts
- Scion Parts
My Garage
My Account
Cart
OEM Toyota Corolla Clutch Disc
Friction Disc- Select Vehicle by Model
- Select Vehicle by VIN
Select Vehicle by Model
orMake
Model
Year
Select Vehicle by VIN
For the most accurate results, select vehicle by your VIN (Vehicle Identification Number).
11 Clutch Discs found


Toyota Corolla Disc Part Number: 31250-02240
$140.75 MSRP: $199.25You Save: $58.50 (30%)Ships in 1-2 Business Days


Toyota Corolla Disc Part Number: 31250-12360-84
$47.07 MSRP: $65.64You Save: $18.57 (29%)Ships in 1-3 Business DaysToyota Corolla Disc Part Number: 31250-33042
$119.72 MSRP: $169.48You Save: $49.76 (30%)Ships in 1-3 Business Days
Toyota Corolla Disc Part Number: 31250-20280-84
$46.86 MSRP: $65.37You Save: $18.51 (29%)Ships in 1-3 Business Days
Toyota Corolla Disc Part Number: 31250-20313
$164.14 MSRP: $232.36You Save: $68.22 (30%)Ships in 1-3 Business Days
Toyota Corolla Disc Part Number: 31250-12443
$213.51 MSRP: $304.84You Save: $91.33 (30%)Ships in 1-3 Business Days

Toyota Corolla Disc Part Number: 31250-05101
$122.42 MSRP: $173.31You Save: $50.89 (30%)Toyota Corolla Disc Part Number: 31250-12200-84
$40.67 MSRP: $56.71You Save: $16.04 (29%)
Toyota Corolla Disc Part Number: 31250-12670
$48.98 MSRP: $68.18You Save: $19.20 (29%)Toyota Corolla Disc Part Number: 31250-02231
Toyota Corolla Disc Part Number: 31250-12055
Toyota Corolla Clutch Disc
Choose genuine Clutch Disc that pass strict quality control tests. You can trust the top quality and lasting durability. Shopping for OEM Clutch Disc for your Toyota Corolla? Our website is your one-stop destination. We stock an extensive selection of genuine Toyota Corolla parts. The price is affordable so you can save more. It only takes minutes to browse and find the exact fit. Easily add to cart and check out fast. Our hassle-free return policy will keep you stress-free. We process orders quickly for swift delivery. Your parts will arrive faster, so you can get back on the road sooner.
Toyota Corolla Clutch Disc Parts and Q&A
- Q: How to service the clutch disc on Toyota Corolla?A:The procedure starts with engine transaxle removal followed by clutch cover and disc extraction when you properly line up clutch cover and flywheel matchmarks while loosening clamping bolts one turn until spring tension releases before drawing the cover and disc out. During this process do not let the clutch disc fall. The service starts by removing the release bearing and fork as one piece before separating them and continuing with the removal of release fork support along with boot. The clutch disc requires inspection using calipers to measure its rivet head depth which should be at least 0.3 mm (0.012 inch). If the measurement falls short, replace the clutch disc. A dial indicator helps check the clutch disc's runout until it reaches 0.8 mm (0.031 inch) while the flywheel runout should not exceed 0.1 mm (0.004 inch) before performing necessary replacements. Measure the diaphragm spring for wear to verify its maximum depth is 0.5 mm (0.020 inch) and maximum width is 6.0 mm (0.236 inch). Then consider replacing the clutch cover if necessary. The inspection includes manual turning of the release bearing with axial loading for determining its replacement needs. The installation process starts with placing Special Service Tool: 09301-00210 on the flywheel but ensuring the clutch disc points towards the correct direction. Then center the matchmarks between both clutch cover and flywheel before tightening the 6 bolts in the sequence to 19 Nm (195 kgf-cm, 14 ft. lbs.), checking for even distribution and disc centering. Follow these steps to check the diaphragm spring tip alignment using a dial indicator until measurement stays below 0.5 mm (0.020 inch). If this measurement is exceeded, use Special Service Tool: 09333-00013 for adjustment. The boot and release fork support needs to be fastened to the transaxle with a torque of 37 Nm (375 kgf-cm, 27 ft. lbs.) Follow this step by spreading molybdenum disulphide lithium base grease (NLGI NO. 2) to the release fork contact points alongside the bearing as well as the push rod and clutch spline. Use product 08887-01706 (100g) of recommended grease to lubricate the release fork and bearing contact points and push rod contact point and pivot point and clutch spline. Reinstall the transaxle with the assembly of the release bearing and fork installed to the transaxle unit.
- Q: How to overhaul the clutch disc on Toyota Corolla?A:The overhaul procedure for clutch disc begins with manual transaxle assembly disassembly and then the removal of clutch release fork sub-assembly containing clutch release fork and bearing. The clutch release bearing assembly needs to be broken free from the fork to remove the release fork support from the transaxle assembly. The clutch cover assembly can be detached by centering the matchmarks from the flywheel sub-assembly. Loosen one set of bolts at a time to relieve spring tension until you can remove the six bolts and pull away the clutch cover assembly without letting the clutch disc assembly fall. You should remove the clutch disc assembly while maintaining a clear surface on its lining and Pressure Plate and flywheel to prevent contamination by oil or foreign materials. Vernier calipers must be used to measure the rivet head depth in the clutch disc assembly and diagnose an excessive reading beyond 0.3 mm (0.012 inch). In such a case, the assembly requires immediate replacement. After proper direction insertion of the clutch disc assembly into the transaxle assembly check its runout using a dial indicator to confirm less than 0.8 mm (0.031 inch) deviation. Replace if runout exceeds the limit. Measure the diaphragm spring wear of the clutch cover assembly with vernier calipers to ensure both depth remains below 0.5 mm (0.020 inch) and width remains less than 6.0 mm (0.236 inch). Change the assembly when necessary. Test the flywheel sub-assembly runout by using a dial indicator to verify it is below 0.1 mm (0.004 inch) because replacement is needed if this value is exceeded. Turn the clutch release bearing assembly manually under axial pressure then change the component if needed. Special Service Tool 09301-00210 should be used to install the clutch disc assembly following correct orientation. Position the matchmarks from both the clutch cover assembly and flywheel sub-assembly before tightening the six bolts to 19.1 Nm (195 kgf-cm, 14 ft. lbs.) at specified torque sequence maintaining uniform clamp load and verifying disc position. Check diaphragm spring tip alignment of the clutch cover assembly with a dial indicator. This alignment should not exceed 0.5 mm (0.020 inch) maximum non-alignment but if needed adjust it using Special Service Tool: 09333-00013. To install the release fork support join the transaxle assembly at 36.8 Nm (375 kgf-cm, 27 ft. lbs.) beforeInstalling the release bearing hub clip and clutch release fork sub-assembly with an application of release hub grease (Part No. 08887-01806) to essential contact areas. The installation requires clutch spline grease (Part No. 08887-01706) on the input shaft spline before putting the bearing into the release fork which leads to the transaxle assembly resulting in proper release fork movement. The manual transaxle assembly and clutch release fork boot need installation as the final steps.


Related Toyota Corolla Parts
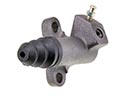 Toyota Corolla Clutch Slave Cylinder
 Toyota Corolla Flywheel
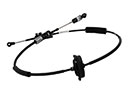 Toyota Corolla Shift Cable
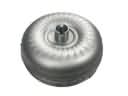 Toyota Corolla Torque Converter
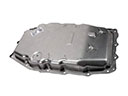 Toyota Corolla Transmission Pan
 Toyota Corolla Clutch Fork
 Toyota Corolla Clutch Hose
 Toyota Corolla Clutch Release Bearing
 Toyota Corolla Clutch Slave Repair Kit
 Toyota Corolla Pilot Bearing
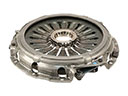 Toyota Corolla Pressure Plate
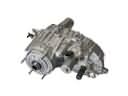 Toyota Corolla Transfer Case