×
ToyotaParts- Hello
- Login or Register
- Quick Links
- Live Chat
- Track Order
- Parts Availability
- RMA
- Help Center
- Contact Us
- Shop for
- Toyota Parts
- Scion Parts
My Garage
My Account
Cart
OEM Toyota FJ Cruiser Windshield
Glass Windshield- Select Vehicle by Model
- Select Vehicle by VIN
Select Vehicle by Model
orMake
Model
Year
Select Vehicle by VIN
For the most accurate results, select vehicle by your VIN (Vehicle Identification Number).
1 Windshield found


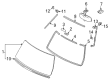
Toyota FJ Cruiser Windshield, Front Part Number: 56101-35072
$534.69 MSRP: $783.59You Save: $248.90 (32%)Ships in 1-3 Business Days
Toyota FJ Cruiser Windshield
Choose genuine Windshield that pass strict quality control tests. You can trust the top quality and lasting durability. Shopping for OEM Windshield for your Toyota FJ Cruiser? Our website is your one-stop destination. We stock an extensive selection of genuine Toyota FJ Cruiser parts. The price is affordable so you can save more. It only takes minutes to browse and find the exact fit. Easily add to cart and check out fast. Our hassle-free return policy will keep you stress-free. We process orders quickly for swift delivery. Your parts will arrive faster, so you can get back on the road sooner.
Toyota FJ Cruiser Windshield Parts and Q&A
- Q: How to install the windshield glass on Toyota FJ Cruiser?A:Begin installing windshield glass by using a scraper to remove damaged stoppers, adhesive, and dam from the glass and subsequently cleaning the outer edge with a non-residue solvent without touching the glass surface. Use a knife to shape the contact areas of the body until all rough adhesive is completely removed while taking all necessary precautions to protect the body structure from damage followed by cleaning with a shop rag or cloth. Position two new stoppers on the vehicle body before applying Primer G on their installation areas for a minimum waiting period of 3 minutes until discarding unused primer. The glass border and contact area receives Primer G application before the moulding gets installed onto the windshield surface after drying for 3 minutes. New dams should have Primer G applied to their installation parts before they dry for three minutes while getting positioned on the windshield glass using double-sided tape except the stopper areas. The task requires windshield glass alignment using suction cups while also checking for proper surface evenness before marking the edges. Apply Primer M to the outer surface of the vehicle body while waiting 3 minutes for it to dry and follow by using Primer G on glass edges plus contact points which need 3 minutes before drying. The sealer gun receives a cartridge nozzle cut before Toyota Genuine Windshield Glass Adhesive or equivalent material gets applied to the windshield window. Transport the windshield glass onto the body frame while matching the marks but apply minimum force to maintain a small space before using a scraper to eliminate unnecessary adhesive. Finally, engage the 6 claws to install the windshield outside lower moulding, conduct a leak test by applying water to the adhesive portions after hardening, seal any leakage with auto glass sealer, and proceed to install the roof side garnish protector, front pillar outer garnish, roof drip side finish moulding retainer, windshield outside upper moulding sub-assembly, roof headlining, room light assembly, inner rear view mirror assembly, inner rear view mirror stay holder cover, visor holder, visor assemblies, front pillar garnishes, visor sub-assemblies, assist grip assembly, assist grip plug, front door opening trim Weather Strips, roof side rail garnishes, roof side inner garnish covers, cowl side trim boards, footrest clip, front floor footrest, access door scuff plates, front door scuff plates, cowl top ventilator louvers, front fender side panels, antenna ornament, roof antenna pole sub-assembly, front wiper arm and blade assemblies, windshield wiper arm cover, and finally connect the cable to the negative battery terminal with a torque of 3.9 Nm (40 kgf-cm, 35 in-lbf).

Related Toyota FJ Cruiser Parts
 Toyota FJ Cruiser Seat Covers
 Toyota FJ Cruiser Bumper
 Toyota FJ Cruiser Grille
 Toyota FJ Cruiser Emblem
 Toyota FJ Cruiser Car Mirror
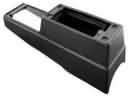 Toyota FJ Cruiser Center Console Base
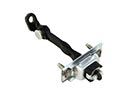 Toyota FJ Cruiser Door Check
 Toyota FJ Cruiser Door Hinge
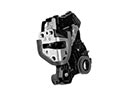 Toyota FJ Cruiser Door Lock
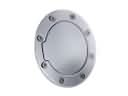 Toyota FJ Cruiser Fuel Door
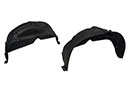 Toyota FJ Cruiser Wheelhouse
 Toyota FJ Cruiser Wiper Motor