- Hello
- Login or Register
- Quick Links
- Live Chat
- Track Order
- Parts Availability
- RMA
- Help Center
- Contact Us
- Shop for
- Toyota Parts
- Scion Parts

Popular OEM Toyota FJ Cruiser Parts
- Body & Hardware Parts View More >
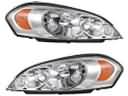
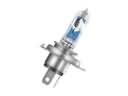
- Electrical Parts View More >
- Engine Parts View More >
- Air & Fuel Delivery Parts View More >
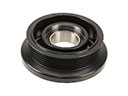
- Belts & Cooling Parts View More >
- Steering Parts View More >
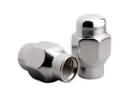
- Suspension Parts View More >
- Emission Control & Exhaust Parts View More >
- A/C & Heating Parts View More >
- Charging & Starting Parts View More >
- Brakes Parts View More >
- Transmission Parts View More >


Why Buy Genuine Toyota FJ Cruiser Parts From ToyotaPartsNow.com
ToyotaPartsNow.com highlights the reliability of OEM Toyota FJ Cruiser parts right at your fingertips. Our skilled staff assists customers in selecting the right Toyota FJ Cruiser parts and provides expert help with any unique part requests. At ToyotaPartsNow.com, we make all Toyota FJ Cruiser parts available to you quickly and efficiently through our fast order and reliable ship process. Our service is designed to make finding the correct Toyota FJ Cruiser parts fast and easy whether you are an amateur or a professional. We offer access to a broad inventory that includes a wide range of Toyota years and variants. Affordable prices, quick processing and professional service are also our specialty to ensure your car remains in top condition with OEM Toyota FJ Cruiser parts. You can feel confident shopping with us because all Toyota FJ Cruiser parts, such as Driveline & Axles you purchase from our store are of genuine quality and built to last.
Toyota launched the FJ Cruiser in 2006 as their response to meet an openings in the mid-size SUV segment. The automotive concept designed by Jin Won Kim made its first appearance at the North American International Auto Show in 2003 before the production models began manufacturing in 2005. With its five-speed automatic transmission the Toyota FJ Cruiser provides 239 horsepower and 278 lb-ft of torque from its 4.0L 1GR-FE V6 engine for enhanced driving flexibility. The FJ Cruiser is built on the same platform as the Toyota Land Cruiser Prado, providing a durable frame and excellent off-road capability. The Toyota FJ Cruiser maintains excellent stability and control through a wheelbase that measures 105.9 inches which is inbetween RAV4 and Highlander. The double-wishbone front suspension design at a high mount together with the 4-link rear suspension using coil springs deliver an even ride quality and powerful stopping capability through disc brakes with ABS and VSC safety equipment. The Toyota FJ Cruiser uses high-quality genuine parts which meet all rigid quality standards to deliver reliable operation and extended lifespan. Every component of the Toyota FJ Cruiser undergoes extensive testing because Toyota stays dedicated to safety and reliability standards which ensures it can serve users requiring reliable off-road transportation.
The Toyota FJ Cruiser is plagued with transmission problems. A frequent issue is the Toyota FJ Cruiser left foot rest pedal getting loose or flying off, and this will affect the interior parts. To solve this problem, you usually need to replace the Toyota FJ Cruiser left foot rest pedal. When the actuator fails in the blend door, another issue is that noise may arise and be loud, but the direction of airflow in the HVAC system is not altered. Such an issue is on the side of the climate control system and typically involves replacing the Toyota FJ Cruiser blend door actuator. Finally, noise in the front engine area of a fan belt type may signal a problem with the serpentine belt or problems with associated pulleys. This is because proper diagnosis should be performed before any repairs are done to ascertain that the right parts are repaired. All these factors underline the need to maintain the Toyota FJ Cruiser regularly and to address it promptly. The early consideration of such issues may improve the performance and comfort of the car. All in all, knowledge of these general problem areas can assist owners of the Toyota FJ Cruiser in taking better care of their cars.
Toyota FJ Cruiser Parts and Q&A
- Q: How to install the alternator assembly on Toyota FJ Cruiser?A:Installation of the generator assembly requires installation with 2 bolts to start with. The harness wire harness clamp is then attached with 2 bolts. Connect the wire harness to the terminal B and connect the connector to the generator assembly and fitting the wire harness stay. Install the fan, generator V belt and covers.
- Q: How to remove and replace the radiator on Toyota FJ Cruiser?A:Disconnect negative battery cable. Remove V-bank and under covers, drain coolant, remove seal. Remove fan shroud: disconnect hose, loosen fan-pulley nuts, remove V-belt, fluid coupling with fan, pulley, and hardware. Remove grille, disconnect radiator hoses and AT oil-cooler hoses if equipped, remove four radiator bolts, remove radiator assembly with hoses.
- Q: How to replace the oil filter on Toyota FJ Cruiser?A:Replacement of the oil filter on 1GR-FE engine; drain out the oil, clean the drain plug and fit it back. Take out the oil filter with special tool, and re-clip the drain lid. Wipe the filter bracket, brush oil onto the new filter and screw it. Fill in with fresh oil and test leakages. Dispose of used oil properly.


