×
ToyotaParts- Hello
- Login or Register
- Quick Links
- Live Chat
- Track Order
- Parts Availability
- RMA
- Help Center
- Contact Us
- Shop for
- Toyota Parts
- Scion Parts
My Garage
My Account
Cart
OEM Toyota FJ Cruiser A/C Clutch
Air Conditioning Clutch- Select Vehicle by Model
- Select Vehicle by VIN
Select Vehicle by Model
orMake
Model
Year
Select Vehicle by VIN
For the most accurate results, select vehicle by your VIN (Vehicle Identification Number).
2 A/C Clutches found


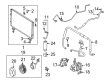
Toyota FJ Cruiser Clutch
Part Number: 88410-35430$214.35 MSRP: $306.04You Save: $91.69 (30%)Ships in 1-2 Business Days
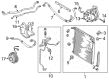
Toyota FJ Cruiser Clutch
Part Number: 88410-2F010$187.44 MSRP: $267.62You Save: $80.18 (30%)Ships in 1-3 Business Days
Toyota FJ Cruiser A/C Clutch
Choose genuine A/C Clutch that pass strict quality control tests. You can trust the top quality and lasting durability. Shopping for OEM A/C Clutch for your Toyota FJ Cruiser? Our website is your one-stop destination. We stock an extensive selection of genuine Toyota FJ Cruiser parts. The price is affordable so you can save more. It only takes minutes to browse and find the exact fit. Easily add to cart and check out fast. Our hassle-free return policy will keep you stress-free. We process orders quickly for swift delivery. Your parts will arrive faster, so you can get back on the road sooner.
FJ Cruiser A/C clutch is a very important component of the air conditioning system highly recognized for its efficiency and durability on various FJ Cruiser models. Of all the A/C Clutch, this one helps transform the engine energy needed to run the A/C compressor; it connects instantly as soon as the air conditioning is turned on. Its design also removes avoidable loads on the engine, which promotes efficient use and safe operation of the equipment. The Toyota FJ Cruiser SUV characterized by powerful off-road specification and construction is very sensitive to the efficiency of the A/C Clutch since it is required to produce cool air in extreme conditions. The ability to install Toyota A/C Clutch in the FJ Cruiser and the TRD Special Edition FJ Cruiser as well as the Trail Teams Special Edition FJ Cruiser underlines the functionality of the clutch. Some important features of this product include its BIFFS - a solid and durable body integrated feature - magnetic engagement mechanism which gives extra assurance and confidence for the intended market of using their FJ Cruiser in their everyday traffic and on other off road adventures. To avoid main problems as slipping or sticking of the A/C Clutch, its operation should be maintained regularly and an eventual replacement made in the timely manner to reduce the negative impact on car cooling system and fuel consumption. Therefore, the Toyota FJ Cruiser A/C Clutch provides a more effective car and at the same time provides a safer and comfortable car that will make it more popular among car lovers as well as the community of ordinary car users.
Toyota FJ Cruiser A/C Clutch Parts and Q&A
- Q: How to remove and replace the A/C Clutch on Toyota FJ Cruiser?A:The compressor clutch installation process begins with refrigerant evacuation from the system then moving on to disconnect the negative battery cable. The service starts with unclamping the battery hold down clamp and removing the battery tray and battery before moving to the No. 1 engine under cover subassembly. Following the removal of both fan and generator V belt you should disconnect the suction hose sub-assembly through bolt and nut removal. Then extract the O-ring from the suction hose while applying vinyl tape to its openings to avoid moisture and foreign matter intrusion. Carry out a discharge hose sub-assembly removal by removing the nut and O-ring and sealing the openings with vinyl tape. The cooler compressor assembly needs removal after disconnecting its connector and removing all four bolts. The installation process requires a step-by-step gas discharge through the service valve until an exact oil amount matches that of the removed compressor while using ND-OIL8 compressor oil. Finish the replacement process by inserting the 4 bolts into the cooler compressor assembly with 24.5 N.m (250 kgf.cm, 18 ft.lbf) torque and then reconnect the connector. To install the discharge hose sub-assembly first remove the vinyl tape then place an O-ring along with fitting surface under a layer of ND-OIL8 before installing the O-ring before mounting the discharge hose to the compressor with a nut featuring 9.8 N.m (100 kgf.cm, 87 in.lbf) torque. Torque the suction hose sub-assembly nut to 9.8 N.m (100 kgf.cm, 87 in.lbf) and bolt to 7.8 N.m (80 kgf.cm, 69 in.lbf) using this procedure once. Reinstall the fan together with the generator V belt while replacing the No. 1 engine under cover subassembly along with the battery tray, battery and battery hold down clamp which requires 6.0 N.m (61 kgf.cm, 53 in.lbf) torque setting. Affix the cable to the negative battery terminal before tightening it to 3.9 N.m (40 kgf.cm, 35 in.lbf). Afterwards charge the refrigerant before warming up the engine while inspecting for refrigerant leakage.

Related Toyota FJ Cruiser Parts
 Toyota FJ Cruiser A/C Accumulator
 Toyota FJ Cruiser A/C Compressor
 Toyota FJ Cruiser A/C Condenser
 Toyota FJ Cruiser A/C Expansion Valve
 Toyota FJ Cruiser A/C Hose
 Toyota FJ Cruiser Ambient Temperature Sensor
 Toyota FJ Cruiser Blend Door Actuator
 Toyota FJ Cruiser Blower Control Switches
 Toyota FJ Cruiser Blower Motor
 Toyota FJ Cruiser Blower Motor Resistor
 Toyota FJ Cruiser Evaporator
 Toyota FJ Cruiser Heater Core