×
ToyotaParts- Hello
- Login or Register
- Quick Links
- Live Chat
- Track Order
- Parts Availability
- RMA
- Help Center
- Contact Us
- Shop for
- Toyota Parts
- Scion Parts
My Garage
My Account
Cart
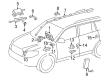
OEM Scion xD Air Bag Sensor
Air Bag Impact Sensor- Select Vehicle by Model
- Select Vehicle by VIN
Select Vehicle by Model
orMake
Model
Year
Select Vehicle by VIN
For the most accurate results, select vehicle by your VIN (Vehicle Identification Number).
9 Air Bag Sensors found

Scion xD Bolt, Flange Part Number: 90105-A0203
$1.18 MSRP: $1.65You Save: $0.47 (29%)Ships in 1-3 Business Days
Scion xD Position Sensor, Driver Side Part Number: 89178-33040
$80.57 MSRP: $113.09You Save: $32.52 (29%)Ships in 1-3 Business Days
Scion xD Rear Sensor Part Number: 89831-33020
$111.38 MSRP: $156.34You Save: $44.96 (29%)Ships in 1-3 Business Days
Scion xD SDM Module Part Number: 89170-52N90
$176.37 MSRP: $216.30You Save: $39.93 (19%)Ships in 1-3 Business DaysScion xD SDM Module Part Number: 89170-52B30
$200.02 MSRP: $245.30You Save: $45.28 (19%)Ships in 1-3 Business Days
Scion xD Side Impact Sensor, Center Part Number: 89831-06060
$82.70 MSRP: $99.71You Save: $17.01 (18%)Ships in 1-3 Business Days
Scion xD Front Impact Sensor Part Number: 89173-59275
$86.14 MSRP: $103.86You Save: $17.72 (18%)Ships in 1-3 Business Days
Scion xD Front Impact Sensor Part Number: 89173-39375
$97.04 MSRP: $117.00You Save: $19.96 (18%)Ships in 1-3 Business DaysScion xD Sensor Assembly, Side Air Bag, Passenger Side, Center Part Number: 89831-0R010
$101.31 MSRP: $122.14You Save: $20.83 (18%)Ships in 1-3 Business Days
Scion xD Air Bag Sensor
Choose genuine Air Bag Sensor that pass strict quality control tests. You can trust the top quality and lasting durability. Shopping for OEM Air Bag Sensor for your Scion xD? Our website is your one-stop destination. We stock an extensive selection of genuine Scion xD parts. The price is affordable so you can save more. It only takes minutes to browse and find the exact fit. Easily add to cart and check out fast. Our hassle-free return policy will keep you stress-free. We process orders quickly for swift delivery. Your parts will arrive faster, so you can get back on the road sooner.
The Scion xD Air Bag Sensor is an important component that should not be overlooked in any Scion xD car. This Air Bag Sensor, commonly called a crash sensor, offers superior performance, and it's mainly responsible for sensing impacts during an accident. When a collision is detected, it quickly sends a message to the control unit and triggers the air bags, which greatly improves passengers' protection. The Scion xD Air Bag Sensor will fit various xD models because there exists a constant mechanism to guarantee crash response no matter the model. This reliability is quite important, especially because the sensor must be able to determine collisions as fast as possible, to trigger the air bag function that is crucial for occupant safety in any accidents. The Scion xD crossover SUV possesses conveniently placed safety features including the Anti-lock Brakes in combination with the multiple numbers of air bags; the addition of the Air Bag Sensor is also efficient. The Scion xD Air Bag Sensor can therefore be considered to be fairly unique in the automotive field because of the proper balance that is presented between the two major areas of performance and safety as well as because of the protective and sturdy construction of the device. While implemented in the xD models above, it not only boosts safety, but also plays a role in the efficiency of the automobile. All in all, one could really benefit if they have the Scion xD Air Bag Sensor since safety from collisions is always to be prioritized by drivers; and passengers too, so overall, this is very reliable if you want to drive safe for overall security.
Scion xD Air Bag Sensor Parts and Q&A
- Q: How to safely remove the front Air Bag sensor on Scion xD?A:Before beginning the process of removing the front Air Bag sensor it is essential to disconnect the cable from the negative battery terminal for safety reasons because service operations can affect the SRS Air Bag system. Remove the front bumper cover as the next step in the procedure. The negative battery terminal must stay unconnected for the duration of the work since contact to the Air Bag sensor from any force could trigger a deployment. The front Air Bag sensor can be detached by first removing its securing bolts followed by disconnecting the linking 2 claws. The protocol requires you to disconnect the Air Bag connector by sliding the CPA backward while pushing the housing equipment while avoiding traction on the wire harness and upper CPA housing. Check that the CPA extends past the rear section of the housing after disconnecting it.
- Q: How to install the side Air Bag sensor safely and correctly on Scion xD?A:The side Air Bag sensor installation requires disabling the Ignition Switch to OFF position and detaching the negative battery terminal to stop Air Bag deployment from sensor impacts. Use the hook to insert it into the body hole then attach the Air Bag sensor with a bolt while torquing the fastener to 9.0 Nm (90 kgf-cm, 80 in-lbf). It is essential to never employ a side Air Bag sensor which experienced a drop or encountered any type of impact. Shake each side Air Bag sensor to check its stability before attaching the Air Bag connectors. After the side Air Bag sensor installation you must place the center pillar lower garnish RH followed by rear door opening trim Weather Strip RH then front door opening trim Weather Strip RH before installing rear door scuff plate RH and front door scuff plate RH. The procedure ends with reattachment of the cable to the negative battery terminal while torquing to 5.4 Nm (55 kgf-cm, 48 in-lbf). Check that the SRS warning light functions correctly.


Related Scion xD Parts
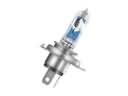 Scion xD Headlight Bulb
 Scion xD Starter
 Scion xD Air Bag Control Module
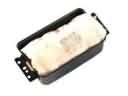 Scion xD Airbag
 Scion xD Clock Spring
 Scion xD Fuel Pump Seal
 Scion xD Mass Air Flow Sensor
 Scion xD Neutral Safety Switch
 Scion xD Oxygen Sensor
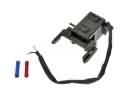 Scion xD Shift Interlock Solenoid
 Scion xD Window Regulator
 Scion xD Windshield Washer Pump
Browse Scion xD Air Bag Sensor by Years
2014
2013
2012
2011
2010
2009
2008