×
ToyotaParts- Hello
- Login or Register
- Quick Links
- Live Chat
- Track Order
- Parts Availability
- RMA
- Help Center
- Contact Us
- Shop for
- Toyota Parts
- Scion Parts
My Garage
My Account
Cart
OEM Scion xA Timing Chain
Engine Timing Chain- Select Vehicle by Model
- Select Vehicle by VIN
Select Vehicle by Model
orMake
Model
Year
Select Vehicle by VIN
For the most accurate results, select vehicle by your VIN (Vehicle Identification Number).
1 Timing Chain found

Scion xA Timing Chain Part Number: 13506-21050
$209.11 MSRP: $298.55You Save: $89.44 (30%)Ships in 1-3 Business Days
Scion xA Timing Chain
Choose genuine Timing Chain that pass strict quality control tests. You can trust the top quality and lasting durability. Shopping for OEM Timing Chain for your Scion xA? Our website is your one-stop destination. We stock an extensive selection of genuine Scion xA parts. The price is affordable so you can save more. It only takes minutes to browse and find the exact fit. Easily add to cart and check out fast. Our hassle-free return policy will keep you stress-free. We process orders quickly for swift delivery. Your parts will arrive faster, so you can get back on the road sooner.
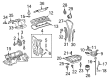
The Timing Chain is a crucial part in the Scion xA's engine, reputed automobile part for its consistency and efficiency. This metal timing chain assists in the management of the timing of the camshaft to the crankshaft to guarantee the required valve timing for the improvement of performance of the car's engine. Unlike the Scion xA rubber timing belt, the Timing Chain is created for durability, and does not require servicing as often and will last longer. This feature is particularly advantageous to the Scion xA car which has a 1.5L DOHC I4 engine; highest horsepower and torque. Another advantage of the timing chain's construction and application in the Scion xA is the high reliability and safety from timing failure in the engine. You can find the compatible timing chain for all xA models of different years and configurations where it is possible to obtain this reliable part. Also, the Timing Chain has been designed to be durable enough to cater for the demand of a read more everyday usage in the market today. As demonstrated by the Timing Chain which can effectively provide the engines with the right performance and still deny frequent replacements, the Scion brand is working towards its consistently high stand of good and improved quality and innovation, a testimonial to the Scion xA's reliability as a choice car to go for in efficiency and performance.
Scion xA Timing Chain Parts and Q&A
- Q: How to replace the timing chain on Scion xA?A:You should start with the front wheel RH removal followed by removing the 4 nuts from the cylinder head cover No.2. Begin the replacement by removing Ignition Coil No.1 using the four bolt screws that lead to extracting its four ignition coils. Both ventilation hoses should be disconnected from the cylinder head cover before the cover's sub-assembly can be removed through the removal of 9 bolts and 2 nuts. Begin by taking off the fan and generator V-belt together with generator assembly and engine under cover RH from the vehicle. The maintenance process begins with drain removal of coolant and engine oil followed by removal of vane pump V-belt then Water Pump pulley and water pump assembly. Start by positioning the number one cylinder directly at TDC/compression then set the timing marks correctly before loosening the pulley bolt by using Special Service Tools: 09213-58012 (91111-50845), 09330-00021. The crankshaft damper removal may require Special Service Tool: 09950-50013 (09951-05010, 09952-05010, 09953-05020, 09954-05021) to complete the operation. Detach the oil control valve connector then unfasten the bolt and remove both the valve and the O-ring since their removal is necessary. To access the Crankshaft Position Sensor, engine mounting insulator sub-assembly RH requires placing a wooden block on a jack before you detach the engine mounting bracket RH. Begin by disassembling the oil pump assembly while also removing the sealing component before proceeding to take off chain tensioner assembly No.1 without rotating the crankshaft. During pressure application to the tensioner plunger users must stabilize the stopper plate with a 2.5mm diameter bar. Proceed by taking out the chain tensioner slipper along with the chain vibration damper No.1 followed by removing the chain sub-assembly. Position the crankshaft at ATDC 40 to 140 degrees before installing the chain vibration damper with its 2 bolts torqued to 9.0 Nm (92 kgf-cm, 80 inch lbs.). First, align the matchmarks of these components and put in the chain tensioner slipper and tensioner with bolts that require torque to 9.0 Nm (92 kgf-cm, 80 inch lbs.). Check the chain tension between intake and exhaust camshaft timing crank after removing the bar connected to the chain tensioner. Apply Special Service Tool 09950-60010 (09951-00250 and 09951-00380 and 09952-06010) and 09950-70010 (09951-07100) when installing both the oil pump seal as well as the water pump assembly. First reinstall the engine mounting bracket RH with 4 bolts at 55 Nm (561 kgf-cm, 41 ft. lbs.), then install the RH engine mounting insulator with 5 bolts and a nut where Bolt A receives 45 Nm (459 kgf-cm, 33 ft. lbs.), Bolt B and Nut get 52 Nm (530 kgf-cm, 38 ft. lbs.), and Bolt C reaches 9.8 Nm (100 kgf-cm, 7.2 ft. lbs.). Install the camshaft timing oil control valve assembly using 7.5 Nm torque while using a new O-ring which must be untwisted throughout installation. Use Special Service Tool: 09960-10010 (09962-01000, 09963-00600) to install the crankshaft position sensor and water pump pulley. The technician should use Special Service Tools 09330-00021 and 09213-58012 and 91111-50845 to align the pin hole during installation of the pulley bolt at 128 Nm (1,305 kgf-cm, 95 ft. lbs.). The service technician must apply a specified packing to the cylinder head cover sub-assembly before securing it with nine bolts and two seal washers and two nuts at 10 Nm (102 kgf-cm, 7.4 ft. lbs.). Finally the service technician reinstalls ignition coil No.1 at 9.0 Nm (92 kgf-cm, 80 inch lbs.) and cylinder head cover No.2, with A nuts tightened first followed by B bolts at 7.0 Nm (71 kgf-cm, 62 inch lbs.). After installing the generator assembly the technician needs to install both V-belts with proper adjustment. The service technician needs to inspect Drive Belt deflection and tension followed by installing the oil pan drain plug with new gasket at 38 Nm (382 kgf-cm, 28 ft. lbs.) before adding engine oil and performing leak checks and engine coolant additions.