×
ToyotaParts- Hello
- Login or Register
- Quick Links
- Live Chat
- Track Order
- Parts Availability
- RMA
- Help Center
- Contact Us
- Shop for
- Toyota Parts
- Scion Parts
My Garage
My Account
Cart
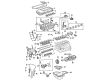
OEM 2010 Toyota Camry Crankshaft Seal
- Select Vehicle by Model
- Select Vehicle by VIN
Select Vehicle by Model
orMake
Model
Year
Select Vehicle by VIN
For the most accurate results, select vehicle by your VIN (Vehicle Identification Number).
7 Crankshaft Seals found


2010 Toyota Camry Rear Main Seal
Part Number: 90311-A0027$44.08 MSRP: $61.37You Save: $17.29 (29%)Ships in 1-3 Business DaysProduct Specifications- Other Name: Seal, Type T Oil; Engine Crankshaft Seal, Rear; Oil Seal; Rear Seal; Front Seal; Seal, Engine Rear Oil; Engine Crankshaft Seal; Crankshaft Seal
- Position: Rear
- Replaces: 90080-31053, 90311-92003, 90311-92010, 90311-92004, 90311-92006, 90311-92009
- Part Name Code: 11381A
- Item Weight: 0.50 Pounds
- Item Dimensions: 5.1 x 5.2 x 0.4 inches
- Condition: New
- Fitment Type: Direct Replacement
- SKU: 90311-A0027
- Warranty: This genuine part is guaranteed by Toyota's factory warranty.


2010 Toyota Camry Rear Main Seal
Part Number: 90311-89010$40.26 MSRP: $56.03You Save: $15.77 (29%)Ships in 1-3 Business DaysProduct Specifications- Other Name: Seal, Type T Oil; Engine Crankshaft Seal, Rear; Crankshaft Pulley Seal; Seal, Engine Rear Oil; Engine Crankshaft Seal; Crankshaft Seal
- Manufacturer Note: 2AZ-FE,*195
- Position: Rear
- Replaces: 90311-89002, 90311-89001, 90080-31073, 90311-89007, 90311-89003, 90311-89004, 90311-C0001
- Part Name Code: 11401L
- Item Weight: 0.50 Pounds
- Item Dimensions: 5.1 x 5.1 x 0.4 inches
- Condition: New
- Fitment Type: Direct Replacement
- SKU: 90311-89010
- Warranty: This genuine part is guaranteed by Toyota's factory warranty.


2010 Toyota Camry Rear Main Seal
Part Number: 90311-A0020$28.19 MSRP: $39.24You Save: $11.05 (29%)Ships in 1-2 Business DaysProduct Specifications- Other Name: Seal, Type T Oil; Engine Crankshaft Seal, Rear; Rear Seal; Seal, Engine Rear Oil; Engine Crankshaft Seal; Crankshaft Seal
- Position: Rear
- Replaces: 90311-A0016, 90311-89006
- Part Name Code: 11401L
- Item Weight: 1.00 Pounds
- Condition: New
- Fitment Type: Direct Replacement
- SKU: 90311-A0020
- Warranty: This genuine part is guaranteed by Toyota's factory warranty.


2010 Toyota Camry Oil Seal, Front
Part Number: 90311-A0018$11.82 MSRP: $16.45You Save: $4.63 (29%)Ships in 1-2 Business DaysProduct Specifications- Other Name: Seal, Type T Oil; Engine Crankshaft Seal, Front; Timing Cover Gasket; Multi-Purpose Seal; Timing Cover Seal; Crankshaft Seal; Front Crank Seal; Front Seal; Front Cover Seal; Seal, Oil(For Timing Chain Or Belt Cover)
- Position: Front
- Replaces: 90311-T0024, 90311-38078, 90311-38096, 90311-A0014, 90080-31072, 90311-38080, 90311-38089
- Part Name Code: 11302A
- Item Weight: 0.50 Pounds
- Item Dimensions: 2.3 x 2.2 x 0.5 inches
- Condition: New
- Fitment Type: Direct Replacement
- SKU: 90311-A0018
- Warranty: This genuine part is guaranteed by Toyota's factory warranty.

2010 Toyota Camry Oil Seal, Front
Part Number: 90080-31049$9.91 MSRP: $13.79You Save: $3.88 (29%)Ships in 1-3 Business DaysProduct Specifications- Other Name: Seal, Type T Oil; Engine Crankshaft Seal, Front; Timing Cover Gasket; Multi-Purpose Seal; Timing Cover Seal; Crankshaft Seal; Front Seal; Timing Cover Oil Seal; Cover Seal; Oil Seal for Timing Chain/Belt.
- Manufacturer Note: (L)
- Position: Front
- Replaces: 90311-38059, 90080-31060
- Part Name Code: 11302A
- Item Weight: 0.50 Pounds
- Item Dimensions: 2.2 x 2.2 x 0.5 inches
- Condition: New
- Fitment Type: Direct Replacement
- SKU: 90080-31049
- Warranty: This genuine part is guaranteed by Toyota's factory warranty.


2010 Toyota Camry Oil Seal, Front
Part Number: 90311-A0005$19.11 MSRP: $26.60You Save: $7.49 (29%)Ships in 1-3 Business DaysProduct Specifications- Other Name: Seal, Type T Oil; Engine Crankshaft Seal, Front; Timing Cover Gasket; Multi-Purpose Seal; Timing Cover Seal; Crankshaft Seal; Front Seal; Timing Cover Oil Seal; Engine Crankshaft Seal
- Position: Front
- Replaces: 90311-42019, 90311-42007, 90311-42037, 90311-42036
- Part Name Code: 11301C
- Item Weight: 0.50 Pounds
- Item Dimensions: 5.3 x 4.8 x 1.0 inches
- Condition: New
- Fitment Type: Direct Replacement
- SKU: 90311-A0005
- Warranty: This genuine part is guaranteed by Toyota's factory warranty.


2010 Toyota Camry Crankshaft Seal, Front
Part Number: 90311-A0015$7.88 MSRP: $10.96You Save: $3.08 (29%)Ships in 1-3 Business DaysProduct Specifications- Other Name: Seal, Type T Oil; Engine Crankshaft Seal, Front; Timing Cover Gasket; Timing Cover Seal; Front Crank Seal; Oil Seal for Timing Gear or Chain Case; Engine Crankshaft Seal
- Position: Front
- Replaces: 90311-A0019, 90311-42043
- Part Name Code: 11301C
- Item Weight: 1.40 Pounds
- Item Dimensions: 2.3 x 2.4 x 0.5 inches
- Condition: New
- Fitment Type: Direct Replacement
- SKU: 90311-A0015
- Warranty: This genuine part is guaranteed by Toyota's factory warranty.
2010 Toyota Camry Crankshaft Seal
Looking for affordable OEM 2010 Toyota Camry Crankshaft Seal? Explore our comprehensive catalogue of genuine 2010 Toyota Camry Crankshaft Seal. All our parts are covered by the manufacturer's warranty. Plus, our straightforward return policy and speedy delivery service ensure an unparalleled shopping experience. We look forward to your visit!
2010 Toyota Camry Crankshaft Seal Parts Q&A
- Q: How to remove the crankshaft seal on 2010 Toyota Camry?A: The first step to replace the crankshaft main bearing seal on the 2AZ-FXE engine involves operating on the hybrid vehicle transaxle assembly. To begin the procedure remove the transmission input damper assembly by employing Special Service Tool: 09213-54015 91651-60855 to maintain crankshaft steadiness while you untighten the 6 bolts holding the transmission input damper assembly from the flywheel. You should use Special Service Tool: 09213-54015 91651-60855 to hold the crankshaft while removing the flywheel sub-assembly by taking out its 8 securing bolts. Use a knife to cut the oil seal lip and extract the oil seal using a taped-tip screwdriver because this process completes the engine rear oil seal removal. Test the crankshaft for damage after removal before processing it with 400-grit sandpaper if damage is present.
Related 2010 Toyota Camry Parts
 2010 Toyota Camry Oil Filter
 2010 Toyota Camry Timing Chain
 2010 Toyota Camry Cam Gear
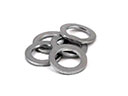 2010 Toyota Camry Drain Plug Washer
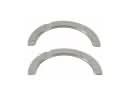 2010 Toyota Camry Crankshaft Thrust Washer Set
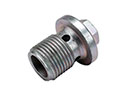 2010 Toyota Camry Drain Plug
 2010 Toyota Camry Exhaust Valve
 2010 Toyota Camry Intake Valve
 2010 Toyota Camry Rocker Arm
 2010 Toyota Camry Rod Bearing
 2010 Toyota Camry Timing Chain Guide
 2010 Toyota Camry Valve Stem Seal