My Garage
Cart
Make sure this part fits

Toyota 90311-89010
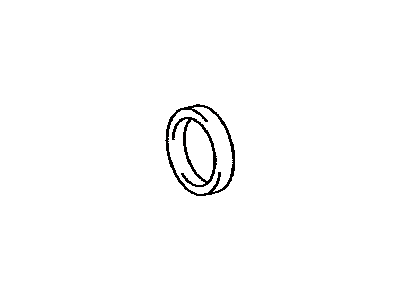
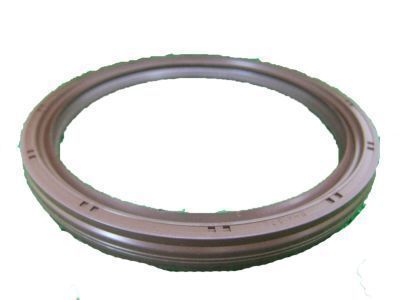
Rear Main Seal

1990-2015 Toyota 9031189010

Customer Questions & Expert Answers (38)
Toyota 90311-89010 Rear Main Seal
  • Part Description
    Seal, Type T Oil; Engine Crankshaft Seal, Rear
  • Part Name Code
    11401L
  • Position
    Rear
  • Replaces
    90311-89002, 90311-89001, 90080-31073, 90311-89007, 90311-89003, 90311-89004, 90311-C0001
  • Manufacturer
    Toyota
Make sure this part fits
$40.26 MSRP: $56.03
You Save: $15.77 (29%)
Ships in 1-3 Business Days
1
ADD TO CART
  • Related Parts
  • Product Specifications
  • Vehicle Fitment
  • Customer Questions & Expert Answers
  • Product Specifications

    BrandGenuine Toyota
    Part Name Code11401L
    Manufacturer Part Number90311-89010
    Part DescriptionSeal, Type T Oil; Engine Crankshaft Seal, Rear
    Other NamesCrankshaft Pulley Seal; Seal, Engine Rear Oil; Engine Crankshaft Seal; Crankshaft Seal
    Manufacturer Note2AZ-FE,*195
    Item Dimensions5.1 x 5.1 x 0.4 inches
    Item Weight0.50 Pounds
    PositionRear
    ConditionNew
    Fitment TypeDirect Replacement
    Replaces90311-89002, 90311-89001, 90080-31073, 90311-89007, 90311-89003, 90311-89004, 90311-C0001
    ManufacturerToyota
    SKU90311-89010
    WarrantyThis genuine Toyota part is guaranteed by Toyota's factory warranty.
    Shipping & ReturnShipping Policy Return Policy
    Warning: California's Proposition 65
  • Vehicle Fitment

    Year Make Model Trim Engine
    2005-2010 Scion tCBase, Spec4 Cyl 2.4 L GAS
    2008-2015 Scion xBBase4 Cyl 2.4 L GAS
    2002-2011 Toyota CamryBase, CE, Hybrid, LE, SE, XLE4 Cyl 2.4 L FULL HYBRID EV-GAS (FHEV), 4 Cyl 2.4 L GAS
    1990-1993 Toyota CelicaAll Trac, GTS All Trac4 Cyl 2.0 L GAS
    2009-2010 Toyota CorollaXRS4 Cyl 2.4 L GAS
    2001-2007 Toyota HighlanderBase4 Cyl 2.4 L GAS
    1991-1995 Toyota MR2Turbo4 Cyl 2.0 L GAS
    2009-2013 Toyota MatrixS, XRS4 Cyl 2.4 L GAS
    2001-2008 Toyota RAV4Base, L, Limited, Sport4 Cyl 2.0 L GAS, 4 Cyl 2.4 L GAS, BATTERY EV (EV/BEV)
    2004-2008 Toyota SolaraSE, SE Sport, SLE, Sport4 Cyl 2.4 L GAS
  • Customer Questions & Expert Answers

    Q:
    Will 90311-89010 fit my vehicle? Posted by ToyotaPartsNow Specialist
    A:
    Find out if part number 90311-89010 is the right fit for your car by Selecting Your Vehicle model.
    Posted by ToyotaPartsNow Specialist
    Q:
    How do you replace the Crankshaft Seal on the 2AZ-FE engine on Scion tC? Posted by Customer
    A:
    When swapping the timing chain cover oil seal on the 2AZ-FE engine begin by removing the old oil seal through screwdriver tapping and hammer hammering. The oil seal retainer must be placed on wooden blocks before using Special Service Tool: 09223-22010 with a hammer to install the new oil seal until its surface matches the timing gear case edge. The lip of the oil seal has to be clean from foreign substances during this process and you should avoid hitting it with a hammer at a slanted angle. Oiling the outer border of the new oil seal with MP grease serves as a recommended step before putting it into place.
    Posted by ToyotaPartsNow Specialist
    Q:
    How to install the rear Crankshaft Seal and assemble the drive plate and flywheel in an automatic or manual transaxle on Scion xB? Posted by Customer
    A:
    New MP grease must be applied to the lip of a fresh oil seal before the installation with Special Service Tool: 09223-15030 09950-70010 and a hammer to achieve the rear oil seal retainer edge flushness while maintaining the lip-free from contamination and avoiding angled impact. The installation process for the drive plate and ring gear sub-assembly in an automatic transaxle requires these steps: Clean 8 bolts and bolt holes before applying Toyota Genuine Adhesive 1344, Three Bond 1344, or equivalent to 2 or 3 bolt threads; use Special Service Tool: 09213-54015 91651-60855 to hold the crankshaft while installing the front drive plate spacer with its pin aligned to the crankshaft pin hole and then adding the drive plate and rear drive plate spacer. Finally, tighten the 8 bolts in the specified sequence to 98 Nm (999 kgf Use Toyota Genuine Adhesive 1344 or equivalent to coat 2 to 3 threads of the 8 bolts, then uniformly tighten them in the specified sequence to final torque 98 Nm (999 kgf-cm, 72 ft-lbf). The manual transaxle flywheel sub-assembly requires a dual application of cleaning and adhesive on its 8 bolts before installing them with special service tool 09213-54015 91651-60855 while tightening them to a torque specification of 130 Nm (1326 kgf-cm, 96 ft-lbf). The manual transaxle receives the installation of clutch disc assembly and clutch cover assembly followed by automatic transaxle assembly and manual transaxle assembly installation appropriate to each model.
    Posted by ToyotaPartsNow Specialist
    Q:
    What is the first step to replace the timing gear case or timing chain case oil seal (2AZ-FE) for the 2005 Scion tC? Posted by Customer
    A:
    Begin by removing the front wheel RH and the front fender apron seal RH.
    Posted by ToyotaPartsNow Specialist
    See expert answers on similar Crankshaft Seal
    Q:
    What is the process for the flywheel sub-assembly for the 2002 Toyota Camry? Posted by Customer
    A:
    Repeat the cleaning and adhesive application process, then tighten the 8 bolts to a torque of 130 Nm.
    Posted by ToyotaPartsNow Specialist
    See expert answers on similar Crankshaft Seal
    Q:
    What tools are required to hold the crankshaft while removing the bolts for the 2005 Scion tC? Posted by Customer
    A:
    Use Special Service Tool: 09213-54015 (91651-60855) and 09330-00021.
    Posted by ToyotaPartsNow Specialist
    See expert answers on similar Crankshaft Seal
    Q:
    What is the procedure for the automatic transaxle for the 2009 Scion xB? Posted by Customer
    A:
    Clean the 8 bolts and bolt holes, apply adhesive to 2 or 3 threads of the bolts using Toyota Genuine Adhesive 1344, Three Bond 1344, or an equivalent. Hold the crankshaft with Special Service Tool: 09213-54015 91651-60855 and 09330-00021, install the front drive plate spacer aligning the pin with the crankshaft pin hole, and install the drive plate and rear drive plate spacer onto the crankshaft. Uniformly tighten the 8 bolts in the specified sequence to a torque of 98 Nm (999 kgf-cm, 72 ft-lbf).
    Posted by ToyotaPartsNow Specialist
    See expert answers on similar Crankshaft Seal
    Q:
    What is the first step to service and repair the engine rear oil seal for the 2007 Toyota Camry? Posted by Customer
    A:
    First, separate the automatic or manual transaxle assembly as applicable.
    Posted by ToyotaPartsNow Specialist
    See expert answers on similar Crankshaft Seal
    Q:
    What is the installation process for the crankshaft pulley for TMMK made for the 2003 Toyota Camry? Posted by Customer
    A:
    Align the pulley set key and use Special Service Tool: 09960-10010 (09962-01000, 09963-01000) to install the pulley bolt with the same torque.
    Posted by ToyotaPartsNow Specialist
    See expert answers on similar Crankshaft Seal
    Q:
    What should you check after removing the oil seal for the 2004 Toyota Camry? Posted by Customer
    A:
    Check the crankshaft for damage; if damaged, smooth the surface with 400-grit sandpaper.
    Posted by ToyotaPartsNow Specialist
    See expert answers on similar Crankshaft Seal
    Q:
    What should be done after the pulley installation for the 2009 Toyota Camry? Posted by Customer
    A:
    Install the V-ribbed belt, engine under cover LH, engine under cover RH, front fender apron seal RH, and front wheel RH, and finally inspect for any engine oil leaks.
    Posted by ToyotaPartsNow Specialist
    See expert answers on similar Crankshaft Seal
    Q:
    What should be ensured while prying out the oil seal for the 2008 Scion xB? Posted by Customer
    A:
    Ensure not to damage the surface of the oil seal press fit hole and crankshaft; taping the screwdriver tip before use is advisable.
    Posted by ToyotaPartsNow Specialist
    See expert answers on similar Crankshaft Seal
    Q:
    How do you remove the flywheel sub-assembly for the manual transaxle for the 2008 Scion xB? Posted by Customer
    A:
    Remove the flywheel sub-assembly using the same Special Service Tool to hold the crankshaft, then remove the 8 bolts and flywheel.
    Posted by ToyotaPartsNow Specialist
    See expert answers on similar Crankshaft Seal
    Q:
    What is the first step to remove the front crankshaft seal on the 2AZ-FE engine for the 2009 Toyota Camry? Posted by Customer
    A:
    First, remove the front wheel RH, front fender apron seal RH, engine under cover LH, and engine under cover RH.
    Posted by ToyotaPartsNow Specialist
    See expert answers on similar Crankshaft Seal
    Q:
    What is the process for M/T regarding the clutch components for the 2005 Toyota Camry? Posted by Customer
    A:
    Remove the clutch cover assembly, clutch disc assembly, and flywheel sub-assembly, fixing the crankshaft with Special Service Tool and removing the 8 bolts, rear spacer, and flywheel.
    Posted by ToyotaPartsNow Specialist
    See expert answers on similar Crankshaft Seal
    Q:
    What components need to be taken off next for the 2010 Toyota Camry? Posted by Customer
    A:
    Take off the V-ribbed belt tensioner cover sub-assembly and the V-ribbed belt.
    Posted by ToyotaPartsNow Specialist
    See expert answers on similar Crankshaft Seal
    Q:
    What should be removed after the engine moving control rod for the 2006 Toyota Camry? Posted by Customer
    A:
    Proceed to remove the engine mounting stay No.2 RH and the engine mounting bracket No.2 RH.
    Posted by ToyotaPartsNow Specialist
    See expert answers on similar Crankshaft Seal
    Q:
    What should be followed for both automatic and manual transaxle assemblies for the 2010 Scion xB? Posted by Customer
    A:
    Follow the appropriate installation procedures.
    Posted by ToyotaPartsNow Specialist
    See expert answers on similar Crankshaft Seal
    Q:
    How should the flywheel be installed for the 2010 Toyota Camry? Posted by Customer
    A:
    Install the flywheel with 8 bolts, uniformly tightening them to a torque of 130 Nm (1,330 kgf-cm, 96 ft-lbf) in the specified sequence.
    Posted by ToyotaPartsNow Specialist
    See expert answers on similar Crankshaft Seal
    Q:
    What is the final step after reinstalling the drive plate and ring gear sub-assembly for the 2004 Toyota Highlander? Posted by Customer
    A:
    Finally, reinstall the automatic transaxle assembly.
    Posted by ToyotaPartsNow Specialist
    See expert answers on similar Crankshaft Seal
    Q:
    What should you do after removing the oil seal for the 2001 Toyota Highlander? Posted by Customer
    A:
    Check the crankshaft for damage and mend it with sandpaper (#400) if necessary.
    Posted by ToyotaPartsNow Specialist
    See expert answers on similar Crankshaft Seal
    Q:
    How do you remove the drive plate and ring gear sub-assembly for the 2005 Toyota Highlander? Posted by Customer
    A:
    Fix the crankshaft using Special Service Tool: 09213-54015 (91651-60855), 09330-00021, and then remove the 8 bolts, rear spacer, drive plate, and front spacer.
    Posted by ToyotaPartsNow Specialist
    See expert answers on similar Crankshaft Seal
    Q:
    What are the next steps for a manual transaxle after removing the transaxle assembly for the 2009 Toyota Corolla? Posted by Customer
    A:
    Remove the clutch cover assembly, then the clutch disc assembly, followed by the flywheel sub-assembly using Special Service Tool: 09213-58013 09330-00021 to hold the crankshaft.
    Posted by ToyotaPartsNow Specialist
    See expert answers on similar Crankshaft Seal
    Q:
    What is the first step to replace the crankshaft main bearing seal for the 2002 Toyota Highlander? Posted by Customer
    A:
    First, remove the automatic transaxle assembly, noting that it is easier to do this after removing the engine assembly with the transaxle.
    Posted by ToyotaPartsNow Specialist
    See expert answers on similar Crankshaft Seal
    Q:
    What is the first step to remove the front crankshaft seal on the 2AZ-FE engine for the 2008 Toyota Camry? Posted by Customer
    A:
    First, remove the front wheel RH, front fender apron seal RH, engine under cover LH, and engine under cover RH.
    Posted by ToyotaPartsNow Specialist
    See expert answers on similar Crankshaft Seal
    Q:
    What should be done after removing the oil seal for the 2007 Toyota Highlander? Posted by Customer
    A:
    Check the crankshaft for damage and smooth the surface with 400-grit sandpaper if necessary.
    Posted by ToyotaPartsNow Specialist
    See expert answers on similar Crankshaft Seal
    Q:
    What components should be installed after the oil seal for the 2006 Toyota Highlander? Posted by Customer
    A:
    Install the timing gear case or timing chain case oil seal, crankshaft pulley, and fan and generator V belt.
    Posted by ToyotaPartsNow Specialist
    See expert answers on similar Crankshaft Seal
    Q:
    How do you install the new oil seal for the rear oil seal for the 2003 Toyota Highlander? Posted by Customer
    A:
    Apply MP grease to the new oil seal lip, keeping it free from foreign materials, and tap in the oil seal using Special Service Tool: 09223-15030, 09950-70010 (09951-07100) until flush with the rear oil seal retainer edge, wiping off any excess grease.
    Posted by ToyotaPartsNow Specialist
    See expert answers on similar Crankshaft Seal
    Q:
    What is the next step after installing the flywheel sub-assembly for the 2008 Toyota Solara? Posted by Customer
    A:
    Proceed to install the clutch disc assembly (M/T) and the clutch cover assembly (M/T), followed by the automatic transaxle assembly (A/T) or the manual transaxle assembly (M/T), ensuring the engine assembly with transaxle is installed after the transaxle.
    Posted by ToyotaPartsNow Specialist
    See expert answers on similar Crankshaft Seal
    Q:
    What are the two methods available to replace the front crankshaft oil seal for the 2005 Toyota RAV4? Posted by Customer
    A:
    The two methods are: 1) Removing the timing chain cover from the cylinder head and block, or 2) Keeping the timing chain cover installed.
    Posted by ToyotaPartsNow Specialist
    See expert answers on similar Crankshaft Seal
    Q:
    What is the procedure for the automatic transaxle after installing the rear crankshaft oil seal for the 2009 Toyota Matrix? Posted by Customer
    A:
    Clean the 8 bolts and bolt holes, apply adhesive to 2 or 3 threads of the bolts using Toyota Genuine Adhesive 1344, Three Bond 1344, or an equivalent. Hold the crankshaft with Special Service Tool: 09213-54015 91651-60855 and install the front drive plate spacer, aligning the pin with the crankshaft pin hole. Install the drive plate and rear drive plate spacer onto the crankshaft, and uniformly install and tighten the 8 bolts in the specified sequence to a torque of 98 Nm (999 kgf-cm, 72 ft-lbf).
    Posted by ToyotaPartsNow Specialist
    See expert answers on similar Crankshaft Seal
    Q:
    How do you remove the engine rear oil seal for the 2006 Toyota Solara? Posted by Customer
    A:
    Remove the engine rear oil seal by cutting through the oil seal lip with a knife and prying it out with a screwdriver that has its tip taped.
    Posted by ToyotaPartsNow Specialist
    See expert answers on similar Crankshaft Seal
    Q:
    What tool is needed to install the new oil seal for the 2008 Toyota RAV4? Posted by Customer
    A:
    Utilize Special Service Tool: 09223-22010 and a hammer.
    Posted by ToyotaPartsNow Specialist
    See expert answers on similar Crankshaft Seal
    Q:
    How do you install the new oil seal for the 2006 Toyota RAV4? Posted by Customer
    A:
    Using Special Service Tool: 09223-22010 and a hammer, carefully tap in the new oil seal until its surface is flush with the timing gear case edge.
    Posted by ToyotaPartsNow Specialist
    See expert answers on similar Crankshaft Seal
    Q:
    What is the process for reinstalling the drive plate and ring gear sub-assembly for the 2004 Toyota Solara? Posted by Customer
    A:
    Reinstall the drive plate and ring gear sub-assembly by fixing the crankshaft again, cleaning the bolt and bolt hole, applying adhesive (Part No. 08833-00070, THREE BOND or equivalent) to 2 or 3 threads of the bolt end, and then installing the front spacer, drive plate, and rear spacer with 8 bolts, uniformly tightening them to a torque of 98 Nm (1,000 kgf-cm, 72 ft. lbs.).
    Posted by ToyotaPartsNow Specialist
    See expert answers on similar Crankshaft Seal
    Q:
    What is the final step after reinstalling the transaxle assemblies for the 2005 Toyota Solara? Posted by Customer
    A:
    Install the clutch disc assembly, clutch cover assembly, and the respective transaxle assemblies.
    Posted by ToyotaPartsNow Specialist
    See expert answers on similar Crankshaft Seal
    Q:
    How do you reinstall the drive plate and ring gear sub-assembly for the A/T for the 2007 Toyota Solara? Posted by Customer
    A:
    Fix the crankshaft with Special Service Tool: 09960-10010 (09962-01000, 09963-01000), clean the bolt and bolt hole, apply adhesive to 2 or 3 threads of the bolt end, and then install the front spacer, drive plate, and rear spacer with 8 bolts, uniformly tightening them to a torque of 98 Nm (1,000 kgf-cm, 72 ft. lbs.).
    Posted by ToyotaPartsNow Specialist
    See expert answers on similar Crankshaft Seal
    Q:
    What should be done next for the automatic transaxle for the 2008 Toyota Solara? Posted by Customer
    A:
    Remove the drive plate and ring gear sub-assembly using Special Service Tool: 09960-10010, 09962-01000, and 09963-01000 to fix the crankshaft, then remove the 8 bolts, rear spacer, drive plate, and front spacer.
    Posted by ToyotaPartsNow Specialist
    See expert answers on similar Crankshaft Seal
    If you have any questions about this product, please don't hesitate to ask us. We will be happy to help you!

OEM Toyota 90311-89010, Excellent Performance and Perfect Fitment

To ensure reliability, purchase Toyota part # 90311-89010 Rear Main Seal. It is sometimes referred to as Toyota Crankshaft Seal. OEM parts are unrivaled in terms of quality. They go through extensive quality control inspections and are produced in accordance with Toyota's official factory specifications. All of these remove defects and imperfections. So you can relax knowing they promise exceptional lifespan and flawless fitment.

ToyotaPartsNow.com is a leading supplier of genuine Toyota parts such as Toyota 9031189010 Rear Main Seal. At ToyotaPartsNow.com, we have a wide variety of OEM Toyota parts available at competitive prices. Our comprehensive range of genuine Toyota parts come with a manufacturer's warranty for peace of mind. We also prioritize customer satisfaction, providing a hassle-free return policy and expedited delivery for all our parts. For detailed Toyota parts information, click here.
Choose ToyotaPartsNow for discounted prices, exceptional service and fast delivery