My Garage
Cart
Make sure this part fits

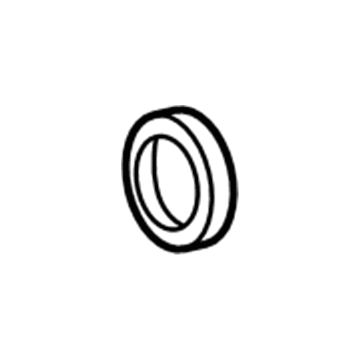
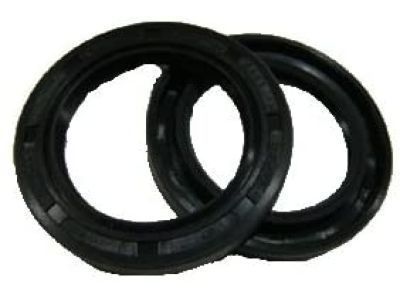
Toyota 90311-A0005
Oil Seal, Front

1984-2022 Toyota 90311A0005

Customer Questions & Expert Answers (53)
Toyota 90311-A0005 Oil Seal, Front
  • Part Description
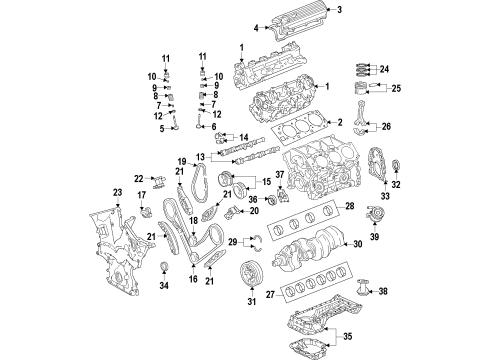
    Seal, Type T Oil; Engine Crankshaft Seal, Front; Timing Cover Gasket; Multi-Purpose Seal; Timing Cover Seal
  • Part Name Code
    11301C
  • Comment
    (FOR TIMING GEAR CASE OR TIMING CHAIN CASE)
  • Position
    Front
  • Replaces
    90311-42019, 90311-42007, 90311-42037, 90311-42036
  • Manufacturer
    Toyota
Make sure this part fits
$19.00 MSRP: $26.45
You Save: $7.45 (29%)
Ships in 1-3 Business Days
1
ADD TO CART
  • Related Parts
  • Product Specifications
  • Vehicle Fitment
  • Customer Questions & Expert Answers
  • Product Specifications

    BrandGenuine Toyota
    Part Name Code11301C
    Manufacturer Part Number90311-A0005
    Part DescriptionSeal, Type T Oil; Engine Crankshaft Seal, Front; Timing Cover Gasket; Multi-Purpose Seal; Timing Cover Seal
    Other NamesCrankshaft Seal; Front Seal; Timing Cover Oil Seal; Engine Crankshaft Seal
    Item Dimensions5.3 x 4.8 x 1.0 inches
    Item Weight0.50 Pounds
    PositionFront
    ConditionNew
    Fitment TypeDirect Replacement
    Replaces90311-42019, 90311-42007, 90311-42037, 90311-42036
    ManufacturerToyota
    SKU90311-A0005
    WarrantyThis genuine Toyota part is guaranteed by Toyota's factory warranty.
    Shipping & ReturnShipping Policy Return Policy
    Warning: California's Proposition 65
  • Vehicle Fitment

    Year Make Model Trim Engine
    2003-2009 Toyota 4RunnerLimited, Sport, SR56 Cyl 4.0 L GAS
    2005-2018 Toyota AvalonBase, Limited, Touring, XL, XLE, XLE Plus, XLE Premium, XLE Touring, XLE Touring SE, XLS6 Cyl 3.5 L GAS
    2007-2017 Toyota CamryLE, SE, XLE, XSE6 Cyl 3.5 L GAS
    1990-1992 Toyota CelicaAll Trac4 Cyl 2.0 L GAS
    2007-2009 Toyota FJ CruiserBase, Trail Teams Special Edition, TRD Special Edition6 Cyl 4.0 L GAS
    2008-2016 Toyota HighlanderBase, LE, LE Plus, Limited, Plus, SE, Sport, XLE6 Cyl 3.5 L GAS
    2013-2021, 2008-2011 Toyota Land CruiserBase, Heritage Edition8 Cyl 5.7 L GAS
    2006-2010 Toyota RAV4Base, Limited, Sport6 Cyl 3.5 L GAS
    2008-2022 Toyota SequoiaLimited, Nightshade, Platinum, SR5, TRD Pro, TRD Sport8 Cyl 4.6 L GAS, 8 Cyl 5.7 L FLEX, 8 Cyl 5.7 L GAS
    2007-2016 Toyota SiennaBase, CE, L, LE, Limited, SE, XLE6 Cyl 3.5 L GAS
    View More
  • Customer Questions & Expert Answers

    Q:
    Will 90311-A0005 fit my vehicle? Posted by ToyotaPartsNow Specialist
    A:
    Find out if part number 90311-A0005 is the right fit for your car by Selecting Your Vehicle model.
    Posted by ToyotaPartsNow Specialist
    Q:
    How to remove the front crankshaft seal on Toyota 4Runner? Posted by Customer
    A:
    Starting the replacement of the 1GR-FE front crankshaft seal requires users to disconnect the negative terminal battery cable. Begin by removing the V-bank cover after which the radiator support seal upper must be detached through 11 clip removal. Untie the sub-assembly of the No. 1 engine under cover by unbolting its four fasteners. Begin by loosening the fan with fluid coupling and then uninstall the fan along with the generator V belt followed by removal of the fan coupled with fluid coupling. The removal of the crankshaft pulley requires Special Service Tools 91651-60855, 09213-54015, 09950-50013, 09330-00021, 09951-05010, 09952-05010, 09953-05020 and 09954-05031. The timing gear case or timing chain case oil seal extraction requires a screwdriver tool to pry it out while the screwdriver tip should have tape coverage to safeguard the crankshaft from damage.
    Posted by ToyotaPartsNow Specialist
    Q:
    How to Service and Repair the Crankshaft Seal on Toyota Avalon? Posted by Customer
    A:
    The crankshaft main bearing seal service and repair procedure demands first disassembling the automatic transaxle assembly followed by both drive plate and ring gear or flywheel removal. Special Service Tools 09213-70011 (09213-70020) and 09330-00021 should be used to hold the crankshaft before you remove its 8 bolts and front spacer and drive plate and 10mm298.95968 lock ring and rear spacer. Begin by using a knife to cut off the oil seal lip then gently remove the oil seal from the engine rear with a taped screwdriver to avoid wrecking the crankshaft. Install the new oil seal by applying MP grease to its lip before striking it into the housing with Special Service Tool: 09223-15030, 09950-70010 (09951-07150) and a hammer to a depth of -0.5 to 0.5 mm (-0.020 to 0.020 in.). Install the drive plate and ring gear or flywheel by applying adhesive to two or three threads of the mounting bolt end using Toyota Genuine Adhesive 1324, Three Bond 1324 or equivalent. Complete the installation by holding the crankshaft with Special Service Tool: 09213-70011 (09213-70020). Before tightening the 8 mounting bolts apply Toyota Genuine Adhesive 1324 or Three Bond 1324 or equivalent to 2 or 3 threads of each bolt end using Special Service Tool: 09213-70011 (09213-70020). Place the crankshaft spacers in order with drive plate and rear spacer before performing bolt torque to 83 N m (850 kgf/cm, 61 ft. lbs.) with even steps. The automatic transaxle assembly should be reinstalled at the end of the task.
    Posted by ToyotaPartsNow Specialist
    Q:
    How to service and repair the front crankshaft seal on Toyota 4Runner? Posted by Customer
    A:
    The repair and service operation for the front crankshaft seal in 2UZ-FE requires several necessary components which should be prepared first. Prepare all necessary tools and replacement parts before starting the front crankshaft seal repair work on the 2UZ-FE engine. Clear the path toward the seal before extracting the old component with careful attention to adjacent parts. A complete cleaning of the sealing surface is crucial before inserting the new seal where it should align properly. After reinstallation of all taken components users should inspect for leakages as a verification of the successful maintenance procedure.
    Posted by ToyotaPartsNow Specialist
    Q:
    How to install the front Crankshaft Seal on Toyota Land Cruiser? Posted by Customer
    A:
    A new oil seal requires MP grease application to its lip before installation. Special Service Tool: 09223-22010 09506-35010 combined with a hammer should be used to tap the oil seal between 0 and 1.0 mm (0 and 0.0394 in.) depth from the timing chain cover edge while maintaining both lip cleanliness and avoiding angular impacts on the seal. Afterward install the crankshaft timing gear key then put on the crankshaft pulley. After applying MP grease to the oil filter bracket and oil cooler you must install them together. Additionally you should install the No. 1 oil cooler bracket with its associated oil cooler. The No. 2 water by-pass pipe sub-assembly can be connected through attaching two water by-pass hoses to the oil cooler followed by installation of three by-pass pipe bolts with 10 Nm (102 kgf-cm, 7 ft-lbf) torque. The installer should first attach the cooler compressor components then proceed with the bracket installation of the oil filter which does not include the oil cooler as well as the oil pressure sender gauge assembly and fan shroud. After hose installation on the No. 1 radiator hose add engine coolant before inspecting the vehicle for leaks at coolant and oil components and checking the engine oil level. The assembly requires installation of the V-bank cover sub-assembly together with the No. 1 engine under cover sub-assembly and front fender splash shield sub-assembly for each left and right side.
    Posted by ToyotaPartsNow Specialist
    Q:
    How to install a Crankshaft Seal and its related components on Toyota RAV4? Posted by Customer
    A:
    New oil seals must start with an application of MP grease to their lips before installation while avoiding both foreign material contact with the lip and grease contact with the dust seal. Special Service Tools 09223-15030 and 09950-70010 should be used together with a hammer to drive the oil seal until its surface matches cylinder block and crankcase dimensions while maintaining a secure position that separates the lip from foreign materials and excludes angled impacts. Clean both bolts and their installation holes before adding a few drops of Toyota Genuine Adhesive 1324, Three Bond 1324 or equivalent to the bolt end up to 2 or 3 threads. Begin by attaching the front drive plate spacer while guiding its pin into the crankshaft pin hole. Position the drive plate and rear drive plate spacer before torquing the eight installation bolts to 98 Nm. Apply Toyota Genuine Adhesive 1324 or Three Bond 1324 or equivalent to 2 or 3 threads of bolt ends before installing and evenly torquing the specified 8 bolts to 98 Nm (999 kgf-cm, 72 ft-lbf) while being cautious about drive plate installation bolt damage. The automatic transaxle installation requires three essential steps according to the vehicle 2WD or 4WD specification. The procedure requires you to first install both the engine and the transaxle. A cable needs connection to the negative terminal before running the Reset Memory procedure on U241E for 2WD or U140F for 4WD.
    Posted by ToyotaPartsNow Specialist
    Q:
    How to install the front Crankshaft Seal and timing pulley on Toyota Sequoia? Posted by Customer
    A:
    Before you install the front crankshaft oil seal you need to apply MP grease to its lip on the new oil seal. A hammer and the Special Service Tools: 09316-60011 and 09316-00011 should be used to tap the oil seal into position until its surface level matches the oil pump body edge while avoiding angled impacts and ensuring no contaminants enter the included lip section. The installation requires Special Service Tool: 09223-46011 and a hammer to tap the timing pulley in while using the set key to align it with the pulley's key groove with the flange side facing towards the inside. Connect the cable to the negative battery terminal with it requiring 5.4 Nm torque (55 kgf-cm, 48 in-lbf) while some systems may require initialization after reconnection. The technician should inspect for leaks of engine oil and coolant and fuel along with measuring engine oil level and checking ignition timing and engine idling speed. The installation procedure ends with the fitting of engine under cover No. 1.
    Posted by ToyotaPartsNow Specialist
    Q:
    How to remove the front crankshaft seal on Toyota Sienna? Posted by Customer
    A:
    Starting the procedure of removing the front crankshaft seal from a 2GR-FE engine begins with removing the right-hand side front wheel along with the right-hand front fender apron seal. Removal of the V-ribbed belt comes after the initial steps. Special Service Tools 09213-70011 and 09213-70020 must be used to lose the crankshaft pulley bolt. Apply Special Service Tools: 09950-50013 alongside 09951-05010 to eliminate the crankshaft pulley bolt and then its accompanying pulley from the system. Use a screwdriver to extract the timing chain case oil seal while taping the screwdriver tip ahead of time. Examine the crankshaft for damage before proceeding with installation.oplayer bolt. Finally, install the crankshaft pulley and secure it with the crankshaft pulley bolt using Special Service Tool: 09950-50013 and 09951-05010. Following this, put on a new timing chain case oil seal by gently tapping it into place. For a proper installation, check all accessory belts, re-adjust the drive belt tensioner, and reset the inset dial on the belt tensioner. After removal, check the crankshaft for any damage; if damaged, smooth the surface with 400-grit sandpaper.
    Posted by ToyotaPartsNow Specialist
    Q:
    What should be done after reinstalling the crankshaft pulley for the 2005 Toyota 4Runner? Posted by Customer
    A:
    Reinstall the fan with fluid coupling and the fan and generator V belt.
    Posted by ToyotaPartsNow Specialist
    See expert answers on similar Crankshaft Seal
    Q:
    What is the first step to replace the timing gear case oil seal (2GR-FE) for the 2006 Toyota Avalon? Posted by Customer
    A:
    Remove the front wheel RH.
    Posted by ToyotaPartsNow Specialist
    See expert answers on similar Crankshaft Seal
    Q:
    What should be applied to the lip of the new oil seal during installation for the 2005 Toyota Avalon? Posted by Customer
    A:
    Apply MP grease to the lip of the new oil seal.
    Posted by ToyotaPartsNow Specialist
    See expert answers on similar Crankshaft Seal
    Q:
    How do you check for engine oil leaks for the 2003 Toyota 4Runner? Posted by Customer
    A:
    Check for leaks after reinstalling the components.
    Posted by ToyotaPartsNow Specialist
    See expert answers on similar Crankshaft Seal
    Q:
    How do you remove the old oil seal for the 2004 Toyota 4Runner? Posted by Customer
    A:
    Cut off the oil seal lip with a knife and pry out the oil seal with a screwdriver, taking care not to damage the crankshaft by taping the screwdriver tip.
    Posted by ToyotaPartsNow Specialist
    See expert answers on similar Crankshaft Seal
    Q:
    What is the next step after removing the V-belt for the 2007 Toyota Avalon? Posted by Customer
    A:
    Remove the crankshaft pulley and the timing chain cover oil seal by prying it out with a screwdriver.
    Posted by ToyotaPartsNow Specialist
    See expert answers on similar Crankshaft Seal
    Q:
    What is the next step after installing the oil seal for the 2008 Toyota Avalon? Posted by Customer
    A:
    Install the crankshaft pulley.
    Posted by ToyotaPartsNow Specialist
    See expert answers on similar Crankshaft Seal
    Q:
    What should be checked after removing the oil seal for the 2008 Toyota Camry? Posted by Customer
    A:
    Check the crankshaft for damage and smooth the surface with 400-grit sandpaper if necessary.
    Posted by ToyotaPartsNow Specialist
    See expert answers on similar Crankshaft Seal
    Q:
    What is the final step in the installation process for the 2009 Toyota Avalon? Posted by Customer
    A:
    Install the V-bank cover sub-assembly and the front wheel RH.
    Posted by ToyotaPartsNow Specialist
    See expert answers on similar Crankshaft Seal
    Q:
    What are the steps to install the flywheel sub-assembly for the manual transaxle for the 2007 Toyota Camry? Posted by Customer
    A:
    Hold the crankshaft with the appropriate tools, clean the bolt and bolt hole, apply adhesive to 2 or 3 threads of the bolt end, and install the flywheel with the 8 bolts, uniformly tightening them to a torque of 130 Nm (1,330 kgf-cm, 96 ft. lbs.).
    Posted by ToyotaPartsNow Specialist
    See expert answers on similar Crankshaft Seal
    Q:
    What is the final step after completing the installation for the 2006 Toyota 4Runner? Posted by Customer
    A:
    Finally, reinstall the automatic transmission assembly for both 2WD and 4WD types.
    Posted by ToyotaPartsNow Specialist
    See expert answers on similar Crankshaft Seal
    Q:
    What is the first step to service and repair the front crankshaft seal for the 2007 Toyota 4Runner? Posted by Customer
    A:
    Begin by disconnecting the cable from the negative battery terminal.
    Posted by ToyotaPartsNow Specialist
    See expert answers on similar Crankshaft Seal
    Q:
    What tool is used to tap the timing pulley in for the 2008 Toyota 4Runner? Posted by Customer
    A:
    Special Service Tool: 09223-46011 and a hammer.
    Posted by ToyotaPartsNow Specialist
    See expert answers on similar Crankshaft Seal
    Q:
    What should be done for TMMK made engines after installing the oil seal for the 2009 Toyota Camry? Posted by Customer
    A:
    Align the pulley set key with the key groove of the pulley, then use Special Service Tool: 09960-10010 and 09962-01000 to secure the pulley in place and tighten the bolt to a torque of 180 Nm (1835 kgf-cm, 133 ft-lbf).
    Posted by ToyotaPartsNow Specialist
    See expert answers on similar Crankshaft Seal
    Q:
    What is the procedure for the transmission input damper assembly for the 2010 Toyota Camry? Posted by Customer
    A:
    Hold the crankshaft with Special Service Tool: 09213-54015 91651-60855 and Special Service Tool: 09330-00021, clean the bolt hole, and install new 6 bolts and the transmission input damper, tightening to a torque of 30 Nm (306 kgf-cm, 22 ft-lbf), ensuring the damper is inserted in the correct direction.
    Posted by ToyotaPartsNow Specialist
    See expert answers on similar Crankshaft Seal
    Q:
    What should be removed after the front wheel RH for the 2010 Toyota Camry? Posted by Customer
    A:
    Remove the front fender apron seal RH, and both the engine under covers LH and RH.
    Posted by ToyotaPartsNow Specialist
    See expert answers on similar Crankshaft Seal
    Q:
    What should be checked after connecting the negative battery terminal for the 2009 Toyota 4Runner? Posted by Customer
    A:
    Check for engine oil leakage.
    Posted by ToyotaPartsNow Specialist
    See expert answers on similar Crankshaft Seal
    Q:
    How should the oil seal be tapped in for the 2008 Toyota Highlander? Posted by Customer
    A:
    Tap the oil seal in until its surface is flush with the timing chain cover edge, ensuring the lip remains free of foreign matter and that the oil seal is not tapped at an angle.
    Posted by ToyotaPartsNow Specialist
    See expert answers on similar Crankshaft Seal
    Q:
    What components are installed after the crankshaft pulley for the 2009 Toyota Highlander? Posted by Customer
    A:
    Install the V-ribbed belt, the front fender apron seal RH, the front fender liner RH, and the front fender moulding sub-assembly RH.
    Posted by ToyotaPartsNow Specialist
    See expert answers on similar Crankshaft Seal
    Q:
    What should be checked after removing the oil seal for the 2009 Toyota Camry? Posted by Customer
    A:
    Check the crankshaft for damage and smooth any damaged surfaces with 400-grit sandpaper.
    Posted by ToyotaPartsNow Specialist
    See expert answers on similar Crankshaft Seal
    Q:
    How should the oil seal be installed for the 2009 Toyota Highlander? Posted by Customer
    A:
    Using Special Service Tool: 09223-15030 09950-70010 and a hammer, tap the oil seal in until its surface is flush with the edges of the cylinder block and crankcase, while keeping the lip free from foreign matter and avoiding tapping at an angle.
    Posted by ToyotaPartsNow Specialist
    See expert answers on similar Crankshaft Seal
    Q:
    How should the oil seal be tapped in for the 2009 Toyota RAV4? Posted by Customer
    A:
    Tap the oil seal in until its surface is flush with the timing chain cover edge, taking care to keep the lip free from foreign matter and to avoid tapping at an angle.
    Posted by ToyotaPartsNow Specialist
    See expert answers on similar Crankshaft Seal
    Q:
    What should be avoided while tapping in the new oil seal for the 2006 Toyota RAV4? Posted by Customer
    A:
    Take care not to tap the oil seal at an angle.
    Posted by ToyotaPartsNow Specialist
    See expert answers on similar Crankshaft Seal
    Q:
    How do you remove the front crankshaft oil seal for the 2009 Toyota Land Cruiser? Posted by Customer
    A:
    Pry it out with a screwdriver, ensuring not to damage the surface of the oil seal press fit hole and crankshaft; it is advisable to tape the screwdriver tip before use.
    Posted by ToyotaPartsNow Specialist
    See expert answers on similar Crankshaft Seal
    Q:
    How deep should the oil seal be tapped for the 2008 Toyota Land Cruiser? Posted by Customer
    A:
    To a depth between 0 and 1.0 mm (0 and 0.0394 in.) from the timing chain cover edge.
    Posted by ToyotaPartsNow Specialist
    See expert answers on similar Crankshaft Seal
    Q:
    How should the oil seal be tapped in for the 2009 Toyota Sequoia? Posted by Customer
    A:
    Tap in the oil seal until its surface is flush with the oil pump body edge, ensuring the lip remains free from foreign matter and that the oil seal is not tapped at an angle.
    Posted by ToyotaPartsNow Specialist
    See expert answers on similar Crankshaft Seal
    Q:
    How should the new oil seal be installed for the 2008 Toyota RAV4? Posted by Customer
    A:
    Tap in the new oil seal until its surface is flush with the timing gear case edge, taking care not to tap the oil seal at an angle.
    Posted by ToyotaPartsNow Specialist
    See expert answers on similar Crankshaft Seal
    Q:
    What is the final step to remove the front crankshaft oil seal for the 2008 Toyota Sequoia? Posted by Customer
    A:
    Cut off the lip of the oil seal with a knife and pry it out using a screwdriver.
    Posted by ToyotaPartsNow Specialist
    See expert answers on similar Crankshaft Seal
    Q:
    What should be installed after the V-ribbed belt for the 2008 Toyota Sienna? Posted by Customer
    A:
    Install the front fender apron seal on the right-hand side.
    Posted by ToyotaPartsNow Specialist
    See expert answers on similar Crankshaft Seal
    Q:
    How do you remove the crankshaft pulley for the 2005 Toyota Tacoma? Posted by Customer
    A:
    First, remove the bolt and separate the bracket (if equipped with air conditioning). Use Special Service Tool: 09213-54015 (91651-60855), 09330-00021 to loosen the crankshaft pulley bolt until only 2 or 3 threads remain, then utilize Special Service Tool: 09950-50013 (09951-05010, 09952-05010, 09953-05010, 09954-05021) to remove the crankshaft pulley and bolt.
    Posted by ToyotaPartsNow Specialist
    See expert answers on similar Crankshaft Seal
    Q:
    What should be checked after removing the oil seal for the 2007 Toyota Tacoma? Posted by Customer
    A:
    Check the crankshaft for damage and smooth any rough surfaces with 400-grit sandpaper.
    Posted by ToyotaPartsNow Specialist
    See expert answers on similar Crankshaft Seal
    Q:
    What is the final step in the installation process for the 2008 Toyota Tundra? Posted by Customer
    A:
    Install the automatic transmission assembly.
    Posted by ToyotaPartsNow Specialist
    See expert answers on similar Crankshaft Seal
    Q:
    What special tools are needed to loosen the crankshaft pulley bolt for the 2008 Toyota Tacoma? Posted by Customer
    A:
    Use Special Service Tool: 09213-54015 and 91651-60855 to loosen the crankshaft pulley bolt until only 2 or 3 threads remain in the crankshaft.
    Posted by ToyotaPartsNow Specialist
    See expert answers on similar Crankshaft Seal
    Q:
    How do you install chain vibration damper No.1 for the 2005 Toyota Tundra? Posted by Customer
    A:
    Install it with 2 bolts torqued to 19 Nm (194 kgf-cm, 14 ft. lbs.), then align the timing gear set key with the key groove of the timing sprocket and install the timing gear onto the crankshaft.
    Posted by ToyotaPartsNow Specialist
    See expert answers on similar Crankshaft Seal
    Q:
    What is the torque specification for reinstalling the bracket for the 2006 Toyota Tacoma? Posted by Customer
    A:
    Torque the bracket bolt to 7.5 Nm (76 kgf-cm, 66 inch lbs.).
    Posted by ToyotaPartsNow Specialist
    See expert answers on similar Crankshaft Seal
    Q:
    What is the final step in the installation process for the 2009 Toyota Sienna? Posted by Customer
    A:
    Install the right front wheel, applying a torque of 103 Nm (1050 kgf-cm, 76 ft-lbf).
    Posted by ToyotaPartsNow Specialist
    See expert answers on similar Crankshaft Seal
    Q:
    What is the first step to install the front crankshaft seal on a 2TR-FE engine for the 2008 Toyota Tacoma? Posted by Customer
    A:
    Apply a light coat of MP grease to the lip of a new oil seal, ensuring the lip remains free of foreign objects.
    Posted by ToyotaPartsNow Specialist
    See expert answers on similar Crankshaft Seal
    Q:
    What are the final steps after installing the crankshaft pulley for the 2007 Toyota Sienna? Posted by Customer
    A:
    Reinstall the V-ribbed belt, front fender apron seal RH, and front wheel RH, with the wheel torque set to 103 Nm (1,050 kgf-cm, 76 ft. lbs.).
    Posted by ToyotaPartsNow Specialist
    See expert answers on similar Crankshaft Seal
    Q:
    How do you remove the rear crankshaft oil seal for the 2007 Toyota Tundra? Posted by Customer
    A:
    Cut off the oil seal lip with a knife and pry it out carefully with a screwdriver, ensuring not to damage the crankshaft by taping the screwdriver tip.
    Posted by ToyotaPartsNow Specialist
    See expert answers on similar Crankshaft Seal
    Q:
    What is the first step to install the rear crankshaft oil seal for the 2009 Toyota Venza? Posted by Customer
    A:
    Apply MP grease to the lip of a new oil seal, ensuring that foreign matter does not contact the lip and that MP grease does not touch the dust seal.
    Posted by ToyotaPartsNow Specialist
    See expert answers on similar Crankshaft Seal
    Q:
    How do you remove the rear crankshaft oil seal for the 2009 Toyota Tundra? Posted by Customer
    A:
    Use a knife to cut off the oil seal lip, then carefully pry out the oil seal with a screwdriver.
    Posted by ToyotaPartsNow Specialist
    See expert answers on similar Crankshaft Seal
    Q:
    What is the final step in the installation process for the 2009 Toyota Tacoma? Posted by Customer
    A:
    Install the No. 1 engine under cover sub-assembly for Pre Runner and 4WD types using 4 bolts, tightening them to 30 Nm (306 kgf-cm, 22 ft-lbf).
    Posted by ToyotaPartsNow Specialist
    See expert answers on similar Crankshaft Seal
    Q:
    What are the two methods to replace the front crankshaft seal for the 2005 Toyota Tundra? Posted by Customer
    A:
    The methods depend on whether the rear timing chain cover is removed or installed.
    Posted by ToyotaPartsNow Specialist
    See expert answers on similar Crankshaft Seal
    Q:
    How do you remove the timing gear case or timing chain case oil seal for the 2009 Toyota Tacoma? Posted by Customer
    A:
    Cut off the lip of the oil seal with a cutter knife, then pry it out using a screwdriver with its tip wrapped in tape.
    Posted by ToyotaPartsNow Specialist
    See expert answers on similar Crankshaft Seal
    Q:
    What is the first step to install the front crankshaft oil seal on the 1AR-FE engine for the 2009 Toyota Venza? Posted by Customer
    A:
    Apply MP grease to the lip of a new oil seal, ensuring that foreign matter does not contact the lip and that MP grease does not touch the dust seal.
    Posted by ToyotaPartsNow Specialist
    See expert answers on similar Crankshaft Seal
    If you have any questions about this product, please don't hesitate to ask us. We will be happy to help you!

OEM Toyota 90311-A0005, Excellent Performance and Perfect Fitment

To ensure reliability, purchase Toyota part # 90311-A0005 Oil Seal, Front. It is sometimes referred to as Toyota Crankshaft Seal. OEM parts are unrivaled in terms of quality. They go through extensive quality control inspections and are produced in accordance with Toyota's official factory specifications. All of these remove defects and imperfections. So you can relax knowing they promise exceptional lifespan and flawless fitment.

ToyotaPartsNow.com is a leading supplier of genuine Toyota parts such as Toyota 90311A0005 Oil Seal, Front. At ToyotaPartsNow.com, we have a wide variety of OEM Toyota parts available at competitive prices. Our comprehensive range of genuine Toyota parts come with a manufacturer's warranty for peace of mind. We also prioritize customer satisfaction, providing a hassle-free return policy and expedited delivery for all our parts. For detailed Toyota parts information, click here.
Choose ToyotaPartsNow for discounted prices, exceptional service and fast delivery