×
ToyotaParts- Hello
- Login or Register
- Quick Links
- Live Chat
- Track Order
- Parts Availability
- RMA
- Help Center
- Contact Us
- Shop for
- Toyota Parts
- Scion Parts
My Garage
My Account
Cart
OEM 2009 Scion xD Trunk Lid Latch
Luggage Compartment Door Lock Assembly- Select Vehicle by Model
- Select Vehicle by VIN
Select Vehicle by Model
orMake
Model
Year
Select Vehicle by VIN
For the most accurate results, select vehicle by your VIN (Vehicle Identification Number).
1 Trunk Lid Latch found


2009 Scion xD Gate Lock, Rear
Part Number: 69350-28151$179.51 MSRP: $256.30You Save: $76.79 (30%)Ships in 1 Business DayProduct Specifications- Other Name: Lock Assembly, Back Door; Liftgate Latch; Tailgate Lock Actuator; Trunk Lock Actuator; Door Lock Actuator; Lock Actuator; Lock Assembly; Lock; Lock Assembly, Back Door, W/Courtesy Lamp Switch
- Manufacturer Note: KOREA SPEC
- Position: Rear
- Replaces: 69350-28150
- Part Name Code: 69350P
- Item Weight: 1.90 Pounds
- Condition: New
- Fitment Type: Direct Replacement
- SKU: 69350-28151
- Warranty: This genuine part is guaranteed by Toyota's factory warranty.
2009 Scion xD Trunk Lid Latch
Looking for affordable OEM 2009 Scion xD Trunk Lid Latch? Explore our comprehensive catalogue of genuine 2009 Scion xD Trunk Lid Latch. All our parts are covered by the manufacturer's warranty. Plus, our straightforward return policy and speedy delivery service ensure an unparalleled shopping experience. We look forward to your visit!
2009 Scion xD Trunk Lid Latch Parts Q&A
- Q: How to remove the Trunk Lid Latch on 2009 Scion xD?A: The first step to unlock a back door involves removing the back door trim upper panel assembly and next the back door side garnish from the left-hand and right-hand sides followed by the back door inside handle and trim board assembly. After disconnecting the connector and removing the three bolts securing the back door lock the lock can be detached. The back door inside handle and back door trim board assembly become the next items to remove from the sequence. The last step requires you to disconnect the connector then separate the back door lock by taking out its mounting bolts.
Related 2009 Scion xD Parts
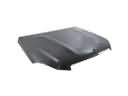 2009 Scion xD Hood
 2009 Scion xD Door Hinge
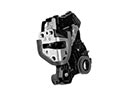 2009 Scion xD Door Lock
 2009 Scion xD Door Lock Actuator
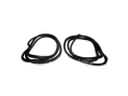 2009 Scion xD Door Seal
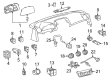
 2009 Scion xD Instrument Cluster
 2009 Scion xD Lift Support
 2009 Scion xD Liftgate Hinge
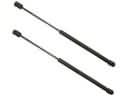 2009 Scion xD Liftgate Lift Support
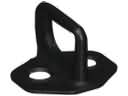 2009 Scion xD Rear Door Striker
 2009 Scion xD Seat Cushion
 2009 Scion xD Weather Strip