- Hello
- Login or Register
- Quick Links
- Live Chat
- Track Order
- Parts Availability
- RMA
- Help Center
- Contact Us
- Shop for
- Toyota Parts
- Scion Parts

Popular OEM Toyota Echo Parts
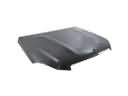
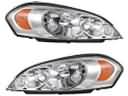
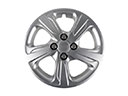
- Body & Hardware Parts View More >
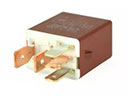
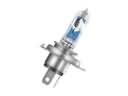
- Electrical Parts View More >
- Engine Parts View More >
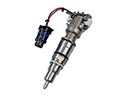
- Air & Fuel Delivery Parts View More >
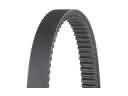
- Belts & Cooling Parts View More >
- Steering Parts View More >
- Suspension Parts View More >
- Emission Control & Exhaust Parts View More >
- A/C & Heating Parts View More >
- Charging & Starting Parts View More >
- Brakes Parts View More >
- Transmission Parts View More >


Why Buy Genuine Toyota Echo Parts From ToyotaPartsNow.com
ToyotaPartsNow.com highlights the reliability of OEM Toyota Echo parts right at your fingertips. Our skilled staff assists customers in selecting the right Toyota Echo parts and provides expert help with any unique part requests. At ToyotaPartsNow.com, we make all Toyota Echo parts available to you quickly and efficiently through our fast order and reliable ship process. Our service is designed to make finding the correct Toyota Echo parts fast and easy whether you are an amateur or a professional. We offer access to a broad inventory that includes a wide range of Toyota years and variants. Affordable prices, quick processing and professional service are also our specialty to ensure your car remains in top condition with OEM Toyota Echo parts. You can feel confident shopping with us because all Toyota Echo parts you purchase from our store are of genuine quality and built to last.
The Toyota Echo served young automotive customers after the Toyota Tercel and Paseo models. The Japanese market branded this vehicle as the Toyota Platz. The model delivered performance balance through its 1NZ-FE four-cylinder 1.5L engine. Toyota Echo offered manual transmission together with automatic transmission which provided drivers the option for varying driving personalities. The Echo measured 93.3 inches for its wheelbase while its length measured 163.2 or 164.6 inches based on the model year leading to a compact yet easily accommodated interior. Among its dimensions the Echo presented a width of 65.4 inches alongside a height that came either at 59.1 inches or 59.4 inches depending on the variant selection. The Australian marketplace offered the 1.3L 2NZ-FE engine together with either a manual transmission or automatic transmission. Between 1999 and 2005 Toyota manufactured the Echo as the sportier Sportivo model which provided upgraded features while emphasizing driving performance. The marketing campaign focused on Toyota parts that went through strict quality tests because quality and reliability formed the basis of the model promotion. The Toyota Echo enhances the company's mission of delivering efficient practical vehicles by establishing its place in the compact segment.
Some of the problems that the Toyota Echo may experience involve the engine and emissions systems. An evaporative emission system (EVAP) error can trigger the Check Engine Light. It is usually due to a malfunctioning Toyota Echo charcoal canister or a loose gas cap which may cause high emissions and poor performance. The other area of issue is the Toyota Echo mass airflow sensor, which may need cleaning or replacement; sluggish acceleration may be observed, or a fault code may be stored. This sensor is very important in managing the air intake of the Toyota Echo engine. Also, the crankshaft angle sensor may fail in some Toyota Echo models, which can cause a misfire or starting problems. The warranty could cover this issue, which gives some comfort to the owners. Management of these problems normally entails diagnosis of the fault; the affected parts are either cleaned or replaced, and all connections are tightened. Doing routine maintenance can avoid these issues and thus ensure that the Toyota Echo functions dependably. All in all, knowing such systems may help with quicker repairs and increase the lifespan of the car.
Toyota Echo Parts and Q&A
- Q: How to service and repair the air filter element on Toyota Echo?A:In order to service the air filter, it is first necessary to remove the glove compartment door. Then change the refiner filter of air by pushing the two claws and drawing out the filter case. Install the new filter, replace the old one and screw the filter case back onto the A/C unit and then reattach the display to the glove compartment door.
- Q: How to remove and install an alternator on Toyota Echo?A:In order to take off the generator, disconnect the wire clamp, generator wire, connector, and harness clamp. Unscrew plenty of bolts and drive belt and then the generator. To install, fit the generator, fit the drive belt, tweak tension, and tighten bolts. Attach again the wire of the generator and replace it with the rubber top.
- Q: How to service and repair the water pump on Toyota Echo?A:To repair the water pump, drain coolant, remove the drive belt, and use Special Service Tool to detach the pump. Inspect for leaks; replace if necessary. Install the new pump and gasket, torque bolts, reinstall the pulley, drive belt, refill coolant, and check for leaks.


