×
ToyotaParts- Hello
- Login or Register
- Quick Links
- Live Chat
- Track Order
- Parts Availability
- RMA
- Help Center
- Contact Us
- Shop for
- Toyota Parts
- Scion Parts
My Garage
My Account
Cart
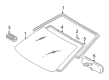
OEM Scion xA Windshield
Glass Windshield- Select Vehicle by Model
- Select Vehicle by VIN
Select Vehicle by Model
orMake
Model
Year
Select Vehicle by VIN
For the most accurate results, select vehicle by your VIN (Vehicle Identification Number).
1 Windshield found

Scion xA Windshield, Front Part Number: 56101-52191
$482.93 MSRP: $707.75You Save: $224.82 (32%)Ships in 1-3 Business Days
Scion xA Windshield
Choose genuine Windshield that pass strict quality control tests. You can trust the top quality and lasting durability. Shopping for OEM Windshield for your Scion xA? Our website is your one-stop destination. We stock an extensive selection of genuine Scion xA parts. The price is affordable so you can save more. It only takes minutes to browse and find the exact fit. Easily add to cart and check out fast. Our hassle-free return policy will keep you stress-free. We process orders quickly for swift delivery. Your parts will arrive faster, so you can get back on the road sooner.
A critical component of the Scion xA Windshield delivers enhanced reliability with improved performance for this automobile model through excellent visibility while protecting occupants from external elements. The Scion xA Windshield maintains its structural integrity while battling against both natural elements and flying debris thus reducing air drag that leads to better fuel economy and driving comfort. The product combines laminated safety glass construction that places two curved glass panels between a tough plastic interlayer to achieve high quality visibility with durable performance characteristics. The windshield matches multiple Scion xA vehicle models which proves its versatility thereby making it a critical element of the design structure. Maintaining proper condition of the Scion xA Windshield remains a necessity because small blemishes diminish sight and expose safety vulnerabilities of occupants. The cost-performance ratio of quality windshields justifies their purchase considering their ability to boost vehicle performance because they cost between $110 and $140 for replacement. The extraordinary abilities of the Scion xA Windshield to minimize glares and create aerodynamic benefits are attributes which make this product stand out in automotive markets. The Scion xA Windshield serves twofold purposes because it improves appearance and simultaneously enhances vehicle performance and safety thus becoming a main attraction of all the automaker model models.
Scion xA Windshield Parts and Q&A
- Q: How to replace the windshield glass on Scion xA?A:The procedure for windshield glass replacement starts with the removal of the roof headlining assembly through a series of steps consisting of taking off front door opening trim from both sides (LH and RH), front pillar garnish (LH and RH), visors, assist grip, visor holders (RH and LH), map lamp lens cover, and the map lamp followed by a partial removal of headlining for windshield accessibility. The cowl top ventilator louver and inner rear view mirror assembly can be reached after you remove the wiper arm covers (RH and LH). Follow this step with the removal of the front wiper arms (LH and RH) before you take off the louver. Heat the installation areas of front fender to cowl side seals (LH and RH) to 20 - 30 degrees Celsius (68 - 86 degrees Fahrenheit) before undertaking any removal process. To protect the body remove windshield moulding outside with a knife before extracting the windshield glass through piano wire insertion between body and glass while tying handles to wire ends and applying protective tape for scratch prevention. Disengage stoppers after cutting glass with piano wire then use a suction cup to extract the glass while keeping as much adhesive on the body of the vehicle. First clean the instrument panel before placing the instrument panel cushion No.1 and move to cleaning the windshield glass by removing all damaged stoppers and adhesive plus scraping off the dam by using white gasoline to clean the outer border. Apply the Primer G coating on Windshield Glass Stopper No.2 before allowing it to dry for a minimum three minutes then tossing unused primer. Install the first windshield glass stopper to the vehicle body then apply Primer G on the installation areas of the window glass adhesive dam which needs to dry before applying double-sided tape to the glass. Apply Primer G to both the glass edges and contact surface before mounting the windshield moulding and leaving the maximum adhesive possible on the surface of the vehicle body. First height the glass by suction then examine the contact area and note reference points before taking down the glass. Apply Primer M to the vehicle body contact surface before both coatings dry. After that you will apply Primer G to the glass edge then contact surface and wipe away extra material. You need to apply adhesive (Part No. 08850-00801 or equivalent) with a sealer gun by using reference marks for alignment before pressing it gently along the rim to check for a proper fit and stopper attachment. The technician should eliminate extra adhesive deposits using a scraper before allowing the required waiting period to elapse. Perform a leak inspection when adhesive cures to identify and fix any air seepage by using auto glass sealer.