×
ToyotaParts- Hello
- Login or Register
- Quick Links
- Live Chat
- Track Order
- Parts Availability
- RMA
- Help Center
- Contact Us
- Shop for
- Toyota Parts
- Scion Parts
My Garage
My Account
Cart
OEM 2006 Scion xA Windshield
Glass Windshield- Select Vehicle by Model
- Select Vehicle by VIN
Select Vehicle by Model
orMake
Model
Year
Select Vehicle by VIN
For the most accurate results, select vehicle by your VIN (Vehicle Identification Number).
1 Windshield found

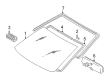
2006 Scion xA Windshield, Front
Part Number: 56101-52191$482.93 MSRP: $707.75You Save: $224.82 (32%)Ships in 1-3 Business DaysProduct Specifications- Other Name: Glass Sub-Assembly, Windshield; Windshield, Front; Glass, Windshield
- Manufacturer Note: *LAM,T=4.56,GREEN
- Position: Front
- Replaces: 56101-52190
- Part Name Code: 56111
- Condition: New
- Fitment Type: Direct Replacement
- SKU: 56101-52191
- Warranty: This genuine part is guaranteed by Toyota's factory warranty.
2006 Scion xA Windshield
Looking for affordable OEM 2006 Scion xA Windshield? Explore our comprehensive catalogue of genuine 2006 Scion xA Windshield. All our parts are covered by the manufacturer's warranty. Plus, our straightforward return policy and speedy delivery service ensure an unparalleled shopping experience. We look forward to your visit!
2006 Scion xA Windshield Parts Q&A
- Q: How to remove and install a windshield on 2006 Scion xA?A: You should disconnect the negative battery cable followed by waiting for at least ninety seconds to keep the Air Bags along with seat belt pretensioners from activating. First detach the front door opening trim Weather Strip LH and RH along with front pillar garnish LH and RH, visor assembly LH and RH, assist grip sub-assembly, visor holder LH and RH, map light assembly, and roof headlining assembly by slightly lowering their installation areas rather than complete removal. Warming the installations surfaces for seals with a heat light will allow you to remove the inner rear view mirror assembly along with the front wiper arm head cap and front wiper arms LH and RH together with the cowl top ventilator louver LH and RH and hood to cowl top seal and front fender to cowl side seals LH and RH. Carefully cut the windshield molding from the outside with a knife while protecting the vehicle body before removing the glass through piano wire installation followed by exterior surface tape placement and matchmarking if using the glass again and adhesive cutting and stoppers disengaging before using suction cups. Start by cleaning the instrument panel and installing a new No. 1 instrument panel cushion before cleaning the windshield glass together with the vehicle body while leaving maximum adhesive on the vehicle body. The installation process starts with new windshield glass stoppers of type No. 2 and No. 1 followed by application of Primer G to installation components and placement of the windshield glass adhesive dam. The installation process calls for windscreen glass to receive Primer G application before receiving a new windshield moulding. Use suction cups to position the glass correctly with matchmarks aligned before applying Primer M to the visible part of the body and applying Part No. 08850-00801 adhesive or its equivalent to the glass for installation to the body ensuring proper fitting and cleaning away excess adhesive. Finally, reinstall the front fender to cowl side seals LH and RH, cowl top ventilator louvers LH and RH, hood to cowl top seal, front wiper arms LH and RH, front wiper arm head cap, roof headlining assembly, visor holders LH and RH, visor assemblies LH and RH, front pillar garnishes LH and RH, map light assembly, assist grip sub-assembly, front door opening trim Weather Strips LH and RH, and inner rear view mirror assembly, check for leaks and repair as necessary, reconnect the cable to the negative battery terminal, and perform initialization for certain systems.
Related 2006 Scion xA Parts
 2006 Scion xA Grille
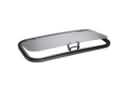 2006 Scion xA Sunroof
 2006 Scion xA Emblem
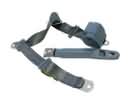 2006 Scion xA Seat Belt
 2006 Scion xA Brake Booster
 2006 Scion xA Car Mirror
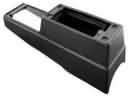 2006 Scion xA Center Console Base
 2006 Scion xA Fuel Door Hinge
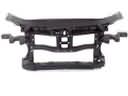 2006 Scion xA Radiator Support
 2006 Scion xA Weather Strip
 2006 Scion xA Window Run
 2006 Scion xA Wiper Linkage