×
ToyotaParts- Hello
- Login or Register
- Quick Links
- Live Chat
- Track Order
- Parts Availability
- RMA
- Help Center
- Contact Us
- Shop for
- Toyota Parts
- Scion Parts
My Garage
My Account
Cart
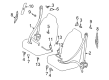
OEM 2006 Scion xA Seat Belt
Seat Safety Belt- Select Vehicle by Model
- Select Vehicle by VIN
Select Vehicle by Model
orMake
Model
Year
Select Vehicle by VIN
For the most accurate results, select vehicle by your VIN (Vehicle Identification Number).
13 Seat Belts found


2006 Scion xA Buckle, Black, Driver Side
Part Number: 73240-52040-B0$66.35 MSRP: $93.13You Save: $26.78 (29%)Product Specifications- Other Name: Belt Assembly, Front Seat; Seat Belt Receptacle, Front Left; Latch; Belt Assembly, Front Seat Inner, Driver Side
- Manufacturer Note: DK.GRAY,TRIM1#
- Position: Driver Side
- Part Name Code: 73240
- Item Weight: 1.00 Pounds
- Condition: New
- Fitment Type: Direct Replacement
- SKU: 73240-52040-B0
- Warranty: This genuine part is guaranteed by Toyota's factory warranty.

2006 Scion xA Buckle, Black, Passenger Side
Part Number: 73470-52170-C0$43.37 MSRP: $60.37You Save: $17.00 (29%)Ships in 1-3 Business DaysProduct Specifications- Other Name: Belt Assembly, Rear Seat I; Seat Belt Receptacle, Rear Right; Latch; Belt Assembly, Rear Seat Inner W/Center, Passenger Side
- Manufacturer Note: BLACK,TRIM9#
- Position: Passenger Side
- Replaces: 73470-52240-C0
- Part Name Code: 73470B
- Item Weight: 1.00 Pounds
- Condition: New
- Fitment Type: Direct Replacement
- SKU: 73470-52170-C0
- Warranty: This genuine part is guaranteed by Toyota's factory warranty.

2006 Scion xA Buckle, Black, Passenger Side
Part Number: 73230-52350-B0$43.37 MSRP: $60.37You Save: $17.00 (29%)Ships in 1-3 Business DaysProduct Specifications- Other Name: Belt Assembly, Front Seat; Seat Belt Receptacle, Front Right; Latch; Belt Assembly, Front Seat Inner, Passenger Side
- Manufacturer Note: DK.GRAY,TRIM1#
- Position: Passenger Side
- Part Name Code: 73230
- Item Weight: 1.50 Pounds
- Item Dimensions: 13.7 x 11.6 x 2.3 inches
- Condition: New
- Fitment Type: Direct Replacement
- SKU: 73230-52350-B0
- Warranty: This genuine part is guaranteed by Toyota's factory warranty.

2006 Scion xA Latch, Black, Passenger Side
Part Number: 73230-52670-B0$40.04 MSRP: $55.73You Save: $15.69 (29%)Ships in 1-3 Business DaysProduct Specifications- Other Name: Belt Assembly, Front Seat; Belt Assembly, Front Seat Inner, Passenger Side
- Manufacturer Note: DK.GRAY,TRIM1#
- Position: Passenger Side
- Part Name Code: 73230
- Item Weight: 1.50 Pounds
- Item Dimensions: 13.7 x 11.2 x 2.3 inches
- Condition: New
- Fitment Type: Direct Replacement
- SKU: 73230-52670-B0
- Warranty: This genuine part is guaranteed by Toyota's factory warranty.

2006 Scion xA Lap & Shoulder Belt, Black, Outer Driver Side
Part Number: 73370-52120-C0$162.61 MSRP: $230.19You Save: $67.58 (30%)Ships in 1-3 Business DaysProduct Specifications- Other Name: Belt Assembly, Rear Seat; Seat Belt Lap and Shoulder Belt, Rear Left; Belt & Retractor; Belt Assembly, Rear Seat 3 Point Type, Outer Driver Side
- Manufacturer Note: BLACK,TRIM1#
- Position: Outer Driver Side
- Part Name Code: 73370
- Item Weight: 2.20 Pounds
- Item Dimensions: 7.3 x 7.4 x 6.1 inches
- Condition: New
- Fitment Type: Direct Replacement
- SKU: 73370-52120-C0
- Warranty: This genuine part is guaranteed by Toyota's factory warranty.

2006 Scion xA Lap & Shoulder Belt, Black, Outer Passenger Side
Part Number: 73360-52170-C0$85.07 MSRP: $119.41You Save: $34.34 (29%)Ships in 1-3 Business DaysProduct Specifications- Other Name: Belt Assembly, Rear Seat; Seat Belt Lap and Shoulder Belt, Rear Right; Belt & Retractor; Belt Assembly, Rear Seat 3 Point Type, Outer Passenger Side
- Manufacturer Note: BLACK,TRIM1#
- Position: Outer Passenger Side
- Part Name Code: 73360
- Item Weight: 2.20 Pounds
- Item Dimensions: 12.4 x 10.8 x 8.3 inches
- Condition: New
- Fitment Type: Direct Replacement
- SKU: 73360-52170-C0
- Warranty: This genuine part is guaranteed by Toyota's factory warranty.

2006 Scion xA Lap & Shoulder Belt, Black, Center
Part Number: 73350-52030-C0$63.27 MSRP: $88.80You Save: $25.53 (29%)Ships in 1-3 Business DaysProduct Specifications- Other Name: Belt Assembly, Rear Seat; Seat Belt Lap and Shoulder Belt, Rear Center; Center Seat Belt; Belt Assembly, Rear Seat, Outer Center
- Position: Center
- Part Name Code: 73350C
- Item Weight: 2.10 Pounds
- Condition: New
- Fitment Type: Direct Replacement
- SKU: 73350-52030-C0
- Warranty: This genuine part is guaranteed by Toyota's factory warranty.
2006 Scion xA Lap & Shoulder Belt, Black, Driver Side
Part Number: 73220-52680-C0$259.85 MSRP: $371.01You Save: $111.16 (30%)Ships in 1-3 Business DaysProduct Specifications- Other Name: Belt Assembly, Front Seat; Belt Assembly, Front Seat Outer, Driver Side
- Manufacturer Note: BLACK,TRIM1#
- Position: Driver Side
- Part Name Code: 73220
- Item Weight: 2.50 Pounds
- Condition: New
- Fitment Type: Direct Replacement
- SKU: 73220-52680-C0
- Warranty: This genuine part is guaranteed by Toyota's factory warranty.
2006 Scion xA Lap & Shoulder Belt, Black, Passenger Side
Part Number: 73210-52650-C0$259.85 MSRP: $371.01You Save: $111.16 (30%)Ships in 1-3 Business DaysProduct Specifications- Other Name: Belt Assembly, Front Seat; Belt Assembly, Front Seat Outer, Passenger Side
- Manufacturer Note: BLACK,TRIM1#
- Position: Passenger Side
- Part Name Code: 73210
- Item Weight: 4.10 Pounds
- Condition: New
- Fitment Type: Direct Replacement
- SKU: 73210-52650-C0
- Warranty: This genuine part is guaranteed by Toyota's factory warranty.

2006 Scion xA Lap & Shoulder Belt, Black, Driver Side
Part Number: 73220-52450-C0$271.08 MSRP: $387.04You Save: $115.96 (30%)Ships in 1-3 Business DaysProduct Specifications- Other Name: Belt Assembly, Front Seat; Seat Belt Lap and Shoulder Belt, Front Left; Belt & Retractor; Belt Assembly, Front Seat Outer, Driver Side
- Manufacturer Note: BLACK,TRIM1#
- Position: Driver Side
- Part Name Code: 73220
- Item Weight: 5.50 Pounds
- Item Dimensions: 10.4 x 7.3 x 6.1 inches
- Condition: New
- Fitment Type: Direct Replacement
- SKU: 73220-52450-C0
- Warranty: This genuine part is guaranteed by Toyota's factory warranty.

2006 Scion xA Lap & Shoulder Belt, Black, Passenger Side
Part Number: 73210-52400-C0$274.70 MSRP: $392.20You Save: $117.50 (30%)Ships in 1-3 Business DaysProduct Specifications- Other Name: Belt Assembly, Front Seat; Seat Belt Lap and Shoulder Belt, Front Right; Belt & Retractor; Belt Assembly, Front Seat Outer, Passenger Side
- Manufacturer Note: BLACK,TRIM1#
- Position: Passenger Side
- Part Name Code: 73210
- Item Weight: 4.10 Pounds
- Condition: New
- Fitment Type: Direct Replacement
- SKU: 73210-52400-C0
- Warranty: This genuine part is guaranteed by Toyota's factory warranty.
- Product Specifications
- Other Name: Belt Assembly, Front Seat; Belt Assembly, Front Seat Inner, Driver Side
- Manufacturer Note: DK.GRAY,TRIM1#
- Position: Driver Side
- Part Name Code: 73240
- Item Weight: 1.40 Pounds
- Condition: New
- Fitment Type: Direct Replacement
- SKU: 73240-52090-B0
- Warranty: This genuine part is guaranteed by Toyota's factory warranty.
 Product Specifications
- Other Name: Belt Assembly, Rear Seat I; Seat Belt Receptacle, Rear Left; Latch; Belt Assembly, Rear Seat Inner W/Center, Driver Side
- Manufacturer Note: BLACK,TRIM1#
- Position: Driver Side
- Part Name Code: 73480
- Item Weight: 2.40 Pounds
- Item Dimensions: 14.3 x 10.4 x 5.1 inches
- Condition: New
- Fitment Type: Direct Replacement
- SKU: 73480-52200-C0
- Warranty: This genuine part is guaranteed by Toyota's factory warranty.
2006 Scion xA Seat Belt
Looking for affordable OEM 2006 Scion xA Seat Belt? Explore our comprehensive catalogue of genuine 2006 Scion xA Seat Belt. All our parts are covered by the manufacturer's warranty. Plus, our straightforward return policy and speedy delivery service ensure an unparalleled shopping experience. We look forward to your visit!
2006 Scion xA Seat Belt Parts Q&A
- Q: How to properly maintain a seat belt on 2006 Scion xA?A: Service of the rear seat inner belt requires starting with removal of the rear seat cushion with cover pad sub-assembly and then moving on to extract the rear seat inner belt assembly LH by removing its bolt and inner belt. The removal of the rear seat inner belt assembly RH must be completed using the identical steps. The next step requires removing both the rear seatback assembly LH followed by the rear seatback assembly RH. The next step involves taking off the child restraint seat tether anchor bracket sub-assembly through the removal of 4 bolts. When installing the child restraint seat tether anchor bracket sub-assembly, apply 4 bolts which must be tightened to 42 N.m (428 kgf.cm, 31 ft.lbf). Proceed with installation by mounting first the rear seatback assembly LH and then the rear seatback assembly RH. Secure the floor anchor and belt to the rear seat inner with center belt assembly LH by using the bolt which should be tightened to 42 N.m (428 kgf.cm, 31 ft.lbf). Verify that the anchor part avoids contact with the floor panel protrusion. Apply proper torque and clearance settings when installing the rear seat inner with center belt assembly RH for the second time. The last step involves placing the rear seat cushion along with its cover pad sub-assembly.
Related 2006 Scion xA Parts
 2006 Scion xA Grille
 2006 Scion xA Sun Visor
 2006 Scion xA Door Lock
 2006 Scion xA Floor Pan
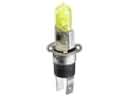 2006 Scion xA Fog Light Bulb
 2006 Scion xA Interior Door Handle
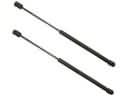 2006 Scion xA Liftgate Lift Support
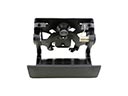 2006 Scion xA Tailgate Handle
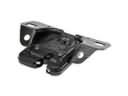 2006 Scion xA Trunk Lid Latch
 2006 Scion xA Wheelhouse
 2006 Scion xA Window Run
 2006 Scion xA Windshield Washer Nozzle