My Garage
Cart
Make sure this part fits

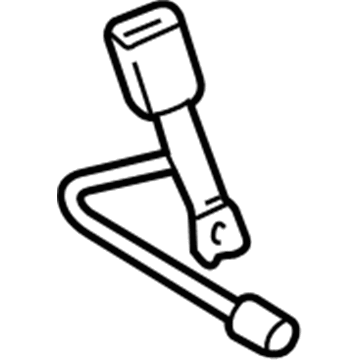
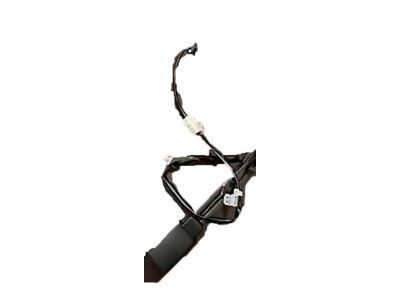
Toyota 73240-52040-B0
Buckle, Black, Driver Side

2004-2006 Scion xA 7324052040B0

Customer Questions & Expert Answers (7)
Toyota 73240-52040-B0 Buckle, Black, Driver Side
  • Part Description
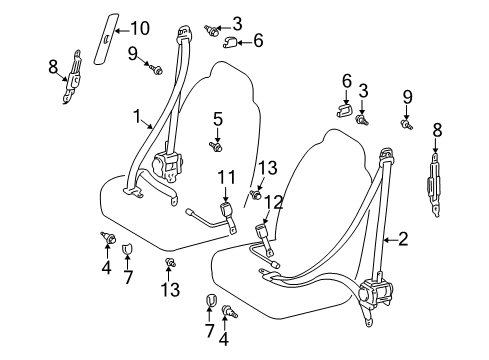
    Belt Assembly, Front Seat; Seat Belt Receptacle, Front Left
  • Part Name Code
    73240
  • Position
    Driver Side
  • Manufacturer
    Toyota
Make sure this part fits
$62.08 MSRP: $87.15
You Save: $25.07 (29%)
Ships in 1-2 Business Days
1
ADD TO CART
  • Related Parts
  • Product Specifications
  • Vehicle Fitment
  • Customer Questions & Expert Answers
  • Product Specifications

    BrandGenuine Toyota
    Part Name Code73240
    Manufacturer Part Number73240-52040-B0
    Part DescriptionBelt Assembly, Front Seat; Seat Belt Receptacle, Front Left
    Other NamesLatch; Belt Assembly, Front Seat Inner, Driver Side
    Manufacturer NoteDK.GRAY,TRIM1#
    Item Weight1.00 Pounds
    PositionDriver Side
    ConditionNew
    Fitment TypeDirect Replacement
    ManufacturerToyota
    SKU73240-52040-B0
    WarrantyThis genuine Toyota part is guaranteed by Toyota's factory warranty.
    Shipping & ReturnShipping Policy Return Policy
    Warning: California's Proposition 65
  • Vehicle Fitment

    Year Make Model Trim Engine
    2004-2006 Scion xABase4 Cyl 1.5 L GAS
  • Customer Questions & Expert Answers

    Q:
    Any advice on whether 73240-52040-B0 is suitable for my car? Posted by ToyotaPartsNow Specialist
    A:
    Find out if part number 73240-52040-B0 is the right fit for your car by Selecting Your Vehicle model.
    Posted by ToyotaPartsNow Specialist
    Q:
    What is the correct procedure for activating and disposing of a front seat outer belt with a seat belt pretensioner using the SRS Air Bag deployment tool on Scion xA? Posted by Customer
    A:
    Vehicle scrapping and seat belt disposal requires first-hand activation of pretensioners through Special Service Tool: 09082-00700 (SRS Air Bag deployment tool) in electric interference-free areas when the components contain seat belt pretensioners or front seat outer belts with pretensioners. First verify that the battery potential reaches 12 V and conduct testing of Special Service Tool: 09082-00700 and 09082-00770 function. The seat belt pretensioner requires the yellow connector to remain unused while connecting the red clip to the battery positive (+) terminal and the black clip to the battery negative (-) terminal. Press the activation switch to check if the LED light turns on because any automatic activation indicates the tool should not be used. Disconnect the battery negative terminal then check the SRS Air Bag system before removing all necessary trim pieces to reach the pretensioner connector. To activate the seat belt pretensioner use the Special Service Tool after positioning it at least 10 m (33 ft) away from the vehicle with all doors and windows closed and operating the pretensioner when no person stands within 10 m (33 ft) of the vehicle. After activation the outer seat belt shows extreme heat that requires safety glasses with gloves to handle along with handwashing afterward and a prohibition to use water on it. The tool disposal protocol requires cutting the seat belt around the retractor followed by a functionality check before connecting it to the pretensioner then wrapping it with tire and wheel before activating the pretensioner in proper safety zones. Handle the outer belt carefully after its minimum 30-minute cooldown period before handling proceeds. Remove the wheel and tool while allowing the belt to rest inside a plastic bag before it receives disposal among other general parts.
    Posted by ToyotaPartsNow Specialist
    Q:
    How to replace the front seat belt on Scion xA? Posted by Customer
    A:
    The battery negative terminal should be disconnected as the first step for front seat belt replacement. The removal process begins with taking out the front seat assembly RH then proceeding to remove the front seat inner belt assembly RH which needs its bolt and inner belt detached. You need to remove the front door scuff plate RH, rear door scuff plate RH, front door opening trim Weather Strip RH and rear door opening trim Weather Strip RH as well as the center pillar garnish lower RH. The operation to remove the front seat belt with pretensioner can begin only after the battery disconnect and ignition shut off happens 90 seconds ago. To begin dismount the floor anchor cover before disconnecting bolt and outer belt on the floor anchor side and subsequently move to the shoulder anchor cover and its bolt and outer belt before disconnecting the pretensioner connector. Mount removal is possible when all two bolts from the retractor side are removed. When installing the outer belt avoid separating the retractor components while verifying ELR lock operation at different tilt angles since locking should occur with at least 45 degrees but not below 15 degrees. When installing the outer belt to the retractor side you need to tighten the upper bolt to 5.5 Nm (51 kgf.cm, 44 in.lbf) while using 42 Nm (430 kgf.cm, 31 ft.lbf) for the lower bolt. The pretensioner connector should be connected and the outer belt gets installed on the shoulder anchor side first before torquing it with 42 Nm force (430 kgf.cm, 31 ft.lbf). Next follows installation of the shoulder anchor cover and outer belt with floor anchor side bolt tightened to 42 Nm force (430 kgf.cm, 31 ft.lbf). Continue by attaching the floor anchor cover and verify the ELR lock function by fast-pulling the belt shortly following completion. The belt must secure properly while testing child restraint fastening to ensure the belt only rewinds when fully extended so it can easily move in and out after maximum extension. The outer belt assembly must get replaced if any operation does not perform according to specification. Reinstall the front seat assembly RH after putting the bolt into the front seat inner belt assembly RH and torquing it to 42 Nm (430 kgf.cm, 31 ft.lbf).
    Posted by ToyotaPartsNow Specialist
    Q:
    What are the essential steps to perform a diagnostic system check on the seat belt and Air Bag components after a collision on Scion xA? Posted by Customer
    A:
    Checking the seat belts together with Air Bags must become necessary after each crash event. A visual examination of the horn button assembly is required on vehicles that have not experienced a collision to check for breaks or alteration of color or cracks in the assembly structure. After a collision with undeployed Air Bags inspect the horn button assembly for identical damage through removal so you can also examine steering wheel assembly and horn button contact plate for deformation. Recover the entire horn button assembly when facing deformed condition on the horn button contact plate. Implementation of the horn button assembly should maintain proper spacing from the steering wheel assembly. An evaluation of the instrument panel passenger Air Bag assembly requires diagnostic testing alongside visual inspection of possible damage present before and after vehicle disassembly. The assembly must receive new components if any show deformation or cracks. The inspection protocols are identical for the curtain shield Air Bag assembly along with the front seat Air Bag assembly and SRS wire harness and connectors where inspectors verify both the existence and conditions of cuts and cracks and material damage. The replacement process includes the Air Bag sensor assembly center and front sensor and rear sensor and side Air Bag sensor assembly depending on Air Bag deployment status. Check that the seat position Air Bag sensor and front seat inner belt assemblies operate correctly while performing resistance tests on all components which do not comply with specifications.
    Posted by ToyotaPartsNow Specialist
    Q:
    What are the steps to remove the front seat outer belt assembly RH for the 2006 Scion xA? Posted by Customer
    A:
    Remove the floor anchor cover, the bolt and outer belt on the floor anchor side, the shoulder anchor cover, the bolt and outer belt on the shoulder anchor side, disconnect the pretensioner connector, and remove the 2 bolts on the retractor side.
    Posted by ToyotaPartsNow Specialist
    See expert answers on similar Seat Belt
    Q:
    How do you check the tilt of the belt when it begins to lock the ELR for the 2004 Scion xA? Posted by Customer
    A:
    Ensure it does not lock within 15° of tilt in all directions but locks with over 45° of tilt when gently moving the retractor; if not, replace the belt assembly.
    Posted by ToyotaPartsNow Specialist
    See expert answers on similar Seat Belt
    Q:
    What components need to be removed next for the 2005 Scion xA? Posted by Customer
    A:
    Remove the front door scuff plate RH, rear door scuff plate RH, front door opening trim weatherstrip RH, rear door opening trim weatherstrip RH, and center pillar garnish lower RH.
    Posted by ToyotaPartsNow Specialist
    See expert answers on similar Seat Belt
    If you have any questions about this product, please don't hesitate to ask us. We will be happy to help you!

OEM Toyota 73240-52040-B0, Excellent Performance and Perfect Fitment

To ensure reliability, purchase Toyota part # 73240-52040-B0 Buckle, Black, Driver Side. It is sometimes referred to as Toyota Seat Belt. OEM parts are unrivaled in terms of quality. They go through extensive quality control inspections and are produced in accordance with Toyota's official factory specifications. All of these remove defects and imperfections. So you can relax knowing they promise exceptional lifespan and flawless fitment.

ToyotaPartsNow.com is a leading supplier of genuine Toyota parts such as Toyota 7324052040B0 Buckle, Black, Driver Side. At ToyotaPartsNow.com, we have a wide variety of OEM Toyota parts available at competitive prices. Our comprehensive range of genuine Toyota parts come with a manufacturer's warranty for peace of mind. We also prioritize customer satisfaction, providing a hassle-free return policy and expedited delivery for all our parts. For detailed Scion parts information, click here.
Choose ToyotaPartsNow for discounted prices, exceptional service and fast delivery