×
ToyotaParts- Hello
- Login or Register
- Quick Links
- Live Chat
- Track Order
- Parts Availability
- RMA
- Help Center
- Contact Us
- Shop for
- Toyota Parts
- Scion Parts
My Garage
My Account
Cart
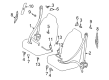
OEM 2005 Scion xA Seat Belt
Seat Safety Belt- Select Vehicle by Model
- Select Vehicle by VIN
Select Vehicle by Model
orMake
Model
Year
Select Vehicle by VIN
For the most accurate results, select vehicle by your VIN (Vehicle Identification Number).
9 Seat Belts found


2005 Scion xA Buckle, Black, Driver Side
Part Number: 73240-52040-B0$66.35 MSRP: $93.13You Save: $26.78 (29%)Product Specifications- Other Name: Belt Assembly, Front Seat; Seat Belt Receptacle, Front Left; Latch; Belt Assembly, Front Seat Inner, Driver Side
- Manufacturer Note: DK.GRAY,TRIM1#
- Position: Driver Side
- Part Name Code: 73240
- Item Weight: 1.00 Pounds
- Condition: New
- Fitment Type: Direct Replacement
- SKU: 73240-52040-B0
- Warranty: This genuine part is guaranteed by Toyota's factory warranty.

2005 Scion xA Buckle, Black, Passenger Side
Part Number: 73470-52170-C0$43.37 MSRP: $60.37You Save: $17.00 (29%)Ships in 1-3 Business DaysProduct Specifications- Other Name: Belt Assembly, Rear Seat I; Seat Belt Receptacle, Rear Right; Latch; Belt Assembly, Rear Seat Inner W/Center, Passenger Side
- Manufacturer Note: BLACK,TRIM9#
- Position: Passenger Side
- Replaces: 73470-52240-C0
- Part Name Code: 73470B
- Item Weight: 1.00 Pounds
- Condition: New
- Fitment Type: Direct Replacement
- SKU: 73470-52170-C0
- Warranty: This genuine part is guaranteed by Toyota's factory warranty.

2005 Scion xA Buckle, Black, Passenger Side
Part Number: 73230-52350-B0$43.37 MSRP: $60.37You Save: $17.00 (29%)Ships in 1-3 Business DaysProduct Specifications- Other Name: Belt Assembly, Front Seat; Seat Belt Receptacle, Front Right; Latch; Belt Assembly, Front Seat Inner, Passenger Side
- Manufacturer Note: DK.GRAY,TRIM1#
- Position: Passenger Side
- Part Name Code: 73230
- Item Weight: 1.50 Pounds
- Item Dimensions: 13.7 x 11.6 x 2.3 inches
- Condition: New
- Fitment Type: Direct Replacement
- SKU: 73230-52350-B0
- Warranty: This genuine part is guaranteed by Toyota's factory warranty.

2005 Scion xA Lap & Shoulder Belt, Black, Outer Driver Side
Part Number: 73370-52120-C0$162.61 MSRP: $230.19You Save: $67.58 (30%)Ships in 1-3 Business DaysProduct Specifications- Other Name: Belt Assembly, Rear Seat; Seat Belt Lap and Shoulder Belt, Rear Left; Belt & Retractor; Belt Assembly, Rear Seat 3 Point Type, Outer Driver Side
- Manufacturer Note: BLACK,TRIM1#
- Position: Outer Driver Side
- Part Name Code: 73370
- Item Weight: 2.20 Pounds
- Item Dimensions: 7.3 x 7.4 x 6.1 inches
- Condition: New
- Fitment Type: Direct Replacement
- SKU: 73370-52120-C0
- Warranty: This genuine part is guaranteed by Toyota's factory warranty.

2005 Scion xA Lap & Shoulder Belt, Black, Outer Passenger Side
Part Number: 73360-52170-C0$85.07 MSRP: $119.41You Save: $34.34 (29%)Ships in 1-3 Business DaysProduct Specifications- Other Name: Belt Assembly, Rear Seat; Seat Belt Lap and Shoulder Belt, Rear Right; Belt & Retractor; Belt Assembly, Rear Seat 3 Point Type, Outer Passenger Side
- Manufacturer Note: BLACK,TRIM1#
- Position: Outer Passenger Side
- Part Name Code: 73360
- Item Weight: 2.20 Pounds
- Item Dimensions: 12.4 x 10.8 x 8.3 inches
- Condition: New
- Fitment Type: Direct Replacement
- SKU: 73360-52170-C0
- Warranty: This genuine part is guaranteed by Toyota's factory warranty.

2005 Scion xA Lap & Shoulder Belt, Black, Center
Part Number: 73350-52030-C0$63.27 MSRP: $88.80You Save: $25.53 (29%)Ships in 1-3 Business DaysProduct Specifications- Other Name: Belt Assembly, Rear Seat; Seat Belt Lap and Shoulder Belt, Rear Center; Center Seat Belt; Belt Assembly, Rear Seat, Outer Center
- Position: Center
- Part Name Code: 73350C
- Item Weight: 2.10 Pounds
- Condition: New
- Fitment Type: Direct Replacement
- SKU: 73350-52030-C0
- Warranty: This genuine part is guaranteed by Toyota's factory warranty.

2005 Scion xA Lap & Shoulder Belt, Black, Driver Side
Part Number: 73220-52450-C0$271.08 MSRP: $387.04You Save: $115.96 (30%)Ships in 1-3 Business DaysProduct Specifications- Other Name: Belt Assembly, Front Seat; Seat Belt Lap and Shoulder Belt, Front Left; Belt & Retractor; Belt Assembly, Front Seat Outer, Driver Side
- Manufacturer Note: BLACK,TRIM1#
- Position: Driver Side
- Part Name Code: 73220
- Item Weight: 5.50 Pounds
- Item Dimensions: 10.4 x 7.3 x 6.1 inches
- Condition: New
- Fitment Type: Direct Replacement
- SKU: 73220-52450-C0
- Warranty: This genuine part is guaranteed by Toyota's factory warranty.

2005 Scion xA Lap & Shoulder Belt, Black, Passenger Side
Part Number: 73210-52400-C0$274.70 MSRP: $392.20You Save: $117.50 (30%)Ships in 1-3 Business DaysProduct Specifications- Other Name: Belt Assembly, Front Seat; Seat Belt Lap and Shoulder Belt, Front Right; Belt & Retractor; Belt Assembly, Front Seat Outer, Passenger Side
- Manufacturer Note: BLACK,TRIM1#
- Position: Passenger Side
- Part Name Code: 73210
- Item Weight: 4.10 Pounds
- Condition: New
- Fitment Type: Direct Replacement
- SKU: 73210-52400-C0
- Warranty: This genuine part is guaranteed by Toyota's factory warranty.
 Product Specifications
- Other Name: Belt Assembly, Rear Seat I; Seat Belt Receptacle, Rear Left; Latch; Belt Assembly, Rear Seat Inner W/Center, Driver Side
- Manufacturer Note: BLACK,TRIM1#
- Position: Driver Side
- Part Name Code: 73480
- Item Weight: 2.40 Pounds
- Item Dimensions: 14.3 x 10.4 x 5.1 inches
- Condition: New
- Fitment Type: Direct Replacement
- SKU: 73480-52200-C0
- Warranty: This genuine part is guaranteed by Toyota's factory warranty.
2005 Scion xA Seat Belt
Looking for affordable OEM 2005 Scion xA Seat Belt? Explore our comprehensive catalogue of genuine 2005 Scion xA Seat Belt. All our parts are covered by the manufacturer's warranty. Plus, our straightforward return policy and speedy delivery service ensure an unparalleled shopping experience. We look forward to your visit!
2005 Scion xA Seat Belt Parts Q&A
- Q: How to replace the rear seat belt on 2005 Scion xA?A: The replacement process for a rear seat belt begins by first taking off the rear door scuff plate RH and rear door opening trim Weather Strip RH before moving to the tonneau cover assembly and deck board No.1 along with the deck floor box RH, spare wheel cover, rear seat assembly, deck floor box rear and deck trim side panel assembly RH and finally roof side garnish inner RH. Detach the rear seat 3 point type belt assembly outer by first removing the bolt and seat belt from the shoulder anchor side before removing the bolt from the retractor side. The process for removing the rear seat belt assembly outer center begins with taking off the seatback board together with the shoulder belt cover afterward uninstalling the bolt and belt from the floor anchor before moving on to taking out the bolt and nut from the retractor side to uninstall the belt. The rear seat inner w/center belt assembly RH and LH can be removed when their respective bolt and inner belt components are disconnected. Replace the child restraint seat anchor bracket sub-assembly RH by removing its 4 bolts prior to installing the new bracket with same bolts then torquing them to 42 Nm (430 kgf.cm, 31 ft.lbf). Secure the floor anchor and belt with the bolt on the rear seat inner w/center belt assembly LH while making sure the anchor part avoids the protrusion on the floor panel and torquing to 42 Nm (430 kgf.cm, 31 ft.lbf). In this installation sequence install the outer center belt from the retractor side and add the nut before tightening it to 42 Nm (430 kgf.cm, 31 ft.lbf). Subsequently attach the shoulder belt cover and seatback board center. Verify that the retractor locks after over 45 degrees of tilt and verify under 15 degrees of tilt that locking does not occur because improper functioning of the belt assembly indicates the need for replacement. The person installing the belt should first lock it into place using the bolt while applying torque of 42 Nm (430 kgf.cm, 31 ft.lbf). Following this, they must check the ELR restriction by quickly pulling on the belt. The locking feature should activate only when the belt extends beyond 955 mm (37.60 in.). If the restriction fails to function properly the belt assembly must be replaced. Check the fastening system of child seat belts to verify their ability to stop extending beyond their limit and then rewind. After full extension or rewind, the system should remain accessible for pulling out or rewinding; replace the belts if this functionality is not present. Finally, install the rear seat inner w/center belt assembly RH by securing the floor anchor and belt with the bolt, ensuring the anchor part does not run onto the protrusion part of the floor panel, torquing to 42 Nm (430 kgf.cm, 31 ft.lbf), and install the rear seat 3 point type belt assembly outer by securing the belt with the bolt on the retractor side, torquing to 42 Nm (430 kgf.cm, 31 ft.lbf), checking the degree of tilt for the ELR lock, and ensuring the belt locks by pulling it out quickly after installation; if not, replace the seat belt assembly. The last step includes testing the child restraint system fastening functions while you install the rear seat assembly.
Related 2005 Scion xA Parts
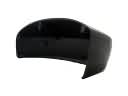 2005 Scion xA Mirror Cover
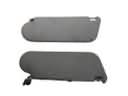 2005 Scion xA Sun Visor
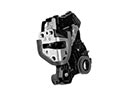 2005 Scion xA Door Lock
 2005 Scion xA Floor Pan
 2005 Scion xA Fog Light Bulb
 2005 Scion xA Interior Door Handle
 2005 Scion xA Liftgate Lift Support
 2005 Scion xA Tailgate Handle
 2005 Scion xA Trunk Lid Latch
 2005 Scion xA Wheelhouse
 2005 Scion xA Window Run
 2005 Scion xA Windshield Washer Nozzle