×
ToyotaParts- Hello
- Login or Register
- Quick Links
- Live Chat
- Track Order
- Parts Availability
- RMA
- Help Center
- Contact Us
- Shop for
- Toyota Parts
- Scion Parts
My Garage
My Account
Cart
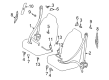
OEM 2004 Scion xA Seat Belt
Seat Safety Belt- Select Vehicle by Model
- Select Vehicle by VIN
Select Vehicle by Model
orMake
Model
Year
Select Vehicle by VIN
For the most accurate results, select vehicle by your VIN (Vehicle Identification Number).
9 Seat Belts found


2004 Scion xA Buckle, Black, Driver Side
Part Number: 73240-52040-B0$66.35 MSRP: $93.13You Save: $26.78 (29%)Product Specifications- Other Name: Belt Assembly, Front Seat; Seat Belt Receptacle, Front Left; Latch; Belt Assembly, Front Seat Inner, Driver Side
- Manufacturer Note: DK.GRAY,TRIM1#
- Position: Driver Side
- Part Name Code: 73240
- Item Weight: 1.00 Pounds
- Condition: New
- Fitment Type: Direct Replacement
- SKU: 73240-52040-B0
- Warranty: This genuine part is guaranteed by Toyota's factory warranty.

2004 Scion xA Buckle, Black, Passenger Side
Part Number: 73470-52170-C0$43.37 MSRP: $60.37You Save: $17.00 (29%)Ships in 1-3 Business DaysProduct Specifications- Other Name: Belt Assembly, Rear Seat I; Seat Belt Receptacle, Rear Right; Latch; Belt Assembly, Rear Seat Inner W/Center, Passenger Side
- Manufacturer Note: BLACK,TRIM9#
- Position: Passenger Side
- Replaces: 73470-52240-C0
- Part Name Code: 73470B
- Item Weight: 1.00 Pounds
- Condition: New
- Fitment Type: Direct Replacement
- SKU: 73470-52170-C0
- Warranty: This genuine part is guaranteed by Toyota's factory warranty.

2004 Scion xA Buckle, Black, Passenger Side
Part Number: 73230-52350-B0$43.37 MSRP: $60.37You Save: $17.00 (29%)Ships in 1-3 Business DaysProduct Specifications- Other Name: Belt Assembly, Front Seat; Seat Belt Receptacle, Front Right; Latch; Belt Assembly, Front Seat Inner, Passenger Side
- Manufacturer Note: DK.GRAY,TRIM1#
- Position: Passenger Side
- Part Name Code: 73230
- Item Weight: 1.50 Pounds
- Item Dimensions: 13.7 x 11.6 x 2.3 inches
- Condition: New
- Fitment Type: Direct Replacement
- SKU: 73230-52350-B0
- Warranty: This genuine part is guaranteed by Toyota's factory warranty.

2004 Scion xA Lap & Shoulder Belt, Black, Outer Driver Side
Part Number: 73370-52120-C0$162.61 MSRP: $230.19You Save: $67.58 (30%)Ships in 1-3 Business DaysProduct Specifications- Other Name: Belt Assembly, Rear Seat; Seat Belt Lap and Shoulder Belt, Rear Left; Belt & Retractor; Belt Assembly, Rear Seat 3 Point Type, Outer Driver Side
- Manufacturer Note: BLACK,TRIM1#
- Position: Outer Driver Side
- Part Name Code: 73370
- Item Weight: 2.20 Pounds
- Item Dimensions: 7.3 x 7.4 x 6.1 inches
- Condition: New
- Fitment Type: Direct Replacement
- SKU: 73370-52120-C0
- Warranty: This genuine part is guaranteed by Toyota's factory warranty.

2004 Scion xA Lap & Shoulder Belt, Black, Outer Passenger Side
Part Number: 73360-52170-C0$85.07 MSRP: $119.41You Save: $34.34 (29%)Ships in 1-3 Business DaysProduct Specifications- Other Name: Belt Assembly, Rear Seat; Seat Belt Lap and Shoulder Belt, Rear Right; Belt & Retractor; Belt Assembly, Rear Seat 3 Point Type, Outer Passenger Side
- Manufacturer Note: BLACK,TRIM1#
- Position: Outer Passenger Side
- Part Name Code: 73360
- Item Weight: 2.20 Pounds
- Item Dimensions: 12.4 x 10.8 x 8.3 inches
- Condition: New
- Fitment Type: Direct Replacement
- SKU: 73360-52170-C0
- Warranty: This genuine part is guaranteed by Toyota's factory warranty.

2004 Scion xA Lap & Shoulder Belt, Black, Center
Part Number: 73350-52030-C0$63.27 MSRP: $88.80You Save: $25.53 (29%)Ships in 1-3 Business DaysProduct Specifications- Other Name: Belt Assembly, Rear Seat; Seat Belt Lap and Shoulder Belt, Rear Center; Center Seat Belt; Belt Assembly, Rear Seat, Outer Center
- Position: Center
- Part Name Code: 73350C
- Item Weight: 2.10 Pounds
- Condition: New
- Fitment Type: Direct Replacement
- SKU: 73350-52030-C0
- Warranty: This genuine part is guaranteed by Toyota's factory warranty.

2004 Scion xA Lap & Shoulder Belt, Black, Driver Side
Part Number: 73220-52450-C0$271.08 MSRP: $387.04You Save: $115.96 (30%)Ships in 1-3 Business DaysProduct Specifications- Other Name: Belt Assembly, Front Seat; Seat Belt Lap and Shoulder Belt, Front Left; Belt & Retractor; Belt Assembly, Front Seat Outer, Driver Side
- Manufacturer Note: BLACK,TRIM1#
- Position: Driver Side
- Part Name Code: 73220
- Item Weight: 5.50 Pounds
- Item Dimensions: 10.4 x 7.3 x 6.1 inches
- Condition: New
- Fitment Type: Direct Replacement
- SKU: 73220-52450-C0
- Warranty: This genuine part is guaranteed by Toyota's factory warranty.

2004 Scion xA Lap & Shoulder Belt, Black, Passenger Side
Part Number: 73210-52400-C0$274.70 MSRP: $392.20You Save: $117.50 (30%)Ships in 1-3 Business DaysProduct Specifications- Other Name: Belt Assembly, Front Seat; Seat Belt Lap and Shoulder Belt, Front Right; Belt & Retractor; Belt Assembly, Front Seat Outer, Passenger Side
- Manufacturer Note: BLACK,TRIM1#
- Position: Passenger Side
- Part Name Code: 73210
- Item Weight: 4.10 Pounds
- Condition: New
- Fitment Type: Direct Replacement
- SKU: 73210-52400-C0
- Warranty: This genuine part is guaranteed by Toyota's factory warranty.
 Product Specifications
- Other Name: Belt Assembly, Rear Seat I; Seat Belt Receptacle, Rear Left; Latch; Belt Assembly, Rear Seat Inner W/Center, Driver Side
- Manufacturer Note: BLACK,TRIM1#
- Position: Driver Side
- Part Name Code: 73480
- Item Weight: 2.40 Pounds
- Item Dimensions: 14.3 x 10.4 x 5.1 inches
- Condition: New
- Fitment Type: Direct Replacement
- SKU: 73480-52200-C0
- Warranty: This genuine part is guaranteed by Toyota's factory warranty.
2004 Scion xA Seat Belt
Looking for affordable OEM 2004 Scion xA Seat Belt? Explore our comprehensive catalogue of genuine 2004 Scion xA Seat Belt. All our parts are covered by the manufacturer's warranty. Plus, our straightforward return policy and speedy delivery service ensure an unparalleled shopping experience. We look forward to your visit!
2004 Scion xA Seat Belt Parts Q&A
- Q: What essential checks should be performed on the seat belt system and Air Bag components after a collision on 2004 Scion xA?A: A diagnostic system check of seat belts and Air Bags must be executed following a crash incident. Inspect the horn button assembly visually in vehicles that did not participate in collisions to check for any sign of cuts and discolorations and cracks. During collision inspections of vehicles with non-deployed Air Bags you must remove the horn button assembly to inspect it for damage and to evaluate any possible deformation of steering wheel components and horn button contact plate. Adamant replacement of the horn button assembly becomes necessary when the horn button contact plate exhibits any form of deformation. The horn button assembly must be installed without any overlap or blocking against the steering wheel assembly. Before continuing with the instrument panel passenger Air Bag assembly check its diagnostic status while also examining damage in its surrounding area. Prior to inspection all vehicles in collisions need to have their assembly removed to evaluate cuts or cracks and wire harness damage. Delete all components which show deformation or cracking. The testing of curtain shield Air Bag assembly includes a complete inspection of front pillar garnish and roof headlining. Check the front seat Air Bag assembly for damages both during the installed and after removing its position. The SRS wire harness requires an examination for broken wires and faulty connectors. The Air Bag sensor assembly center needs replacement when the Air Bag module comes into contact during deployment. Front and rear Air Bag sensors need inspection for damage whenever a vehicle faces a collision incident. Replace sensors that show signs of defect. A full examination of the seat position Air Bag sensor and side Air Bag sensor assembly needs to be performed to check for any signs of damage then necessary replacements must be completed. The inspection of front seat inner belt assemblies must determine if the buckle switch functions properly along with resistance checks before replacing faulty units.
Related 2004 Scion xA Parts
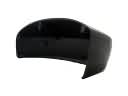 2004 Scion xA Mirror Cover
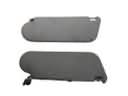 2004 Scion xA Sun Visor
 2004 Scion xA Door Lock
 2004 Scion xA Floor Pan
 2004 Scion xA Fog Light Bulb
 2004 Scion xA Interior Door Handle
 2004 Scion xA Liftgate Lift Support
 2004 Scion xA Tailgate Handle
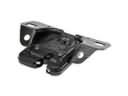 2004 Scion xA Trunk Lid Latch
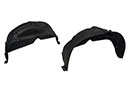 2004 Scion xA Wheelhouse
 2004 Scion xA Window Run
 2004 Scion xA Windshield Washer Nozzle